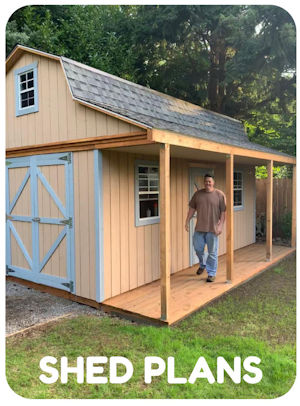
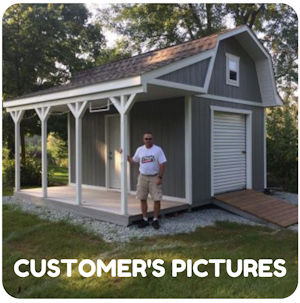
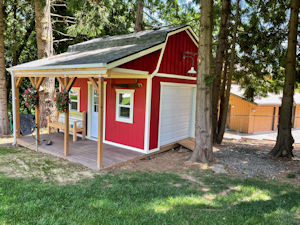
Save 30% off Any Shed Plan Purchase!
Signup For My 'Shed n Sight' Newsletter
and Get Your 30% off Promo Code To Use At Checkout.
- Home
- Customer Shed Pictures
Pictures of Sheds and Testimonials
From My Customers
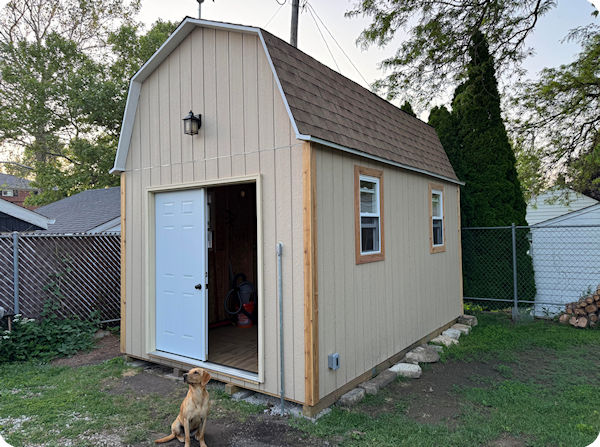
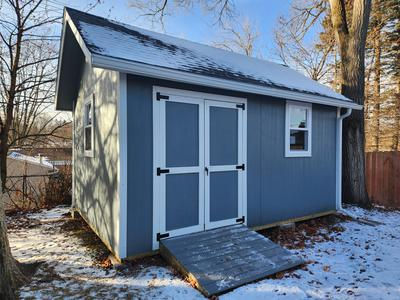
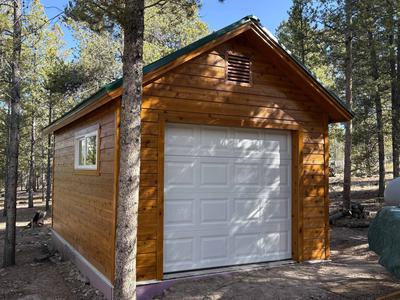
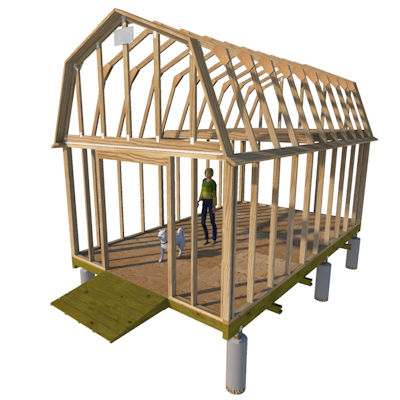
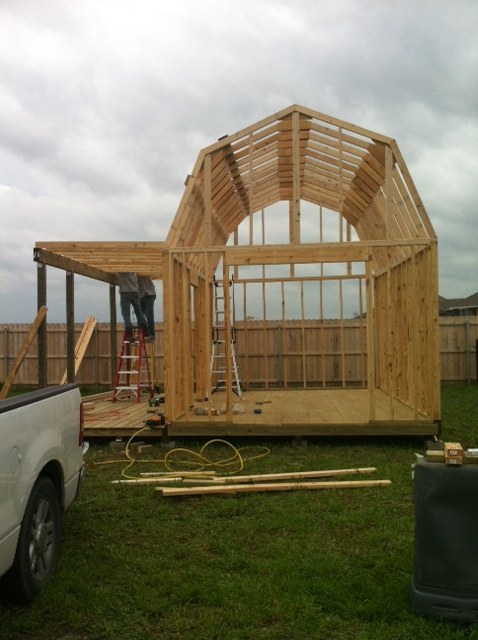
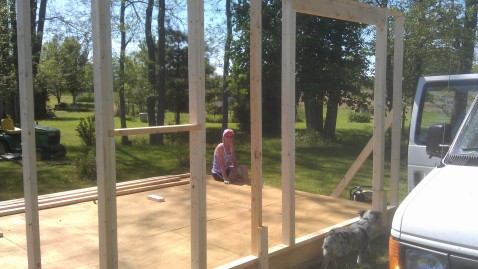
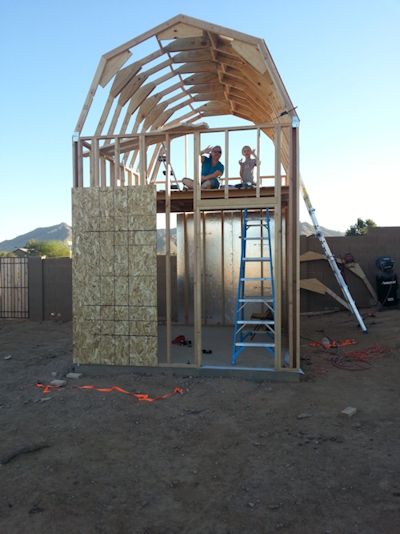
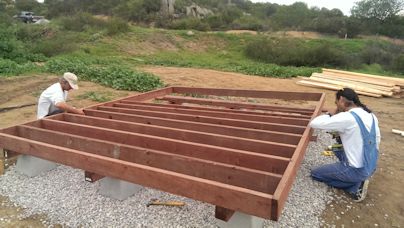
Here are some pictures of sheds built from my storage shed plans sent in by my customers.
It's interesting to see variations of the shed plans I have sold. It just goes to show you that you can modify my plans and blueprints to accommodate whatever special needs you may have.
If you built a shed using my shed plans, please submit your pictures here.
Impressive Custom Shed Built By Jeff
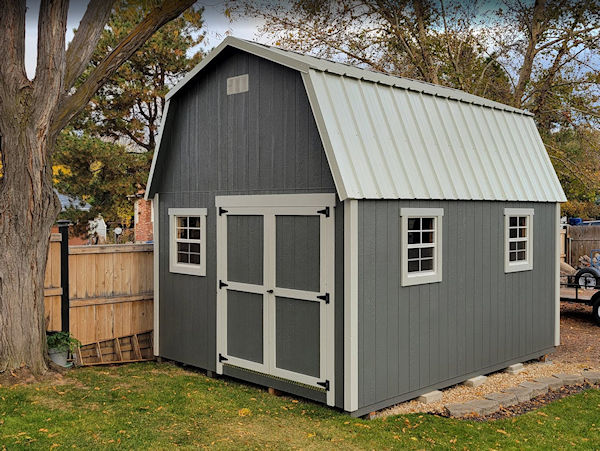 Very Impressive 12'x16' Barn Built By Jeff
Watch a video of Jeff's shed project from start to finish.
Here's the email I received from Jeff about using my 12'x16' Barn Shed Plan:
Hi John,
Wow... What a busy summer I've had as I'm sure you did too! I'm finally done with this build and wanted to follow-up with a photo! I still need to add a ramp and figure out inside organization options, but the shed is mostly done.
Your plans were great, easy to follow, and your communication has been very helpful, thank you! This was my first major project like this and I'm happy how it turned out. As you can see, I moved the entrance doors to one side of the front wall due to our tree being so close, which now gives me more clearance to add the ramp. In hindsight, I'm not sure I would go with the metal roof again. I was torn to begin with as I favor the characteristic look of the barn shed with the side overhangs, which had to be omitted for the metal, and the metal roof was more difficult to work with than I expected. However, it looks good and will last a long time I'm sure. I was also uncertain on where to put my access hole to the loft, and wound up centering it on the loft floor. Not sure that was a good choice and I may wind up moving it to one side at a later date?
My wife created an album of the process, starting with the tear down of the old shed and the construction of this one. I'll give you access to that and you're welcome to share any photos if you choose, so please take a look! Let me know if you have problems accessing the album, or have questions on any of the photos. You'll see when I tore down the old shed, there were several large cement blocks supporting its wooden floor. I was pleasantly surprised by that and was able to use those to support the new floor, along with concrete piers I poured on the four corners.
Thank you again, John, this has been a fun project.
Regards,
Jeff
Jeff, thank you so much for taking the time to send me your shed pictures! You don't know how much I appreciate it, and thank you for buying my shed plan!
Learn more about the 12x16 barn shed plans Jeff used.
Joshua's Awesome 12x16 Gable Shed
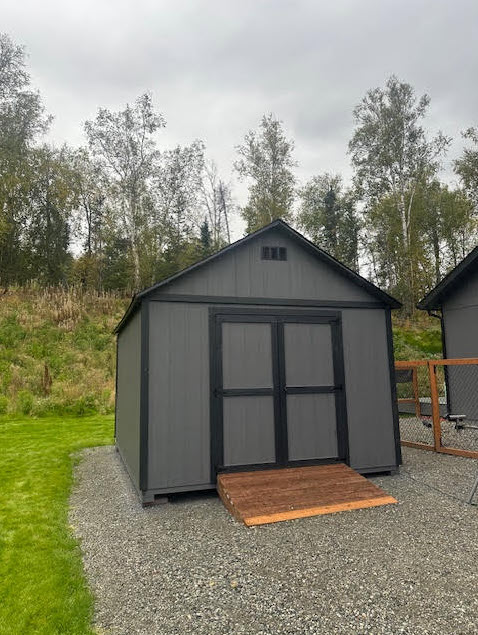 Joshua's 12x16 Gable Shed Has A Nice Clean Look!
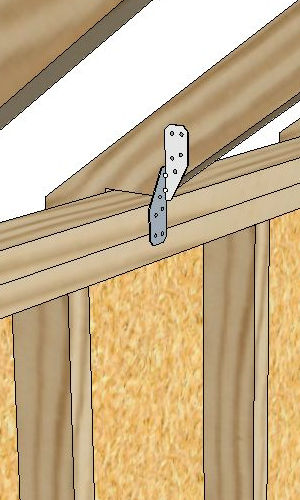 Hurricane Ties For Trusses
Being up in Alaska one of the issues Joshua had was finding Hurricane ties, which are specialized metal connectors used to anchor a building's roof to its walls and walls to the foundation, preventing the roof from being ripped off and the walls from collapsing during high-wind events like hurricanes.
My suggestion to Joshua was to try Amazon! Amazon carry's a ton of building supplies for shed building projects!.
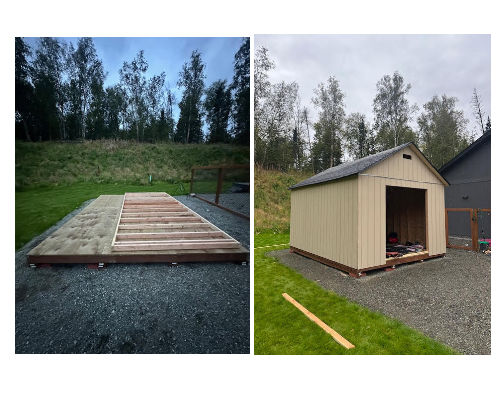 Using The Shed Floor To Build The Walls
I appreciate you Joshua for taking the time to send in your shed pictures. You built a great looking shed!
You can find the shed plans Joshua used here.
Just got this shed picture from Tom who used my 10x16 barn shed plans to build his great looking shed! Tom modified the plans somewhat by increasing the wall height so double pre-hung doors could be used in place of building the doors himself. Also Tom added windows to the shed.
Here's what Tom had to say about using my shed plans to build his awesome shed:
" Thanks for the plans for the barn style 10 x 16. The exterior is complete so I wanted to share a photo with you…very happy with the detail of the plans and the outcome!"
Andy's 12x16 Barn With Porch
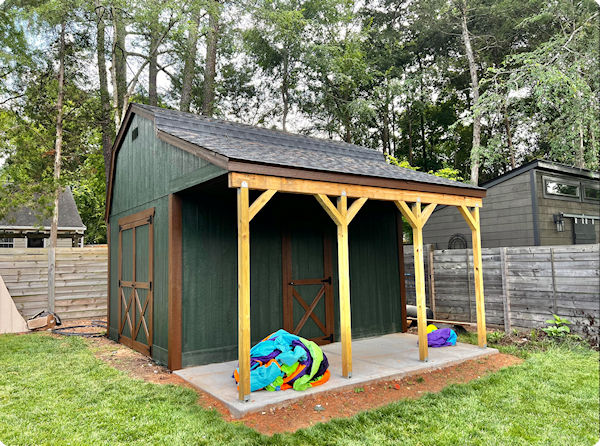 Andy's Awesome 12x16 Barn With Porch Picture
Andy used my 12x16 Barn with porch plan to build this really nice looking shed!
Here's the comments Andy included along with his submission:
"Hey John! The build went great and thank you for your detailed plans! Now on to final inspection and landscaping. "
"Only things I did different was adding a single 2x4 extension to the gable soffits, using 2x3 (on edge) door construction to make them strong and light, and adding a sacrificial 8” trim board at the bottom of all sides if rot occurs. "
Bryan's 12x16 Garden Shed
This is a really nice 12x16 garden shed built by Bryan from Michigan. It looks great with the blue siding and white trim. Bryan had a few issues installing the siding and you can read more about this issue and see more pictures of this neat shed here.
Here's a link to the plans Bryan used.
Bill's 12x16 Gable Shed With Garage Door
Bill from Leadville Colorado built this really nice looking gable shed using my 12x16 gable shed with roll up shed door plans.
Bill had to make some changes to the shed build due to some extreme weather conditions where he lives. You can read about the adaptations he made and see more pictures here.
Thank you Bill for sharing your pictures and story about your shed building project and for buying my shed plans!
Here's a Super Nice Shed From One Of My Customers
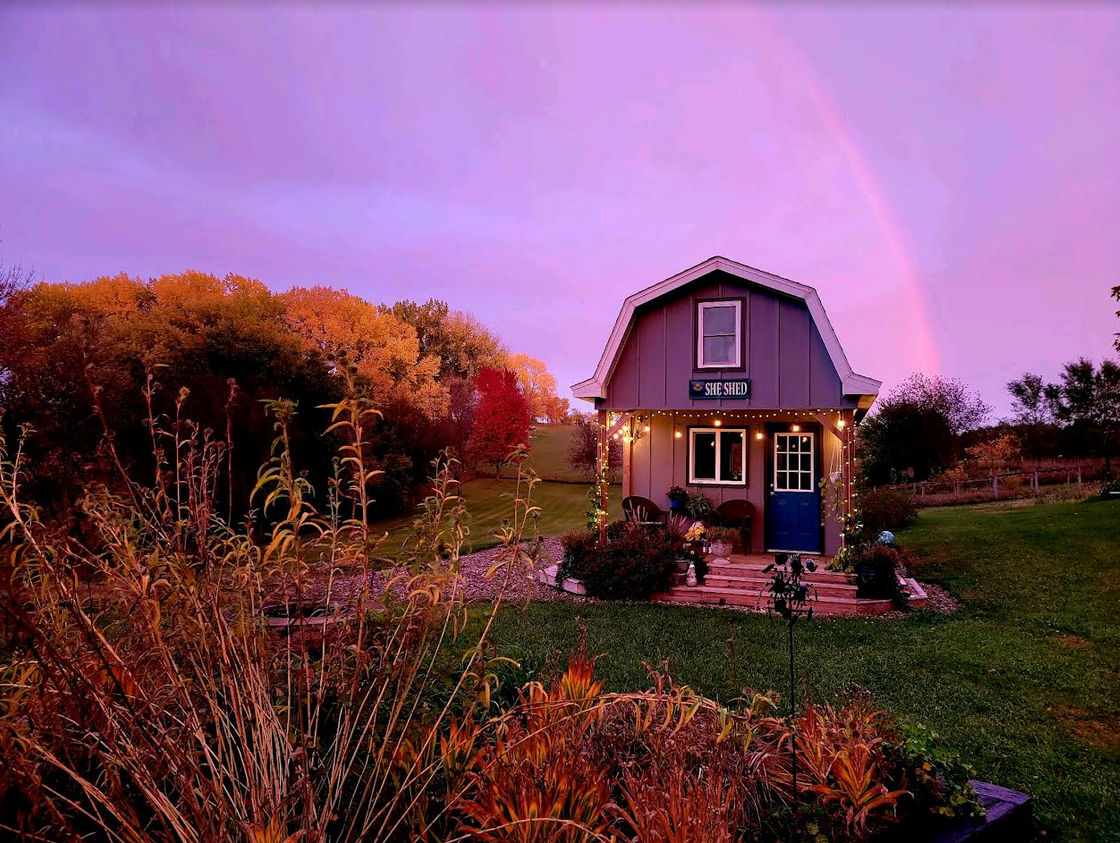
The shed picture above is one of the prettiest I've gotten from one of my plan buyers!
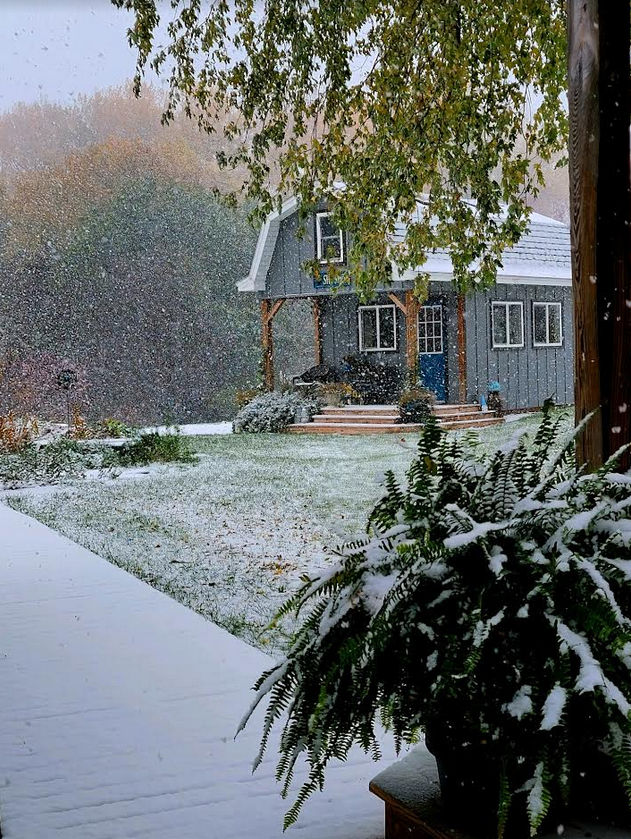 Such A Pretty Scene!
Here's what this customer had to say about using my 12x22 Barn with front porch plans:
Here are a couple my wife took. About a week apart. Here in Sioux City, Iowa.
I will dig up my construction pictures for you. We had a wonderfulul summer, Fall, Winter building this! Best thing we did during the shutdown. Everyone was moping around and we had the best time ever building this.
I modified the roof line with a soffit because I needed ventilation. This is heated and AC with a Mini Split on the back side.
I'll send you a bunch more later. Enjoy these.
Did you know she sheds go by another name! Check them out here.
Kalvin's Nice 12x20 Barn Shed
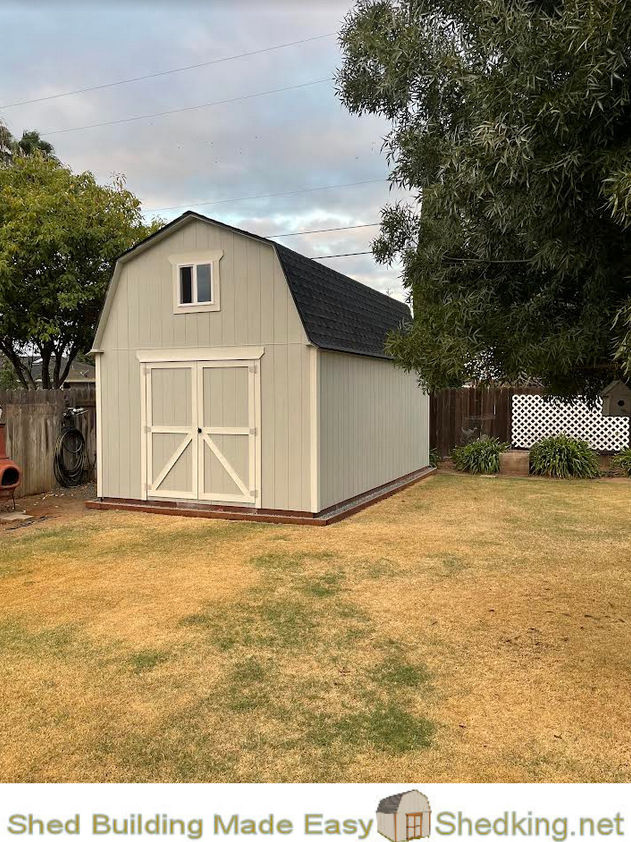
Kalvin purchased my 12x20 barn shed plans and built this awesome looking shed. Here's what Kalvin had to say about using the plans:
"I wanted to take a minute to thank you for offering your plans online
and share my build with you! Your plans were easy to follow and I was
happy to find that the materials list has very little scrap left over.
I’m hoping to have enough left to build a dog house to match. Start to
finish the project took me about 12 days total mostly working alone.
I’ve attached a photo feel free to share on your social media if you
like! "
Thanks!
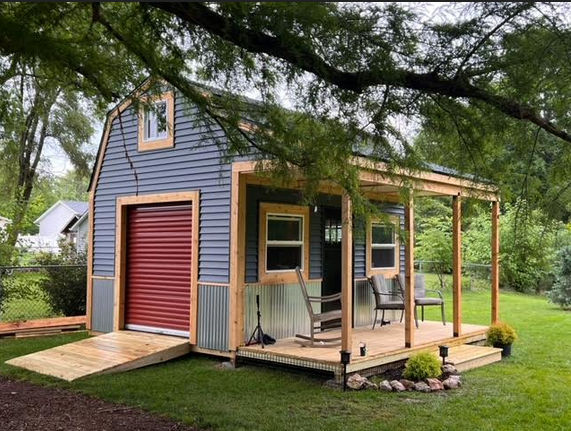 Charlie's 12x16 Barn Shed With 6' Side Porch
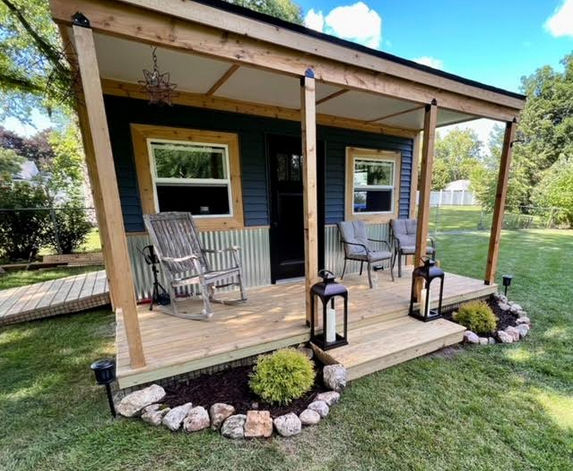 Nice landscaping on this shed!
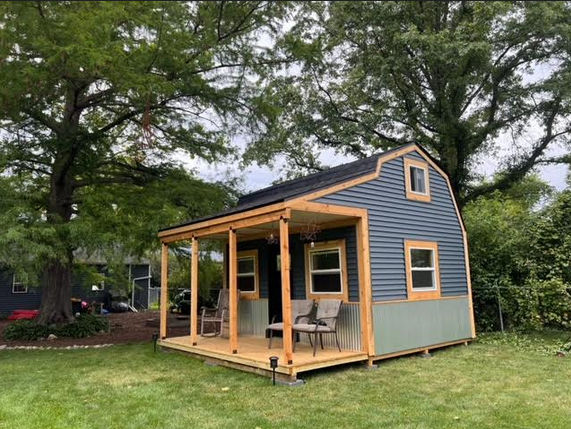 Beautiful picture of Charlies 12x16 barn with porch shed
What a beautiful shed Charlie built! I love the color scheme and he even added wainscoting to the exterior siding. Everything about this shed turned out great!
Thankyou Charlie for sending me your shed pictures! You can learn more about the shed plans Charlie used here.
Dave's 10x14 Barn Shed
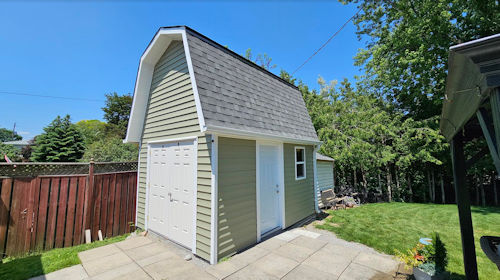 Dave's 10x14 Barn Shed
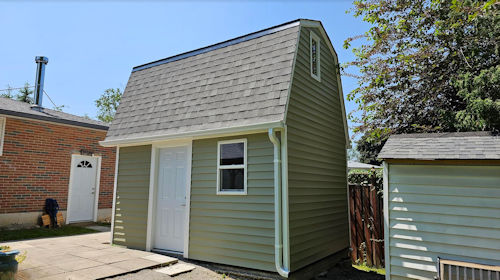 6.5' of Headroom in The Loft Area of Dave's Shed.
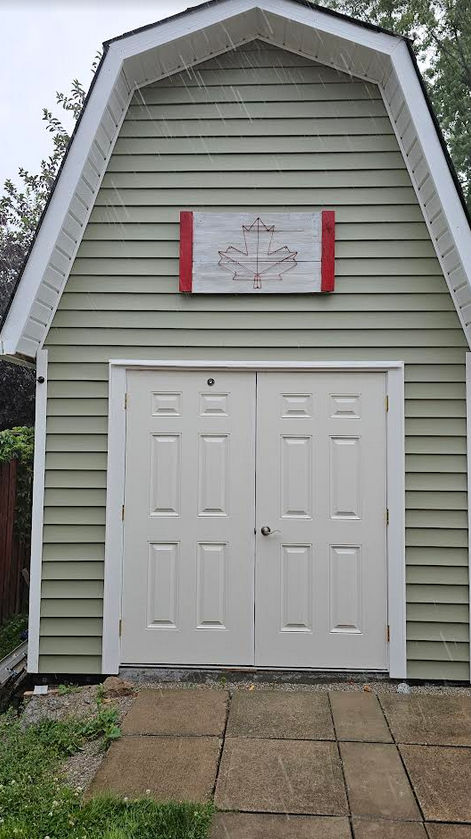 Pre-hung Double Doors Are an Added Modification to the plans.
Dave purchased my 10x16 barn shed plans and did some awesome modifications to the plans. The nice tall roof modification gives him lots of headspace in the loft. He also added pre-hung double doors and windows making this an awesome looking and very functional shed.
Here's what Dave had to say about building this shed:
'Hi
Here are a few pictures. The plans helped a lot. But missed cripple studs for the shelf at 7 feet inside, ended up using 25 and 22 degrees for the rafters and have a 6.5 foot headroom up top. In process of insulating as will have heat inside. Overall. 10 x 14 with 14,10 height. Built with 16 in centers and 2x4s total count was 140 2x4s with 36 3/8 plywood sheeting. Vinyl from home depot. Wrapped completely in rino wrap.
Dave. '
If you would like to see the plans Dave used you can see them here.
Chris's 16x12 Garden Shed
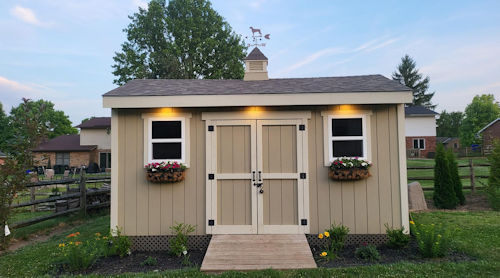 Chris's Beautiful 16x12 Garden Shed
Chris used my 16x12 garden shed plans to build this really neat looking shed! Included with the plans he downloaded were the cupola plans which he also built and it sits atop his shed.
Great job building your shed and cupola Chris! Thank you so much for sending me your picture. You can find the plans Chris used here.
David's 6'x8' Lean To Shed
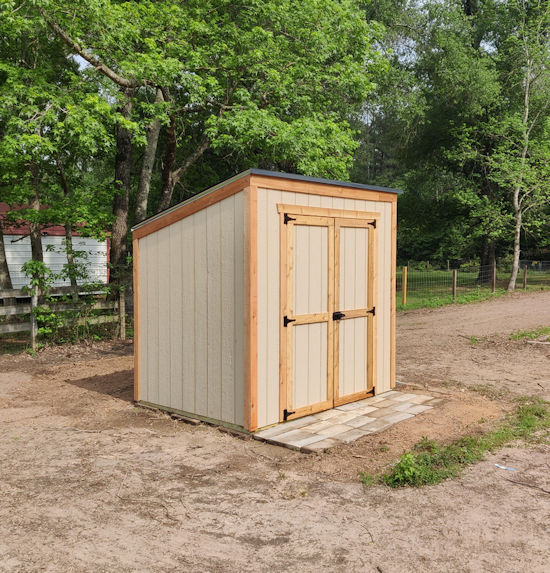 David's 6'x8' Lean to Shed
Here's David's 6'x8' Lean to Shed that he built for use as a cover for a water well and softener. You can find the lean to shed plans David used here.
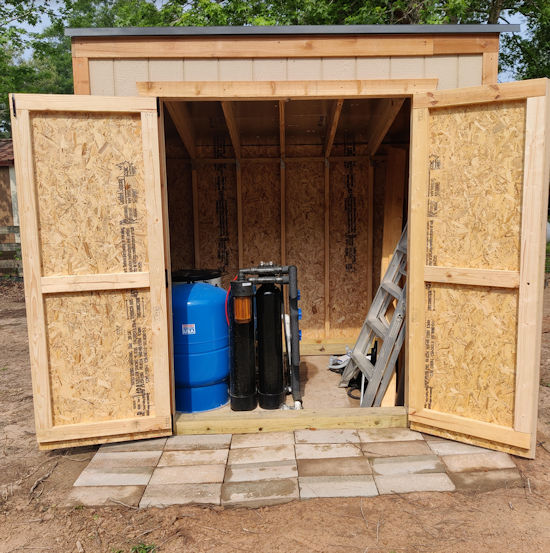 His Lean To Shed Used as a Well and Softener Cover His Lean To Shed Used as a Well and Softener Cover |
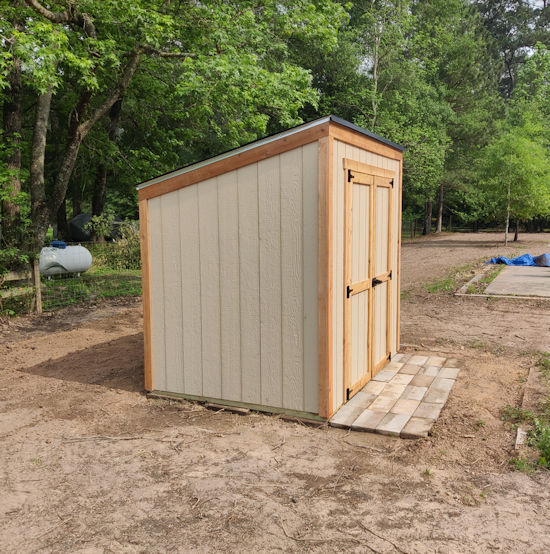 Side View of David's 6'x8' Lean to
Shed Side View of David's 6'x8' Lean to
Shed |
Here's what David had to say about using my shed plans:
Got them, thanks! Just wrapped up the build. Attached are some pictures.
Pretty
happy with the plans. I wanted them to build a cover over a water well
and a water softener , so no floor but a 4"x6" treated foundation. It's a
bit overkill but glad I did it.
I'd have only two comments overall about the plans. OK, three if you count the comment about how the plans were really great and accurate. First comment, the materials list only listed the 1"x4" cedar for the doors, not the 1"x6" and 1"x4" for the rest of the shed. Would have saved me an hour round trip to Lowes.
Secondly and this is kinda on me, but would have been nice on the materials list to state in bold letters "THIS MATERIAL LIST PRODUCES AS LITTLE WASTE AS POSSIBLE, IF YOU NEED TO CUT A 5 1/2" 2"x4", DON"T JUST GO GRAB A 2"x4"x8", GO CHECK THE SCRAP FROM THE 2"x4"x12" YOU JUST CUT TO SEE IF IT'S LONG ENOUGH."
Disclaimer, that was another hour round trump to Lowes.
Otherwise super happy with the plans and with the shed. Thanks for making them available.
Regards,
David Kilchrist
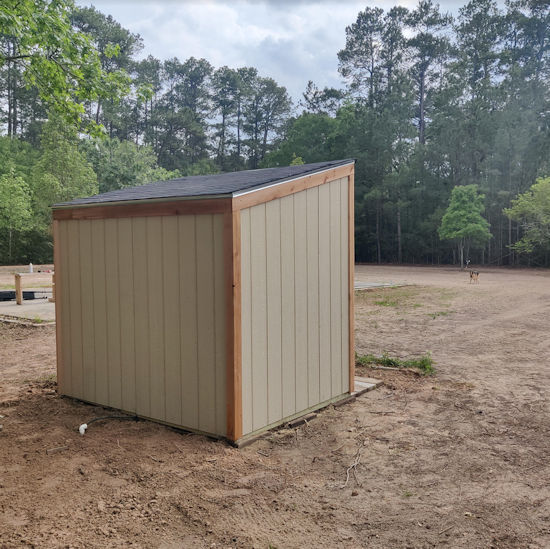 Back View of David's 6'x8' Lean To Shed
Thank you David for sending me your pictures of your neat shed. Great job building it!
Vince's 4'x8' Lean To Shed
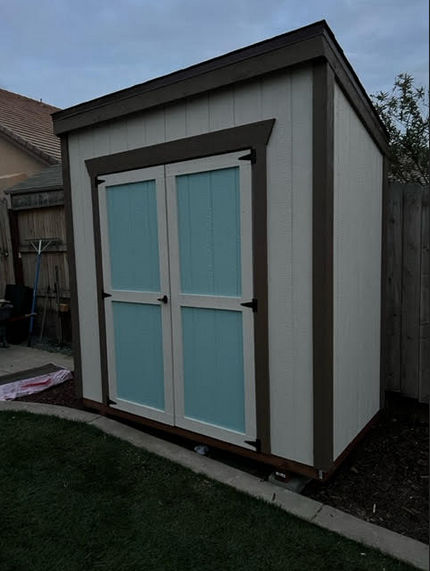 Vince's 4'x8' Lean To Shed
Vince built this nice 4'x8' Lean to shed using my 4x8 lean to shed plans. Here's what Vince had to say about using the plans:
Hello John,
I just completed my 4’x8’ shed
construction using your plans. I am exceedingly pleased with the
finished product. I would highly recommend your plans to anyone
considering building their own shed.
I really
appreciate some of the little details, such as the stud layout which
precisely places the siding grooves centered on studs on all four sides
of the shed. This hides nearly all the siding nails in the grooves and
gives the siding a very clean and beautiful “nail-less”look. I also love
your door design which utilizes the siding lap to form a tight seal in
the joint between the double doors.
I will be returning to your site for my next shed plans.
Best regards,
Vincent
Ione, Ca.
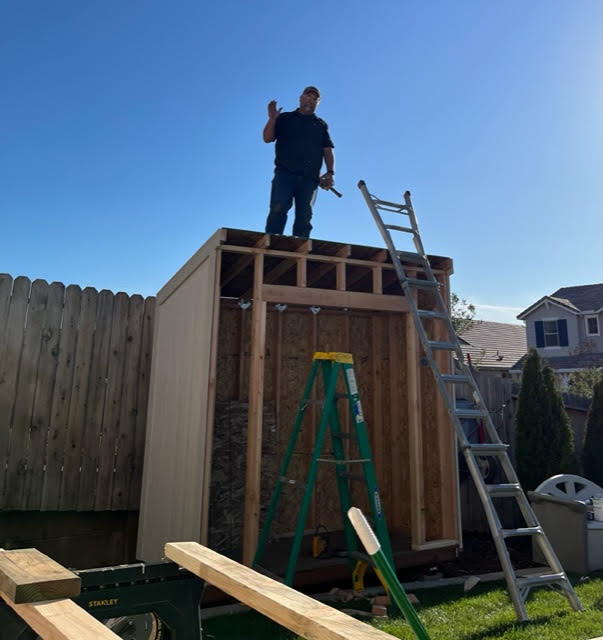 Vince On His 4x8 Lean To Shed
Thank you Vince for taking your time to send my in your pictures of your neat shed you built!
Chris's Firewood Shed
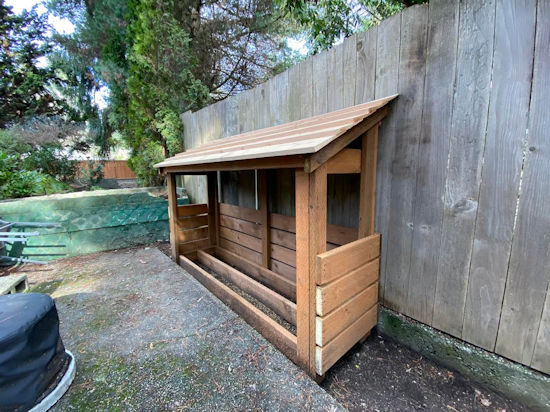 2"x8' Firewood Shed Build By Chris
Chris used built a neat firewood storage shed using my 2'x8' firewood storage shed plans.
Here's what Chris had to say about using the plans:
"Hi John,
The website mentioned you liked getting pictures, so here's one of the firewood shed built per your plans.
I reversed the slope of the roof so that the shed would not accumulate leaves against the fence. It was a fairly trivial change; I just swapped the side walls.
Thanks,
Chris
Here's a link to the plans Chris used.
Dillon's Eagle Scout Project
 Dillon's Eagle Scout Shed Project
Getting pictures like this one from Eagle Scout Dillon is truly rewarding! This young man did quite the awesome job building this shed for his eagle scout project. Here's what Dillon emailed me about what he did for a local school:
"My name is Dillon, you would be happy to know that your 8x10 gable shed plans helped me do my eagle scout project. My eagle scout project was to replace a shed at a local elementary school. The plans were easy to understand and read, so it made the build process very easy. Thank you for having these shed kits out for public use."
Thank you Dillon for sending me this picture! It really is very heartwarming to see this type of positive activity in a community in this day and age when not many young men and women are going into scouting. So my hats off to you Dillon for building this really nice looking shed for your Eagle Scout Project. What a great job you did!!
Alan's 10x10 Gable Shed
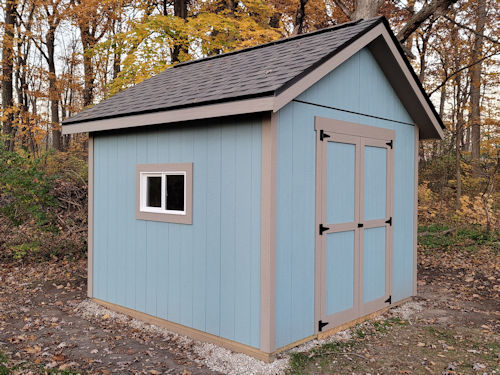 Alan's 10x10 Gable Shed
Alan used my 10x10 gable shed plans to build this 'crisp and clean' looking shed. I love his color scheme! Here's what Alan had to say about using my shed plans:
Hi John,
I finished my shed a few weeks ago now. Thanks again, the plans were a useful reference. I ended up drawing my own version in sketchup to account for some slight changes I made (roof pitch, windows, etc.):
Thank you Alan for sending me a picture of your awesome shed!
You can find the shed plans Alan used here:
Matthew's 2'x8' Firewood Shed
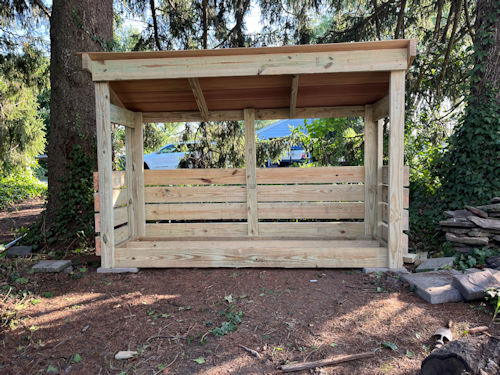 Matt's Completed 2'x8' Firewood Shed
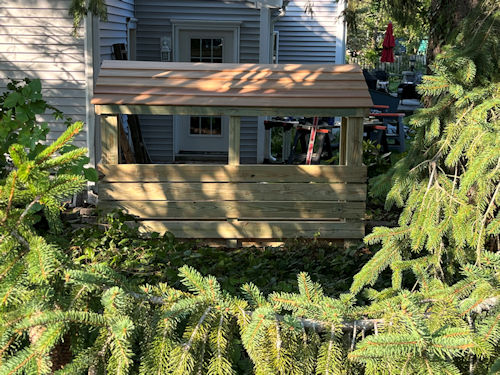 View From The Rear
 Construction In Progress
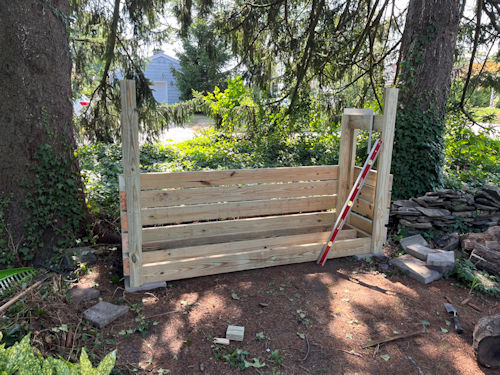
Matthew built this neat looking firewood storage shed using my 2'x8' firewood shed plans. Here's what Matthew had to say about using the plans:
"Made all the precuts by section and worked out beautifully! I built it alone but with clamps as extra hands, it worked out well... looking forward to loading it for winter! Thanks again and here's a few photos... "
Thank you Matt for sending in your pictures! Here's a link to the plans Matthew used.
Josh's Neat 8x10 Barn Shed
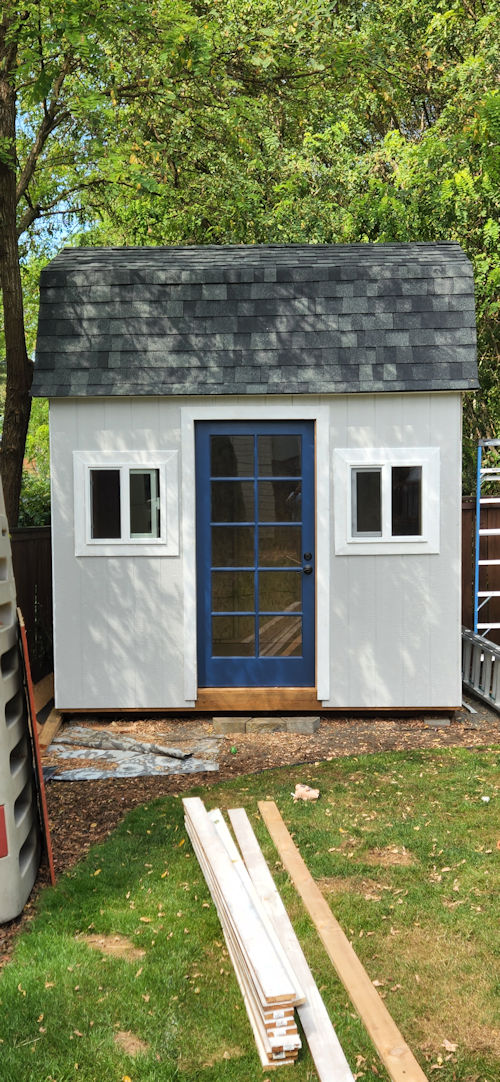 Josh's 8x10 Barn Shed Picture
Josh built this nice 8x10 barn shed and modified the plans somewhat by putting a pre-hung door and 2 windows on the 10' side. Here's what Josh had to say about using my shed plans:
Hi John, thanks for sending the plans. They worked out great. The shed turned out better than we could have asked.
I'm still finishing the outside before working on the inside. I'll send you one once steps and some landscaping around it have been completed, but here it is as it currently stands.
Thank you Josh for sending me your shed picture! You can learn more about these plans here.
Chris's 16x12 Saltbox Shed
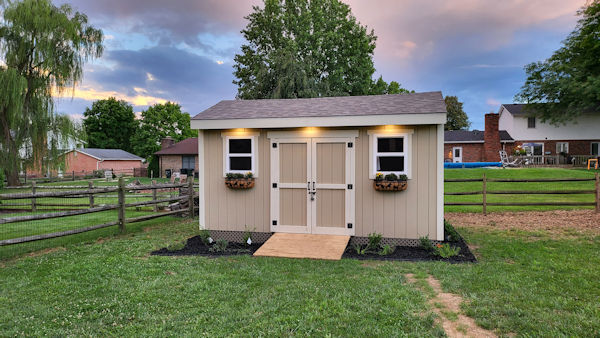 Chris's Neat 16x12 Saltbox Shed Picture
This is a beautiful picture sent in by Chris who built this neat 16x12 saltbox shed. I love how he added the accent lights under the front soffit of his shed! Here's what Chris said about using my plans:
Hi John, I finished up the shed and I think it turned out great. It was my first time ever constructing any type of structure. Thanks again for the design and affordable plans.
The lights are 6 inch round recessed led lights. They are ultra thin so they didn’t interfere with the trusses. I have them connected to a WiFi smart dimmer switch so I can run a on/off schedule. Currently set to 8 to midnight. The smart switch also allows me to turn lights on or off from the house by voice with Alexa. You can certainly use the pics however you want.
One thing about the 12X16 plans, I had to buy two more sheets of siding to finish the gables. The material list has 14 sheets but it took 16 sheets.
I really enjoyed building it and as a school teacher with summers off, I may start a summer business building a shed or two on my time off if I can get some customers.
Enjoy your day,
Chris
Learn more about the 16x12 saltbox shed plans.
Brian's Neat 12x16 Barn w/Porch
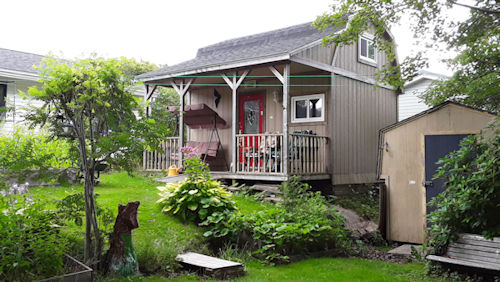 Brian's 12x16 Barn Shed With Porch
Brian used my 12x16 barn shed with porch plans to build this really cool looking shed. Here's what Brian emailed me about his project:
"Thank you, John, very much appreciated. I'll see if I can find the pics of the build for you. As I said, the ceiling was lowered by a foot which gives headspace upstairs and storage space was made above the porch.
We use it downstairs for a hobby room and, in the winter I bring in my vintage '69 BSA A65 for any work that needs doing.
I often look at it and think with a bit of modification to comply with municipal rules, it would make a great guesthouse or even a backyard rental which is now legal in our area.
And that porch? Well, in the hot weather a cool breeze comes up through the woods from the lake and you could, and we do, sit there all day!
all the best
Brian
Thank you Brian for sending me your shed picture! To learn more about the plans Brian used you can see them here.
Jack's Awesome Meat Smoker Shed
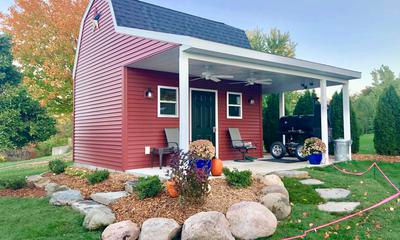 Jack's Meat Smoker Shed
Jack used my 12x16 barn with porch plans to build this neat shed for his meat smoker.
See more pictures of this awesome shed and read about Jack's business he has with meat smoking products here.
Chuck's 12'x22' Workshop Shed
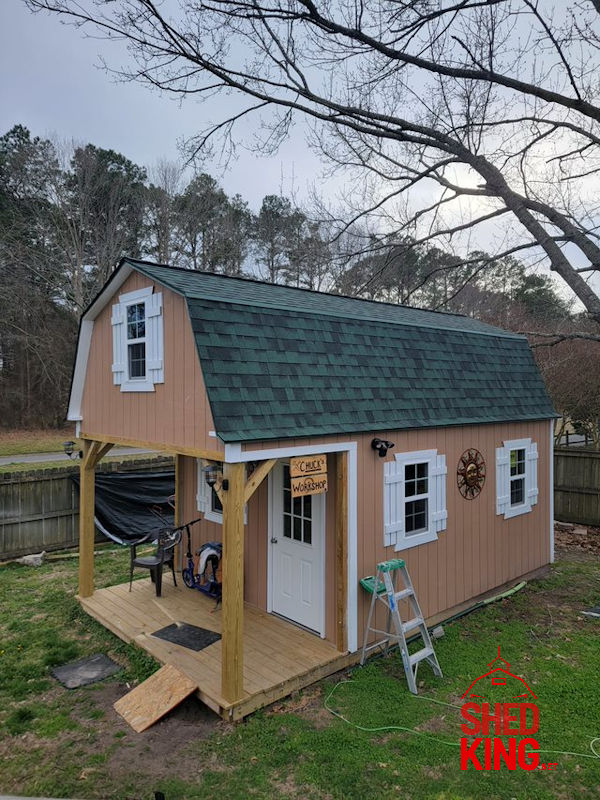 Chuck's 12'x22' Workshop Shed
I just think this is one of the most awesome sheds that has been built by one of my customers who purchased a shed plan from me. This picture was sent in by Chuck who used the plans for his workshop shed. This particular shed has a huge loft that can span from one end of the shed to the other .
More pictures of Chuck's workshop shed.
Here's the plans Chuck used to build this neat shed.
Rod's Neat 10'x10' Gable Storage Shed
The above shed picture is Rod's 10'x10' gable style storage shed. He actually built the shed using all my 'how to build a shed' information contained here on the site and didn't purchase any plans.
You can see more of Rod's pictures here.
Todd's 10x10 Barn Shed Pictures
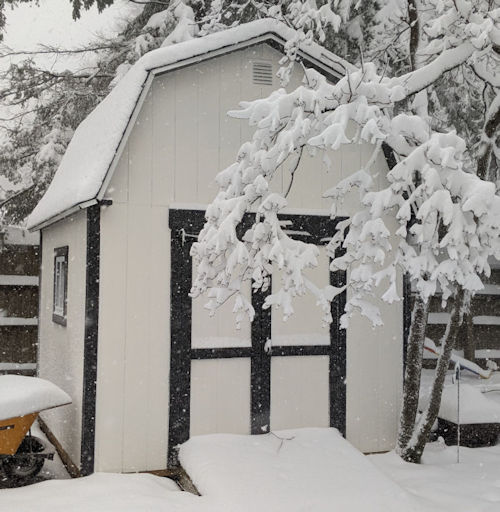 Todd's 10x10 Barn Shed
Todd built this really neat 10x10 barn shed that has a huge loft in it. You can see more of Todd's pictures here.
Rodney and Carey's Tiny Guest House Shed
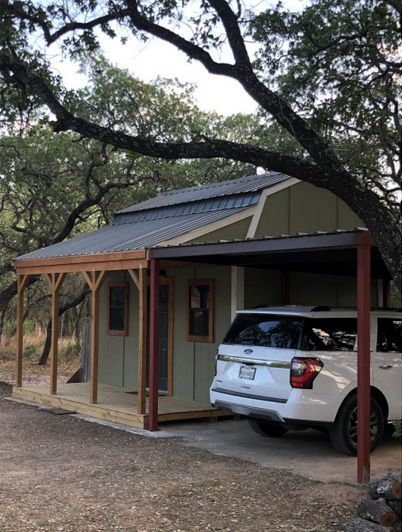 Rodney and Carey's Guest House Shed
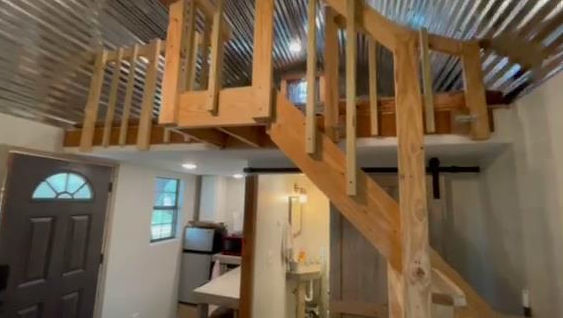 Complete with Kitchen, Bathroom, living room, and Sleeping Loft
Rodney and Carey from Texas used my 12x16 barn shed plans with porch to build this neat tiny guest house shed. Click here to read more about this neat shed to house conversion.
Nick from NZ Built This Neat Cupola For His Shed
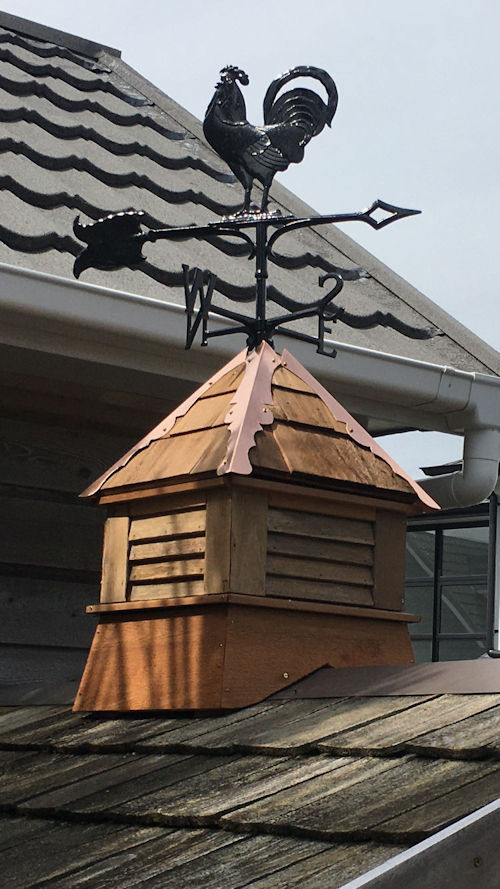 Nick From New Zealand's Cupola
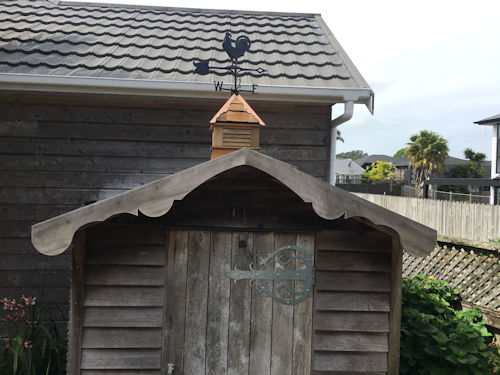 Nick's Neat Shed and Cupola
This cupola that Nick from New Zealand built is so neat! He trimmed it out with copper and did a fantastic job with the construction! Here's what Nick had to say about using my cupola plans:
Hi Shed King
I hope this email finds you well?
I attached a couple of photos of my cupola made using your plans.
As you can see I have made copper roof flashings mimicking the shape of
the decorative gable- end. The cupola is set on my cedar garden shed
(which I’ve been pimping- decorative gable-ends, medieval hinges)
This was a really good wood work project for me and I want to thank you for your very clear plans, diagrams & narrative.
I topped it off with a weather vane from USA. This was the most
expensive part of the project as it happened - not unexpected when you
live halfway round the world as I do.
Once again, thank you for your excellent plans!
Kind regards
Nick from NZ
Ryan's 10x12 Barn Shed
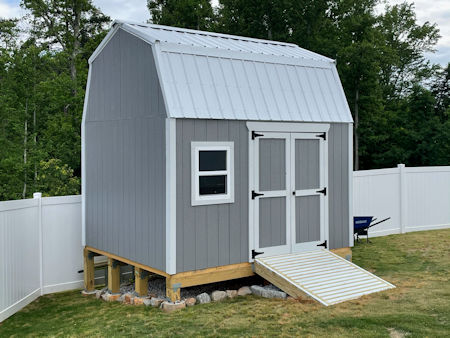 Ryan's 10x12 Barn Shed
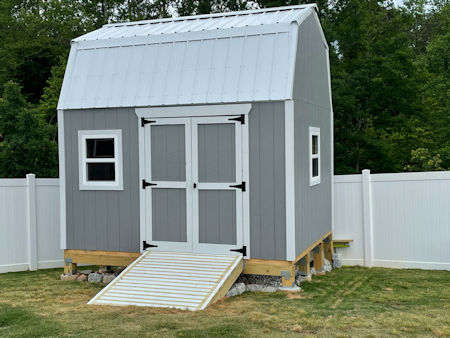 Ryan's neat 10x12 Barn Shed
Ryan modified my 10x12 barn shed plans to build his neat storage shed. He modified the plans somewhat by off centering the double shed doors, added windows, and instead of going with a shingled roof he added a metal roof!
Here's what Ryan had to say about his shed building experience using my plans:
"Hi John,
I just finished the shed and wanted to send you a picture to show how it
came out. I’m really happy with it! Thanks for all your help, I could
not have done it without your help.
Feel free to post the pictures on your site. I plan on using it as a storage shed for lawn and garden tools, and the loft has some stuff that I won’t use much, but want out of the way, like some extra tires and random wood pieces. I was able to find wood in the local area that helped a bit on cost, but it seems to be going up every where, especially plywood. Since this was the only time I had to do it, I didn’t have much choice… I have gotten lots of compliments and people asking when I’m going to post it on Airbnb, lol. It was a big hit at the memorial day picnic too."
Ryan thank you for sending me your shed pictures! You did an awesome job!
Eric's Neat Barn Shed with Chicken Coop
Eric sent me these pictures of the 12'x22' barn shed he built. He added a front and side porch and screened the porch in to make a chicken coop. Here's what Eric had to say about using my shed plans:
Hello John,
"The plans worked great. I made some modifications to the 12x22 barn
shed but the core plans were really good and remain mostly in tact.
Made it 12x26 with an 8' lean to on one side. It's a chicken coop on
one side and storage on the other. Here are some
pictures. "
Thanks,
Eric
If you are interested in checking out the plans Eric used you can learn more about them here.
Paul's Shed with Loft and Porch
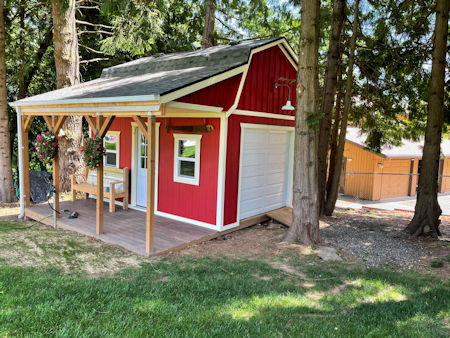 Paul's 12x22 Barn Shed
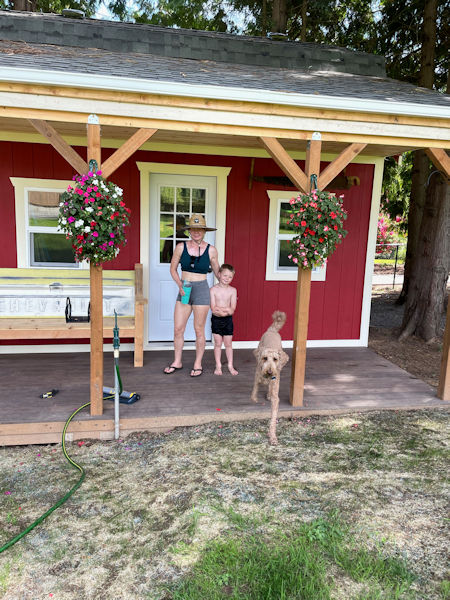 Paul's Family
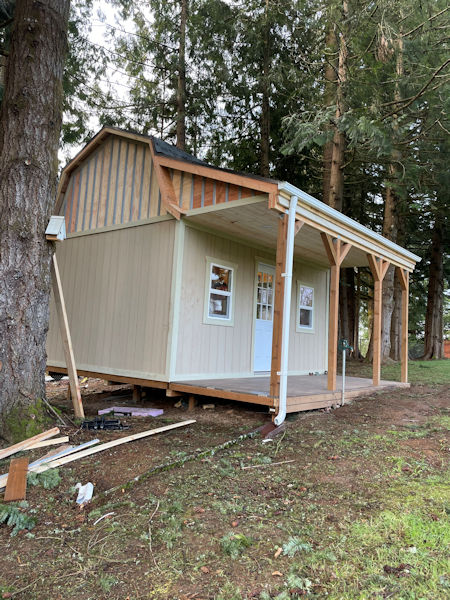 Huge Porch on Paul's Shed
Paul built this really neat barn shed that has a huge loft, 6'x16' side porch, roll up shed door, and entry door with 2 side windows off the porch. The plan Paul purchased can be used to build a backyard guest house, livable shed, shed to house, she shed house and more.
Learn more about the plans here.
Leyland's Neat 10'x16' Barn Shed
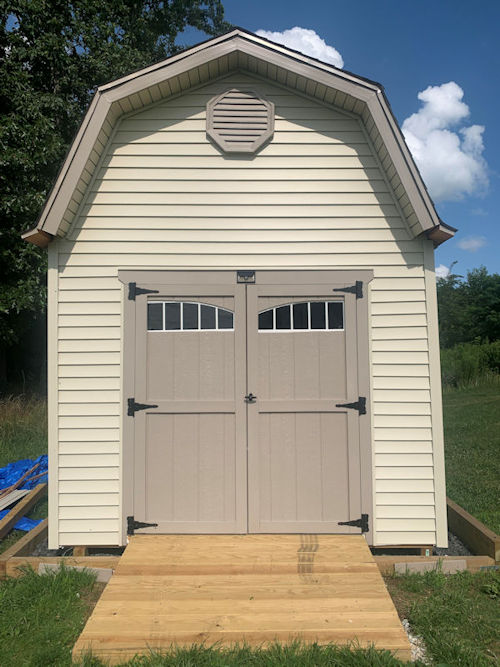 Leyland's Shed Picture of His Awesome 10'x16' Barn Shed
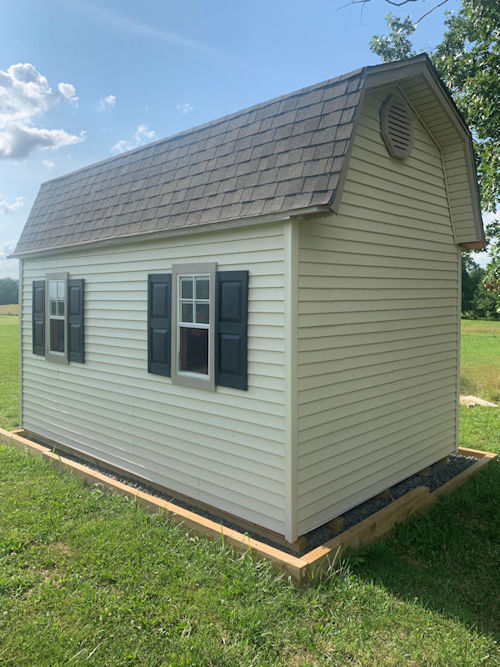 Nice Siding and Additional Windows Make This Shed Stand Out!
Leyland sent me these pictures of his really neat 10'x16' barn shed. I love the siding he used and the windows with shutters really adds to the uniqueness of his shed. Another neat thing he did was adding the transom windows to his shed doors.
Great job on your shed Leyland! Here's a link to the 10x16 barn shed plans Leyland used.
Mr. Pearson's Awesome Gable Storage Shed
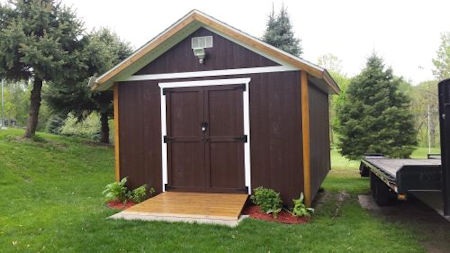 Nice Job Mr. Pearson on Your Gable Shed!
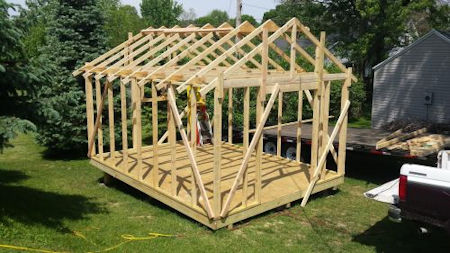 Framing Done On Mr. Pearson's Gable Shed
Framing is looking good on this 12'x16' gable shed and it's easy to do with my shed plans and free building guide. You can checkout the shed plans Mr. Pearson used here: 12x16 gable shed plans.
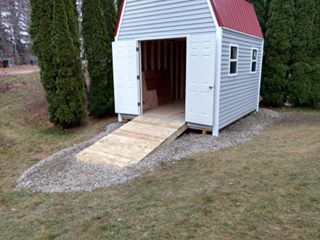
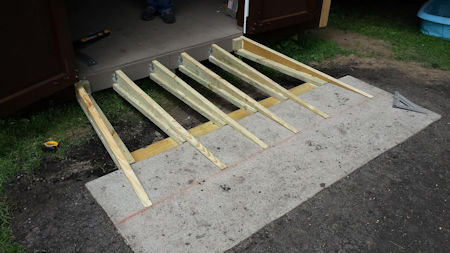 Here's An Awesome Shed Ramp For Sure!
This is one of the neatest ways to build a shed ramp that I have seen. Pouring a concrete pad for the front of the ramp is a great idea!
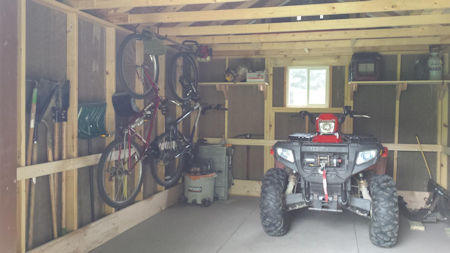 Mr. Pearson's Neat and Tidy Storage
Now this is the way to do storage in a shed!
Aaron's 2'x8' Firewood storage shed
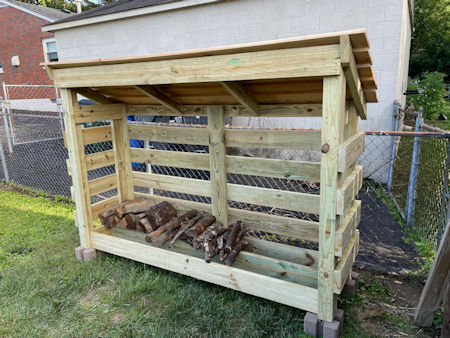 Aaron's 2'x8' Firewood Storage Shed
Aaron used my 2'x8' firewood shed plans to build this neat structure for storing firewood. Here's more about the firewood shed plans Aaron used.
Here's what Aaron had to say about using the plans:
Hi John,
Thanks for the reply! We must have had an
outdated set. My father and I built this in stages over the last few
days and are really happy with how it turned out. Now just need some
firewood! Attached pics below.
Have a happy July 4!
My Wife's Shed During the Winter of 2020
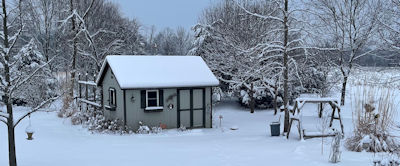 My Wife's Garden Shed Winter 2020
I just had to throw in this picture of my wife's shed during the winter of the pandemic, 2020. We were hoping for a mild winter but no such luck! If you want to see more of this 12x16 garden shed that I built for my wife 6 or 7 years ago you can see it here.
Mr. Stralen's 'Poetry Urban Barn Shed'
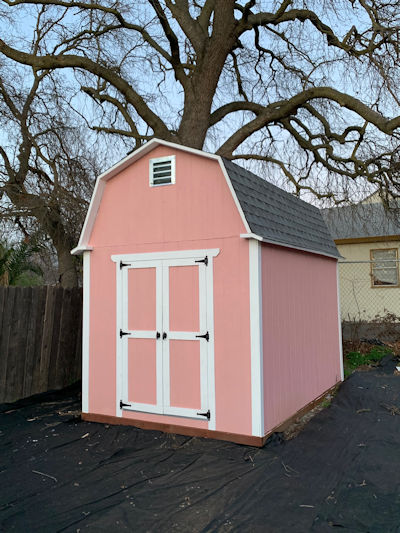 John Stralen's 8x12 Barn Shed
Here's some comments from Mr. Stralen about his barn building experience using my plans:
John,
I finished the shed about a month ago. My
daughter and son-in-law bought a house on a large lot in Oak Park
Sacramento and are just beginning a non-profit "urban farm" project
(Instagram @poetry_urbanfarm). They needed a shed and really wanted the
barn style. I did a little bit of work building fences and putting in
landscape in my college days, but never tackled a project this size on
my own but was happy to give it a try to help them save money. The plans
from your website, material list, and other help made it simple, and
doing it ourselves saved a ton of money. I just went step-by-step. I
think it turned out great!
I followed the plans precisely as possible. The only significant difference is that I did use 2 x 4's for the loft. The reason I did that is I made a mistake by putting the roof boards on before I put the loft boards in and it made it extremely difficult to use 2 x 6's. I did double up on a few and it was plenty strong. (I just mention that because you will see that in the photos.)
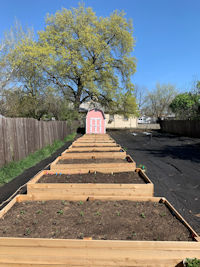 Garden Beds In Front
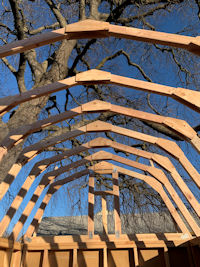 Pre-built Roof Trusses
John's 12'x16' Gable Shed Project
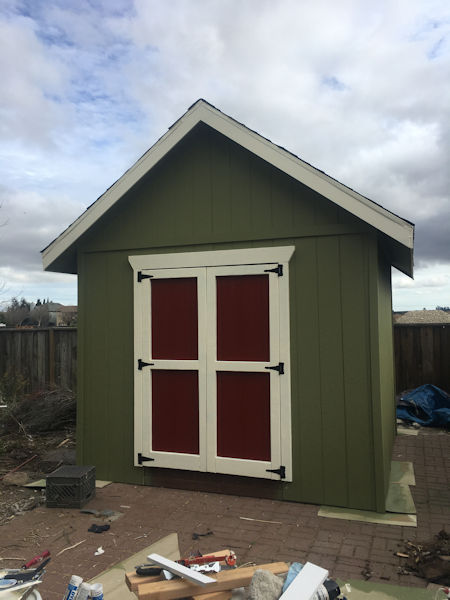 John's 12x16 Gable Shed
John gave me some great feedback on his shed building project and my shed plans:
Hi John- just finished my shed and thought I would drop you a few lines.
I am 52, took wood shop in 7-12th grade, worked in a production shop for
a couple of years, and have continued to make furniture and cabinets
since departing the cabinet shop for education.
This is my first attempt at framing/ building.
As I was working by myself, one thing I did differently was install the
vertical support beam for the ridge board at the same time using Simpson
connectors- acted as another set of hands allowing me to get it up
there by myself.
If I did this again I would install the siding before the roof just to eliminate the wobble.
I made a mistake that I preferred to work around than redo- I thought I
was following directions when installing siding...first side wall no
issues, started in corner of back, when I should have started in middle-
not specifically spelled out in plans but checking with a tape would
have been a good idea- quicker to install a nailer in between studs.
One thing I could not find an answer for in the plans- what to do about
the space between the top plate and roof sheathing in between the
rafters. As I “ saved” a sheet by installing back wall incorrectly, I
made a soffit with the extra siding I had, installed a trim piece under,
on the wall and caulked the seams. No light gets in so I am happy with
the results of improvisation.
After being mostly done with rafters, I saw your post about a shed where
you left rafter tails long to cut off later- I would do this next time
as well. Probably a function of working by myself there was some
variance to the installed distance of rafter to ridge board, making trim
installation interesting.
And another dumb mistake- I installed the trim on the eaves to install
the drip edge before I did the Gable fascia....I had the 4” and 6” trim
on hand and did not see a specification in directions. As the 4” fit
nicely on the rafter tails, I installed it, then installed the paper,
then the gable fascia....yeah all needed to be 6”.
Overall, a fun learning experience. I am much better with a skill saw
now and got comfortable being on a ladder. I honestly did not like the
roofing....I installed a 2x4 to anchor my feet while I pretty much laid
on the roof to install shingles...that sucker is steep!
Thanks for the plans!
John
Mike's Awesome 12'x20' Barn Shed
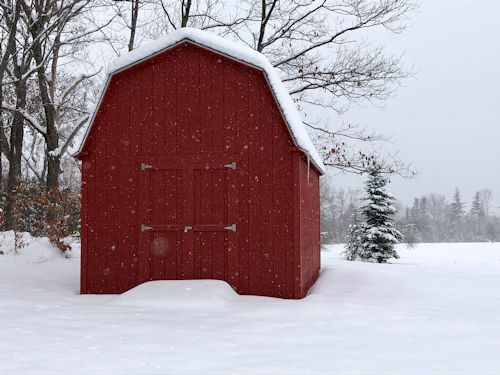 Mike's 12'x20' Barn Shed
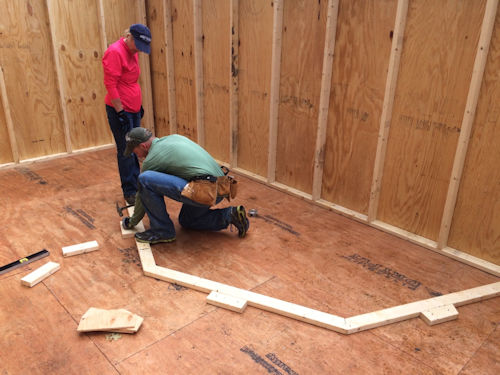 Mike's Floor Jig for Truss Construction
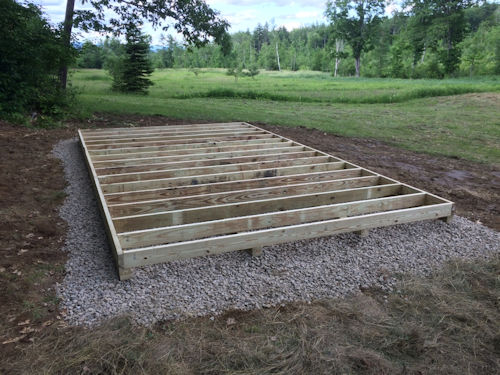 Treated Floor on Crushed Rock Foundation
Mike used my 12x16 barn shed plans and expanded them to build this beautiful 12x20 barn shed. I love the color. Great job Mike!
Brian's Neat 12'x16' Barn Shed
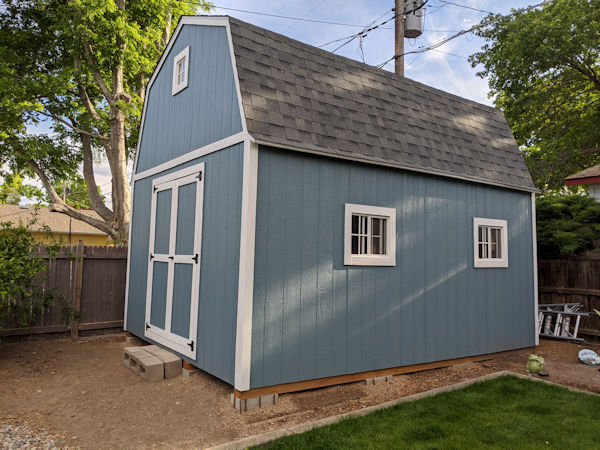 Brian's Neat 12'x16' Barn Shed
Brian built this neat 12'x16' barn shed using my 12x16 barn shed plans.
He modified the plans somewhat by adding some windows which is easy to do and any of my plan buyers can easily do so by visiting the window link on the left side of the website. Here's what Brian had to say about using my plans:
"Attached is a picture of our shed. You are welcome to use it for your website. Your material list was great and your plans were very easy to follow. Again, we really thank you for what you do!"
Thank you Brian for sending me your neat shed picture!
Karl's Awesome 10'x12' Gable Shed
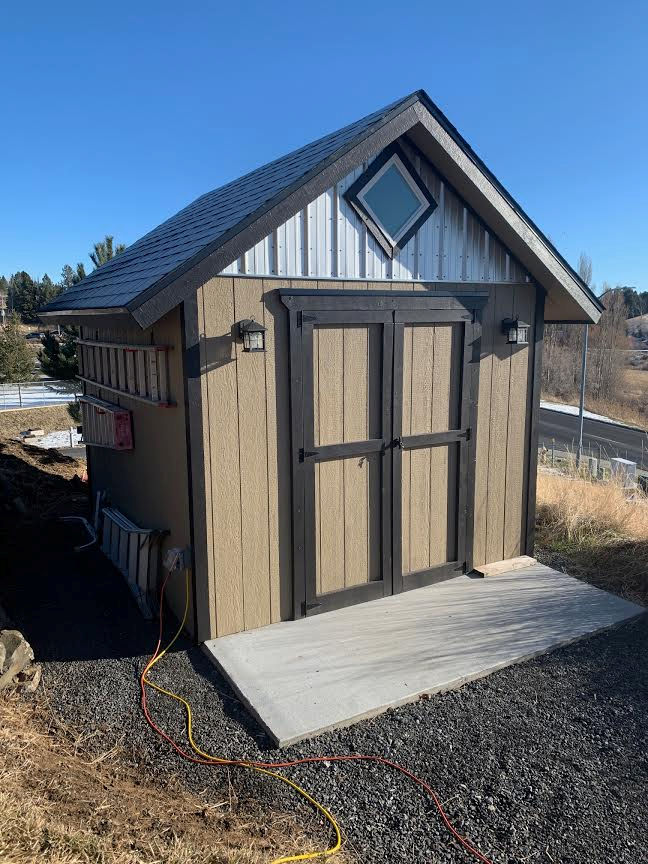 Karl's Neat 10'x12' Gable Shed
Karl used my 10x12 gable shed plans to build the neat shed you see above. Here is the email I received from Karl about his experience building his really cool shed:
John,
Happy New Year!
Months ago my son and I finished our shed project with your help! I am
the one that asked about 8’ high walls because he is 6”10”. He and his
wife and their 6 month old son are living with us due to Covid.
As you can see from pictures we finished the gables with left over
Galvalome roofing. Another money saving feature was using 3/8” LP
Smart Side 8” siding strips for the final fascia, it was pre finished
on one side and we painted 3 coats on both sides before installing and
then touched up the nails. The panels 16’ length easily led to
installation on 14’ total length of the shed. The extra height led to
longer rafters and more sheltered area outside. We were pretty precise
to your directions and were less than 1/4” out of square vs 14’
length. The corner trim is fir 1x4”s salvaged from 8’ industrial
pallets (factory being built). Those same pallets yielded 24 8’ 2x4”s
and the 7/16” wafer board sheets that you advised against for roof
sheeting (we used 7/16 plywood instead).
We also liked the look of slanted rafter ends, and put drip metal
around the entire shed.
The cords are powering Christmas lights.
Again, thanks for your advice!
Thank you Karl for your shed picture!
Michael's Neat 10x16 Barn Shed
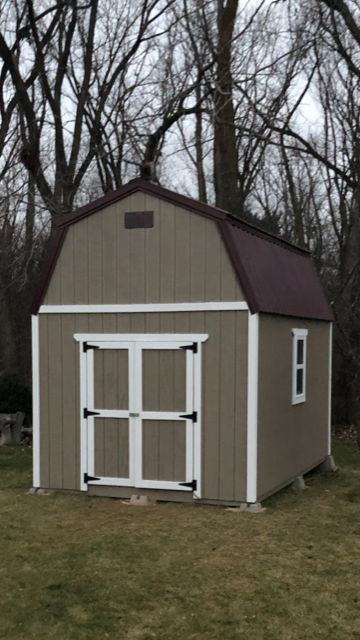 Here's Michael's 10x16 Barn Shed Picture
Michael used my 10x16 barn shed plans to build this neat shed. I love the color scheme Michael came up with, and he also modified the plans somewhat by going with a metal roof. He also added in 2 windows which are a relatively simple modification to any shed plan you purchase here.
Here's what Michael had to say about building his shed with my plans:
I followed the plans for the most part, but added some of my own ideas. I set the shed on 9 deck blocks and used 2x6 treated and 3/4 in treated decking. I really liked the design of the gambrel roof and making an assembly jig on the deck really helped out. I decided to go with a metal roof instead of shingles. By just using purlins for roof support I did not have to sheet the roof. I also added a couple windows. These shed plans were great and this shed is as sturdy as any house.
Thanks,Mike
Parrish's 12'x16' gable shed with roll up shed door
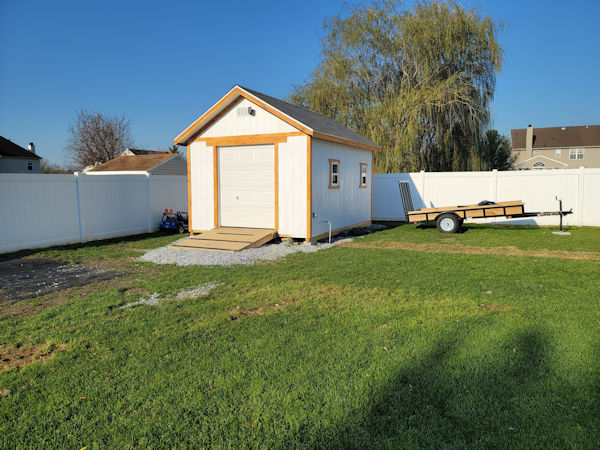 Parrish's 12'x16' Gable Shed with Roll Up Shed Door
This neat gable shed with roll up shed door was built by Parrish from New Jersey. Parrish modified the plans some what by adding a window in where the entry door is shown in the plans.
Great Job Parrish on your awesome looking shed! You can find the plans Parrish used here: 12x16 Gable with roll up shed door.
81 years young Edward built this awesome shed..
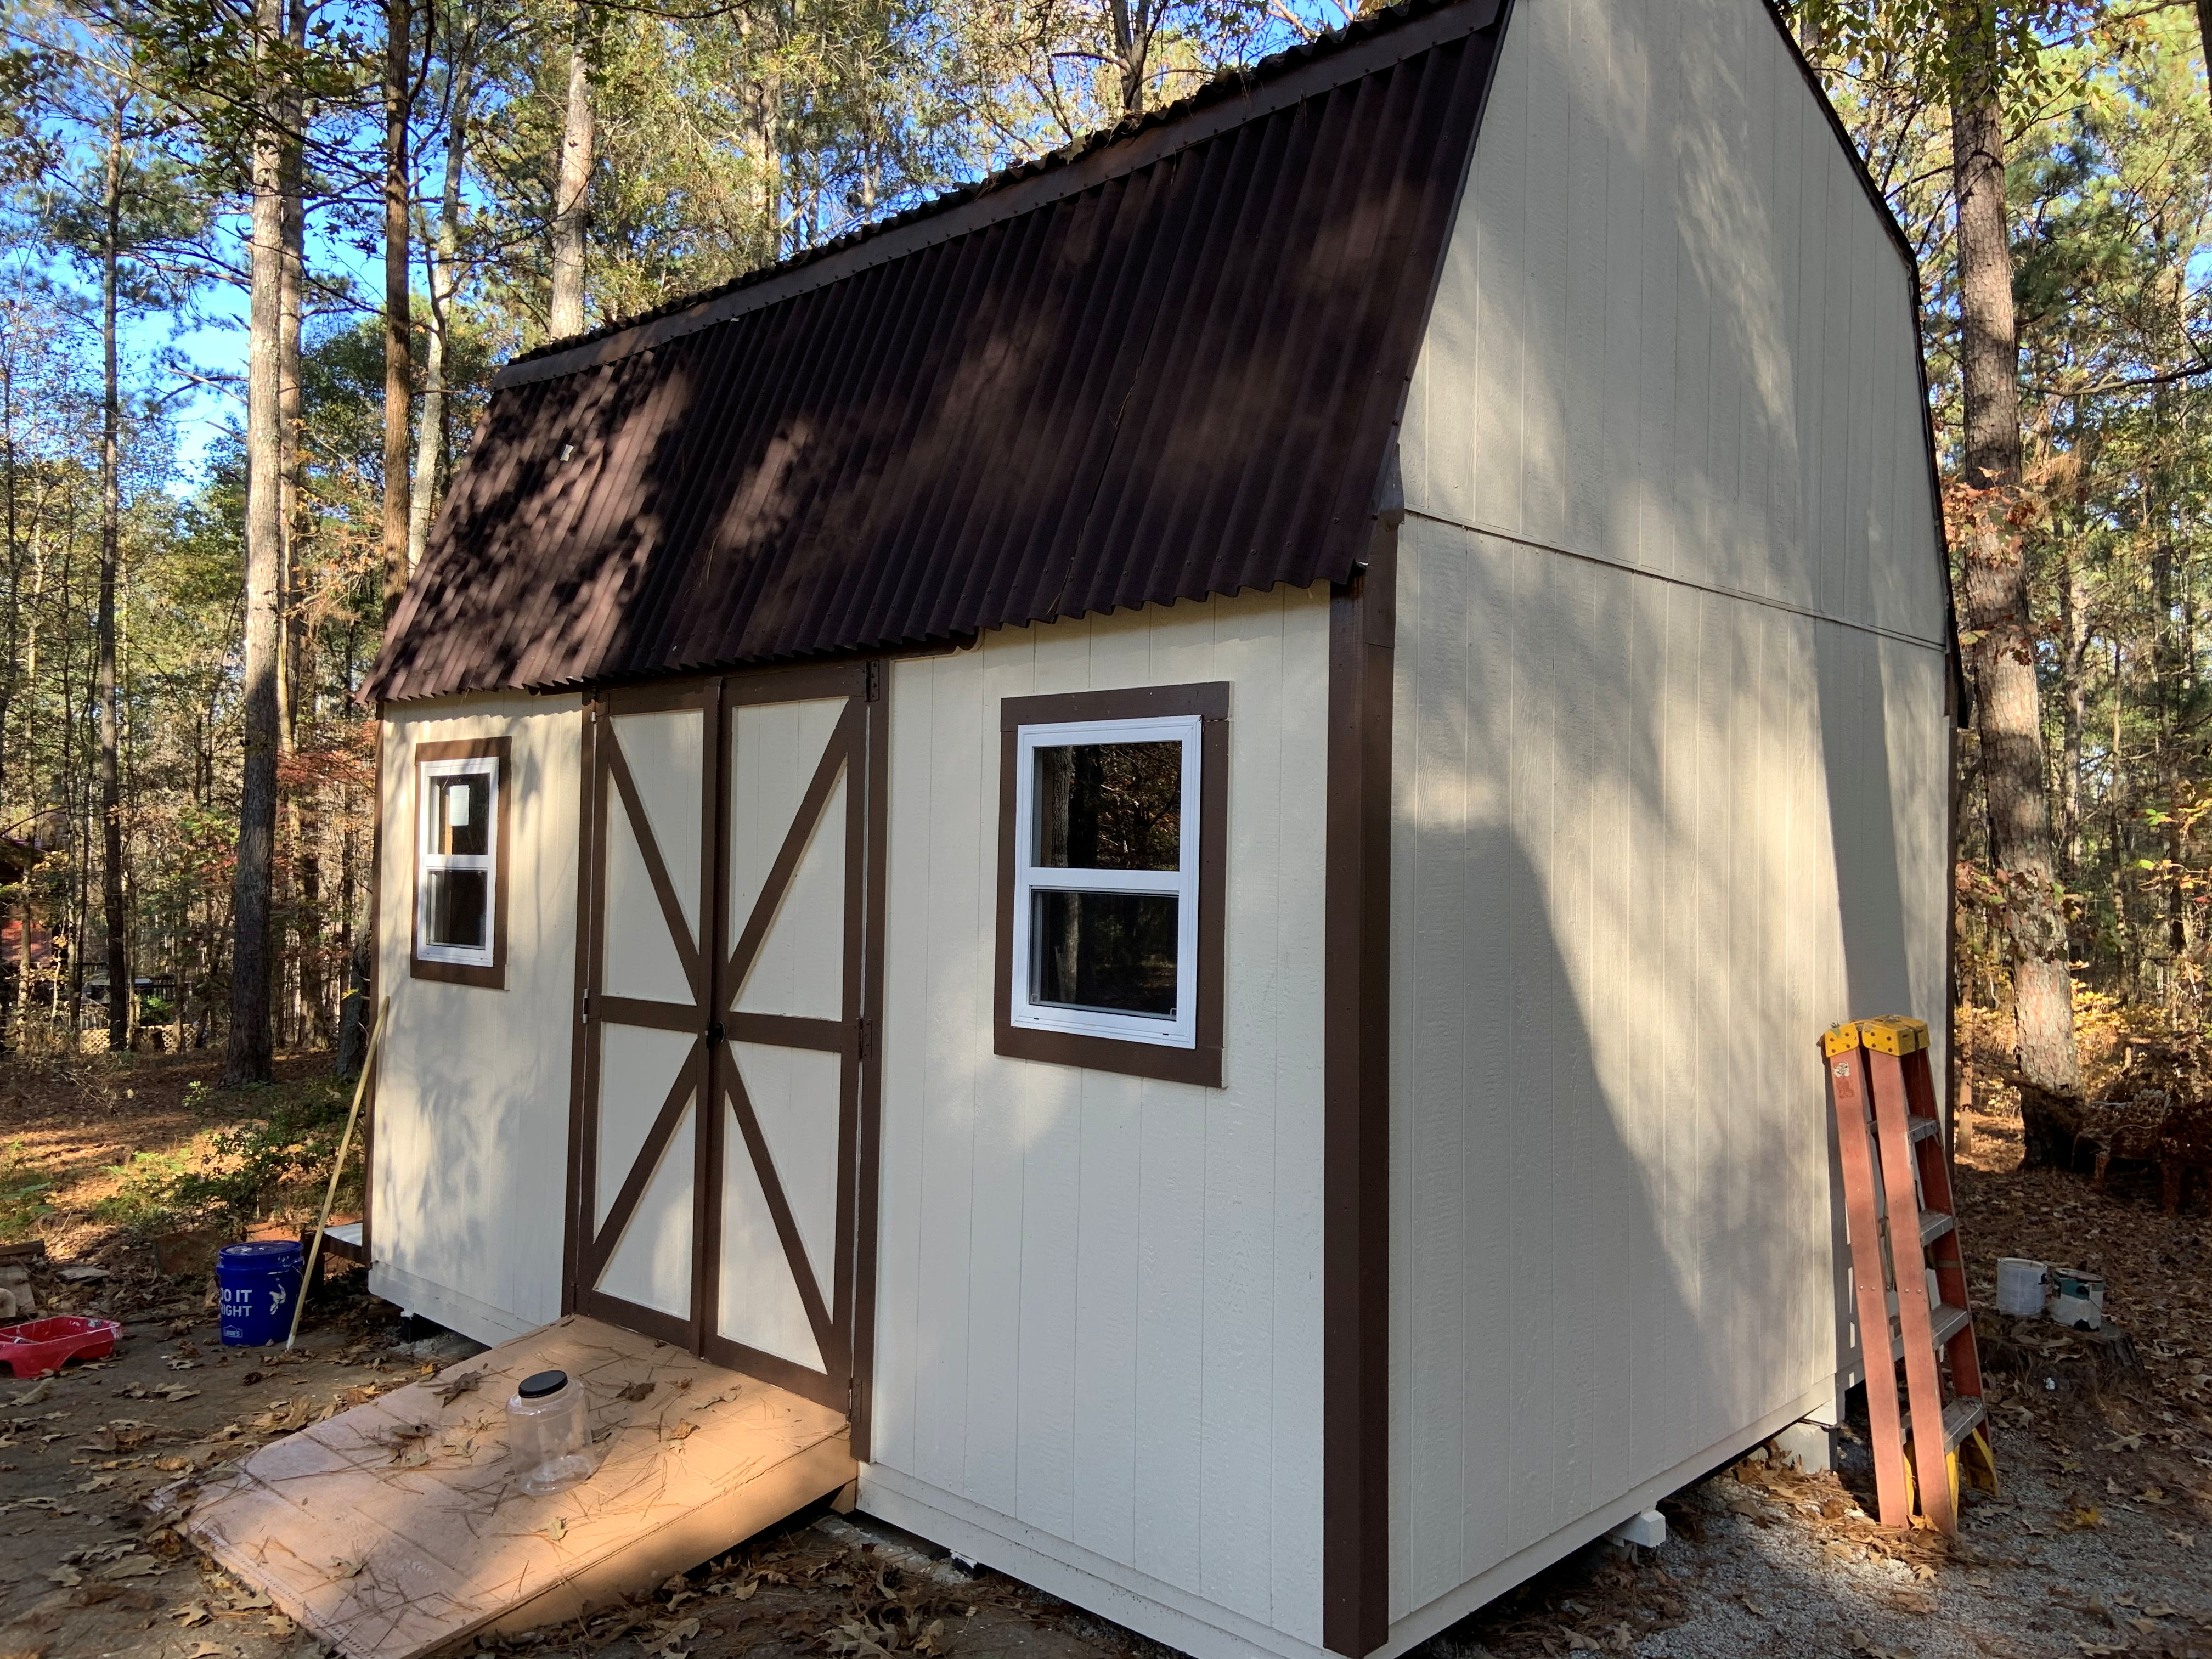 Here's Edwards' 12x16 Barn Shed and Edward is 81 Years Young!
All I can say is Edward - kudos to you for building your neat shed! I hope that I can do this when I reach your age. Some of us don't let age hold us back and Edward is a fine example of that! This shed has a great color scheme and just looking at it you can tell that Edward took some time making sure that everything was perfect about his shed. All the details of construction are absolutely fine indeed! Thank you Edward for sending my your shed picture!
Roger's Outstanding 12'x16' Barn w/Porch
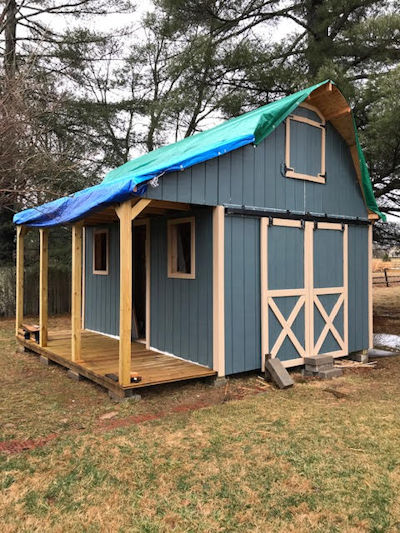 Almost Finished!
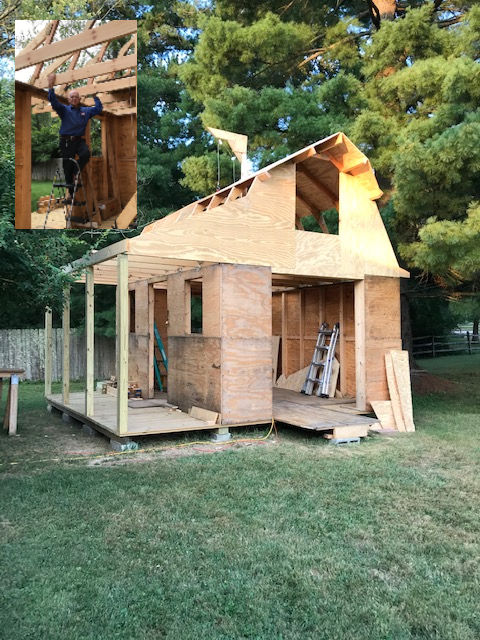 87 Year Young Roger Building His Awesome Barn Shed
Here's an update on Roger's barn project. What's amazing about Roger is that he is 87 years young and just retired not too long ago. And Roger is building this barn all by himself! That's Roger in the corner of the shed picture above. It just amazes me how young Roger looks! Thank you Roger for buying my barn with porch plans and a big thank you to Roger's wife Chola for taking the time to send me his progress pictures. Here's a comment from Chola:
"My Roger is 87yrs old and retired just last month! Now he spends his days doing what he loves... building our shed!"
Please watch the video below to see more of Roger building his shed:
Spark's Totally Awesome 12'x16' Barn
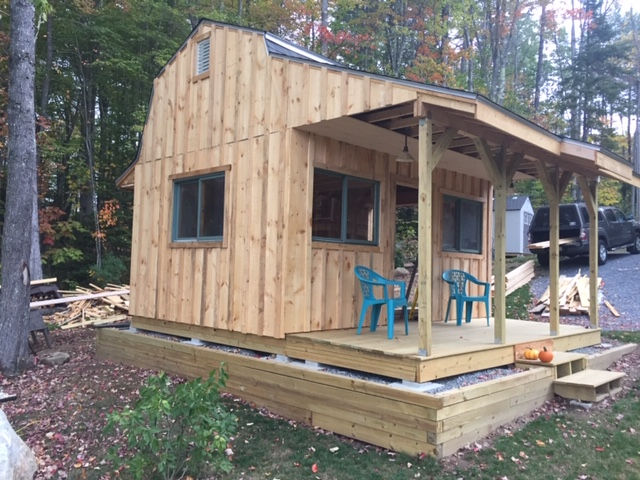 Spark's Awesome !2'x16' With Side Porch Barn
Spark's used my 12x16 barn with side porch plans to build this really nice looking shed
Cory's 12'x16' Barn with Roll up Shed Door
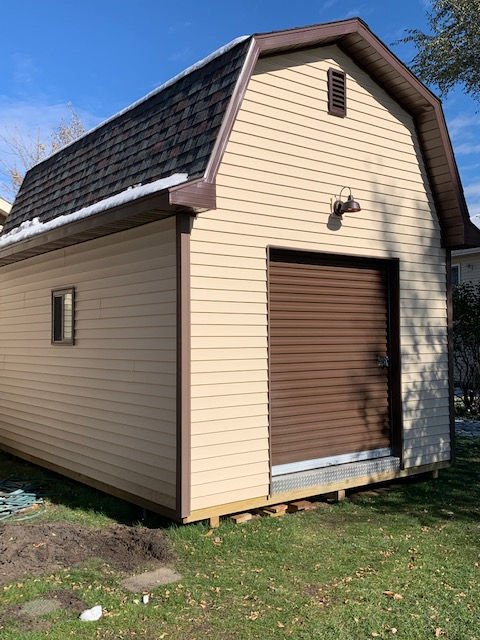 Cory's Neat 12'x16' Barn Shed
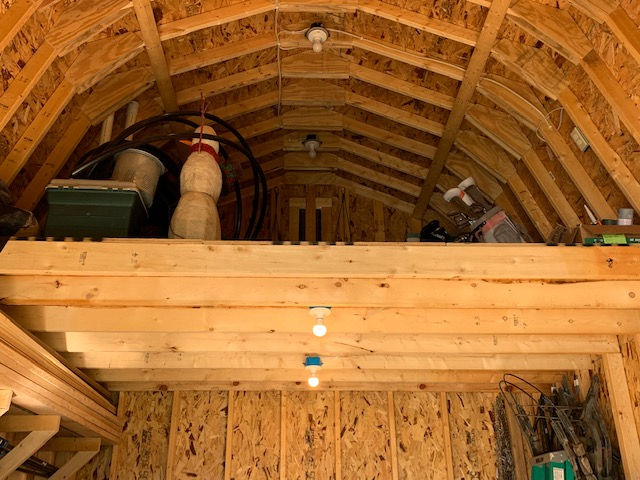 Lots of Storage Space in the Loft!
Cory used my 12x16 barn with porch and roll up door plans to build his neat shed. He modified the plans somewhat to store his riding mower and 4-wheeler in his shed.
Here's what Cory had to say about using my shed plans: "You might recall I had asked if you had any plans for a roll up door,
service door and window. You referred me to the plan with the porch. But
here it is completed. I’m really happy with how it turned out. I
obviously made some changes along the way. As it sits I only have about
$4,700 into this project. I used 2x8 floor joists sense my riding mower
and 4-wheeler will be stored in here. Plans were great. And very
detailed. Thank you. I plan to finish up the ramp and steps in the
spring. I just ran short of time with a baby due. Thanks again!"
Kelly and Lisa's 'She Shed' and 'Man Cave' Shed
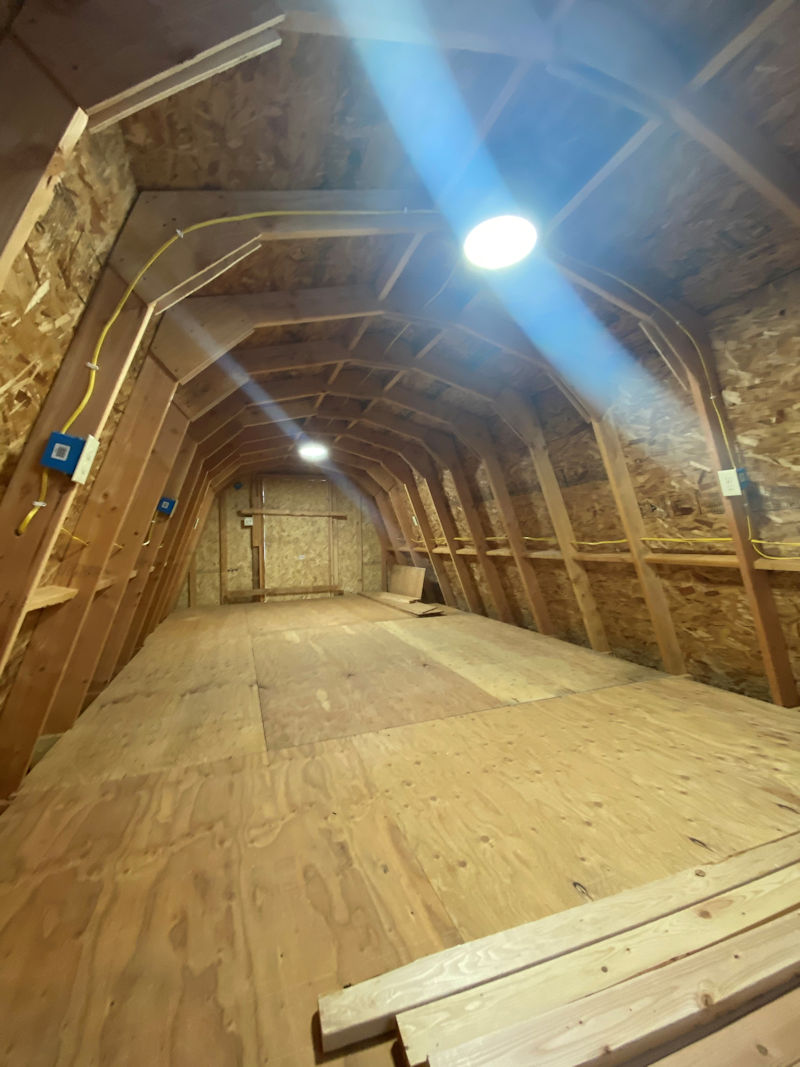 Kelly's Man Cave in The Loft
Hey John,
I don't know if you remember me buying a plan from you in june but I remember telling you I would send you the "kinda" complete shed pictures when we got done. We really learned a lot from your plan too. We've had a lot of fun and some not so fun moments. A learning experience that's for sure. As you can see we altered the plan a bit. We took out the porch from inside the building and wasn't going to have a porch and then later on we decided we wanted one on the side. There is a little pitch to the porch roof, more than you can see on the pictures. Should of added it into the shed roof but the tin was already on the roof and i guess it is what it is. We'll see what happens this winter.
Also we changed the pitch on the side of the loft so we had more stand up room. I'm betting no snow stays on that steep of a roof for long. So my husband gained a man cave upstairs and I guess I'll share my she shed with my razor downstairs.
I love that my grandson helped me out with building the trusses and my sister and brother helped us raise the trusses up. We did cheat a little I had to hire a contractor to put on the ply boards and tin on the roof. It was too dangerous for us old folks. But I think we did alright considering my husband had a double hernia surgery in the middle of this and I was still recouping from a back fusion in january.
Oh I got to give a shout out to my father in law who is 85 and he made sure we were level and precise. He always showed up for work and never got paid. Best employee I ever had. I think he had a lot of fun! We love our shed! I wish the landscaping was done but it's hunting season now and that can wait till next year.
Thanks again!
Kelly and Lisa
Greg's 10x12 Barn Shed
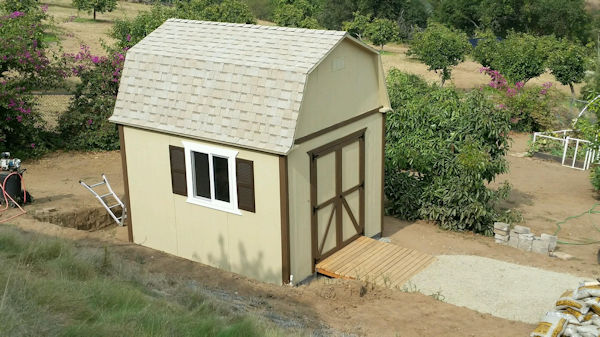 Greg's 10x12 Barn Shed Picture
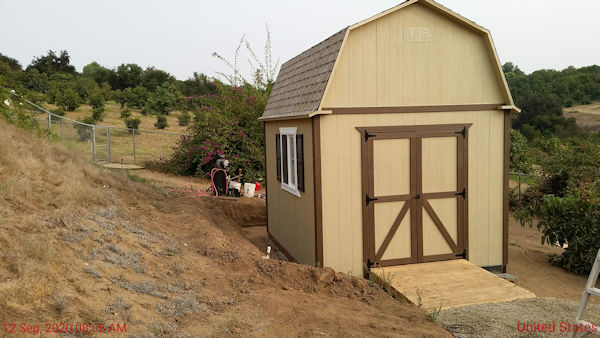 Front View of Greg's 10x12 Barn shed
Here's what Greg had to say about using shed plans from shedking:
Hey John, here is another testament to your great plans! BTW-I built this shed 100% by myself, not bad for a 70 year old guy!
Thank you Greg for sending me pictures of your awesome shed!
Jeff's 12'x16' Barn Shed with Porch
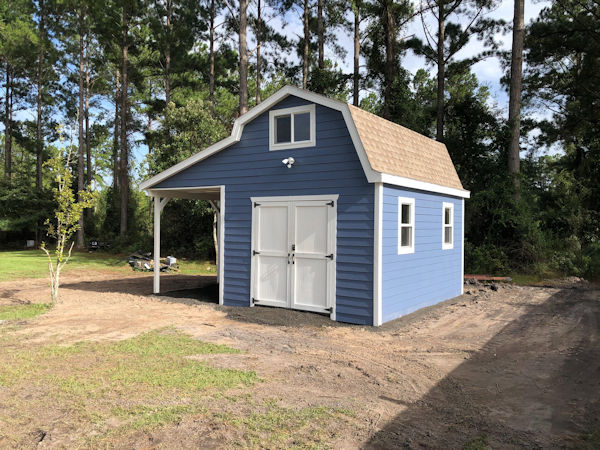 Jeff Added More Windows
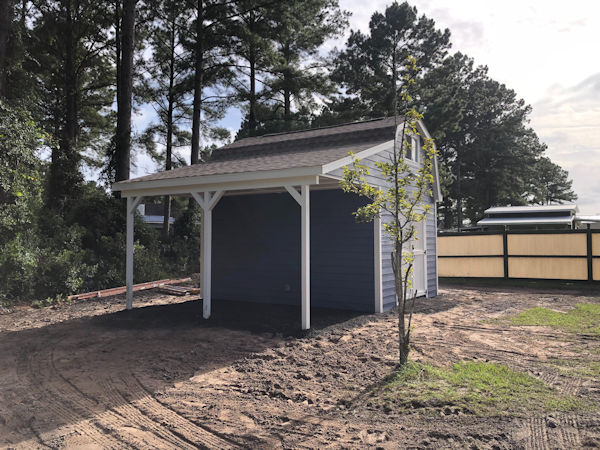 Covered Side Porch Area
Here's a comment Jeff left about using my shed plans:
"Good evening John,
Just wanted to show how well your plans turned out. Thanks for the help!"
Thank you Jeff for sending me pictures of your beautiful shed!
Jeff used my 12x16 barn shed with side porch plans to build this neat shed. You can learn more about these plans here.
Sang's Nice 12'x8' Saltbox Shed
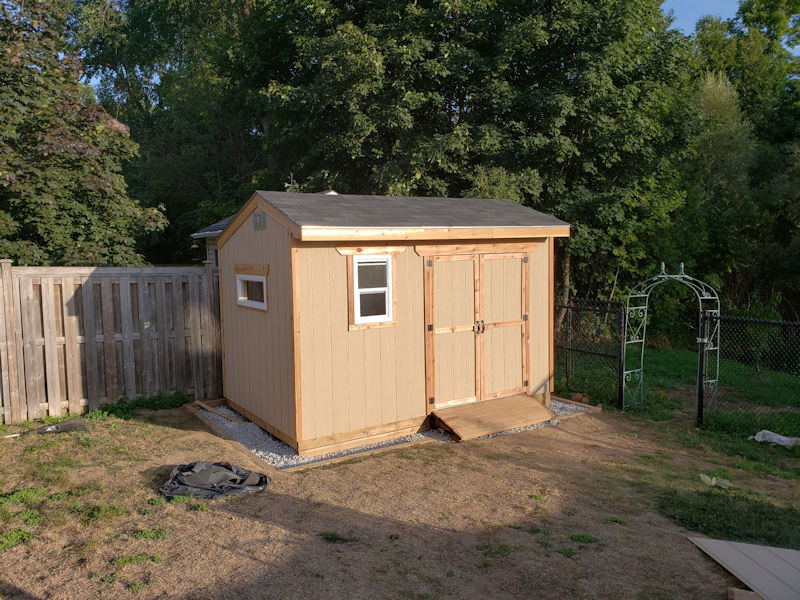 Sang's 12'x8' Saltbox Shed Picture
View Sang's shed building progress below...
Here's what Sang had to say about using my shed plans:
Hello,
I've been fortunate to have found reference to your informative site/plans.
I'm
a civil engineer on paper but have zero hands-on "DIY" kind of build.
Having interpreting drawings as a job, following your estimate and plans
were so simple to follow along while making minor adjustments to better
suit our needs. I'm sure anyone with little to no experience would feel
confident and comfortable in a similar boat.
Per your request, I've been meaning to send you build pictures but here I am now.
Cheers,
Sang.
Click here to learn more about my 12'x8' saltbox shed plans.
Roger's 12x16 Barn with Porch Shed

This is Roger's 12x16 barn with 6' side porch project. Roger is a WWII and Korean war veteran, and is 87 years young! I can only hope to be as active and productive as Roger when I get to be his age! For Roger obviously age is not a factor but only a state of mind when it comes to accomplishing things that most people half his age would not attempt to do.
I want to thank Roger's wife Chola for sending me these shed pictures of her awesome husband and his equally awesome shed. Keep them coming Chola.
Here's the 12x16 barn with side porch plans Roger used to build his shed.
Dayne's 10'x16' Barn Shed
Dayne built this awesome looking 10'x16' barn shed using these shed plans. He also built a neat little gambrel style dog house that matches the same style as his beautiful shed.
If you would like to take an interactive tour of this shed download the 'kubity go' app on your phone and then scan the code below:
 Download the 'kubity go' app on your phone then scan this code.
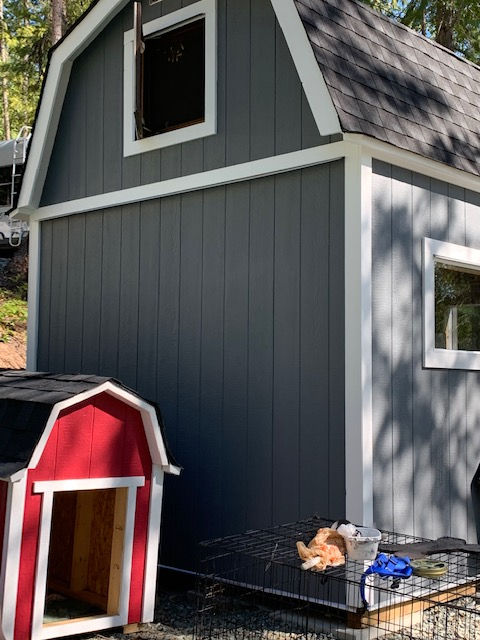 Dayne's Barn Style Dog House Too!
Chris's 12'x8' Saltbox Shed
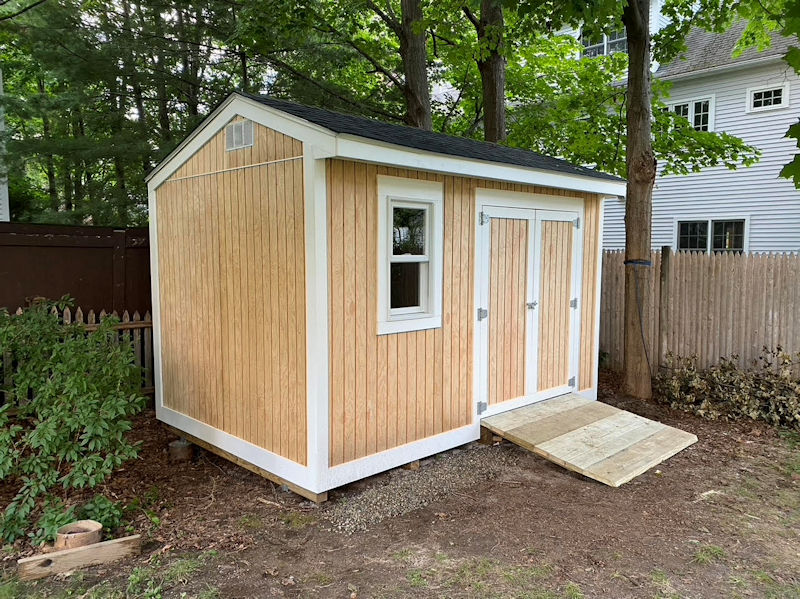 Chris's 12x8 Saltbox Shed Picture
"Hi John. I just wanted to thank you for the great shed plans. As a relatively novice builder, I found them easy to follow and to adapt when needed. (For example, we couldn’t get 4x4x12 PT timbers here, so I had to use 4x4x8 for the skids and re-orient the floor joists.). My 16 year old son and I spent about three weeks building, not every day but probably three days a week. We’re really thrilled with the result. Here’s a picture!
I understand from the news that a lot of Americans are building sheds during the pandemic. Hope you’re staying busy and healthy."
Thank you Chris for your picture of your neat saltbox shed. During the pandemic treated lumber has been scarce and various adaptations have had to be made by buyers of my shed plans. Particularly 16' lengths of 2x4's and 4x4's.
You can find the plans Chris used here: 12'x8' Saltbox Shed Plans
Brad's 6'x8' Lean To Shed
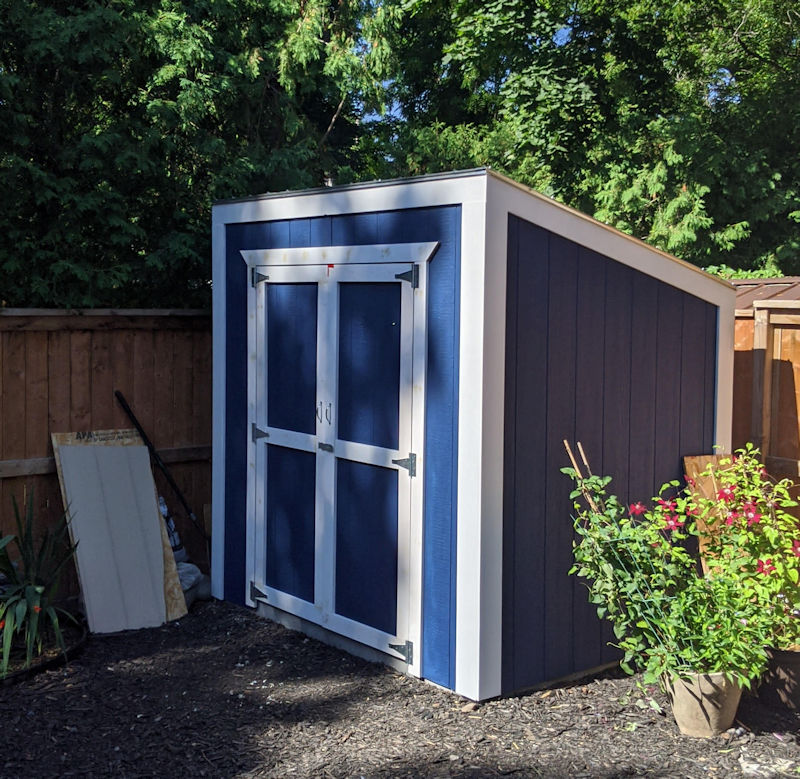 Brad's 6'x8' Lean To Shed
Brad did a great job building this 6'x8' lean to shed! Here's a little bit of what Brad had to say about using my lean to shed plans:
"Sharing a pic of our finished 6x8 lean-to shed (well, needs some sanding and paint touch-ups on the trim where nail holes are filled). Great plans and tx for answering my questions."
Lee's 12x16 Barn Shed with huge shed loft
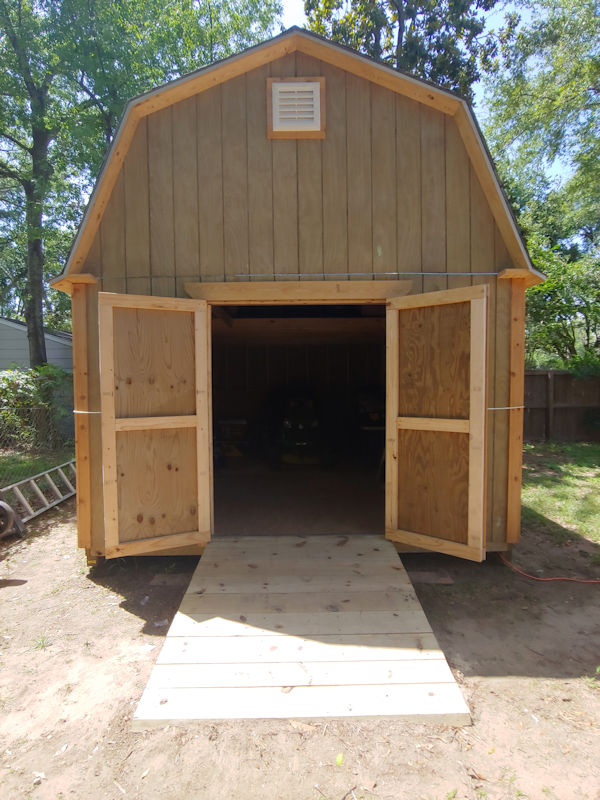 Lee's Awesome 12x16 Barn Shed Picture
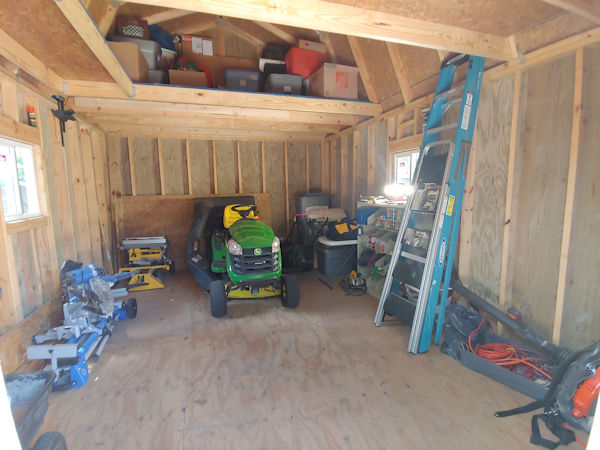 Huge Storage Space with This 12x16 Barn Shed
Lee sent me his shed pictures of the neat 12x16 barn shed he built. Here's a little of what Lee had to say about his project:
"Hey John, of course! Post away, here are a few more as well. Now doing this for the first time I did a few things I'd like to have done better. I don't know if you have a blog or user's comment section but that might be helpful. I made several mistakes doing this the first time around that is definitely do differently of I was to build another shed. But overall, things turned out great and I thought your plans were very well explained.
Thanks again!"
Casey's 12x16 Barn Shed
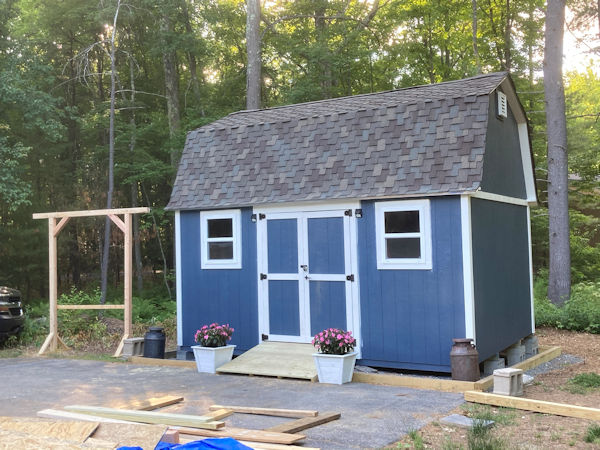 Casey's 12x16 Barn Shed Picture
Casey sent me his shed pictures of his awesome 12x16 barn shed. The plans Casey used come with the option of putting the doors on the short end wall, or the long side wall with 2 windows as the picture above shows.
Here's a link to the plans Casey used:
John's 12x10 Saltbox Shed Pictures
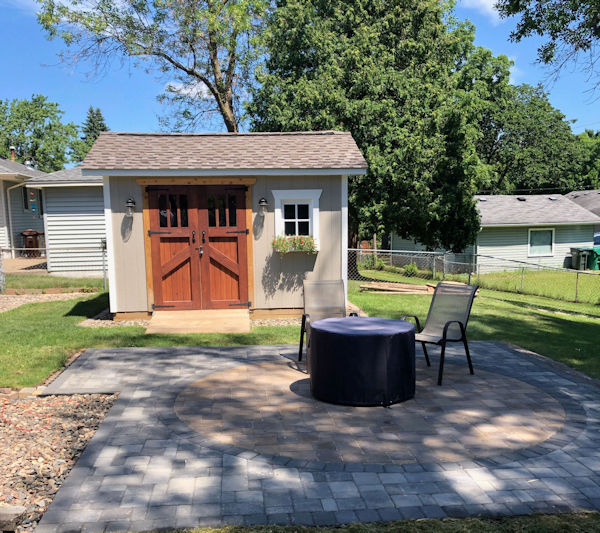 John's 12x10 Saltbox Shed Picture
Here's some comments John sent along with his shed pictures:
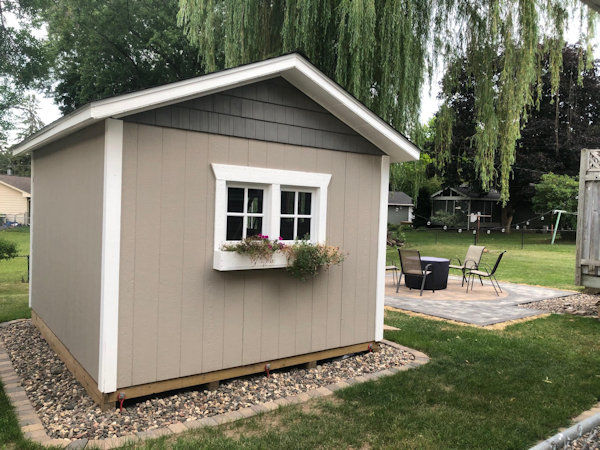 The Backside of John's Saltbox shed
"Hi John,
Almost a year ago you modified your 10 x 12 plans for me to include an offset door on the 12’ wall.
Your website says that you like folks to send in photos of the finished creation.
I wanted to wait until I installed the patio to send a photo, the large dirt patch in front of it kinda took away from the look.
It took almost a year, but, thanks to your plans and the excellent info on your website, I’m finally done.
I’m pretty proud of how it turned out, especially since I’ve never built anything before.
It went from a backyard eyesore.
To a wonderful backyard living space.
Thanks for your website, it was the most valuable tool that I had."
John
Josh's 12x16 Barn Shed
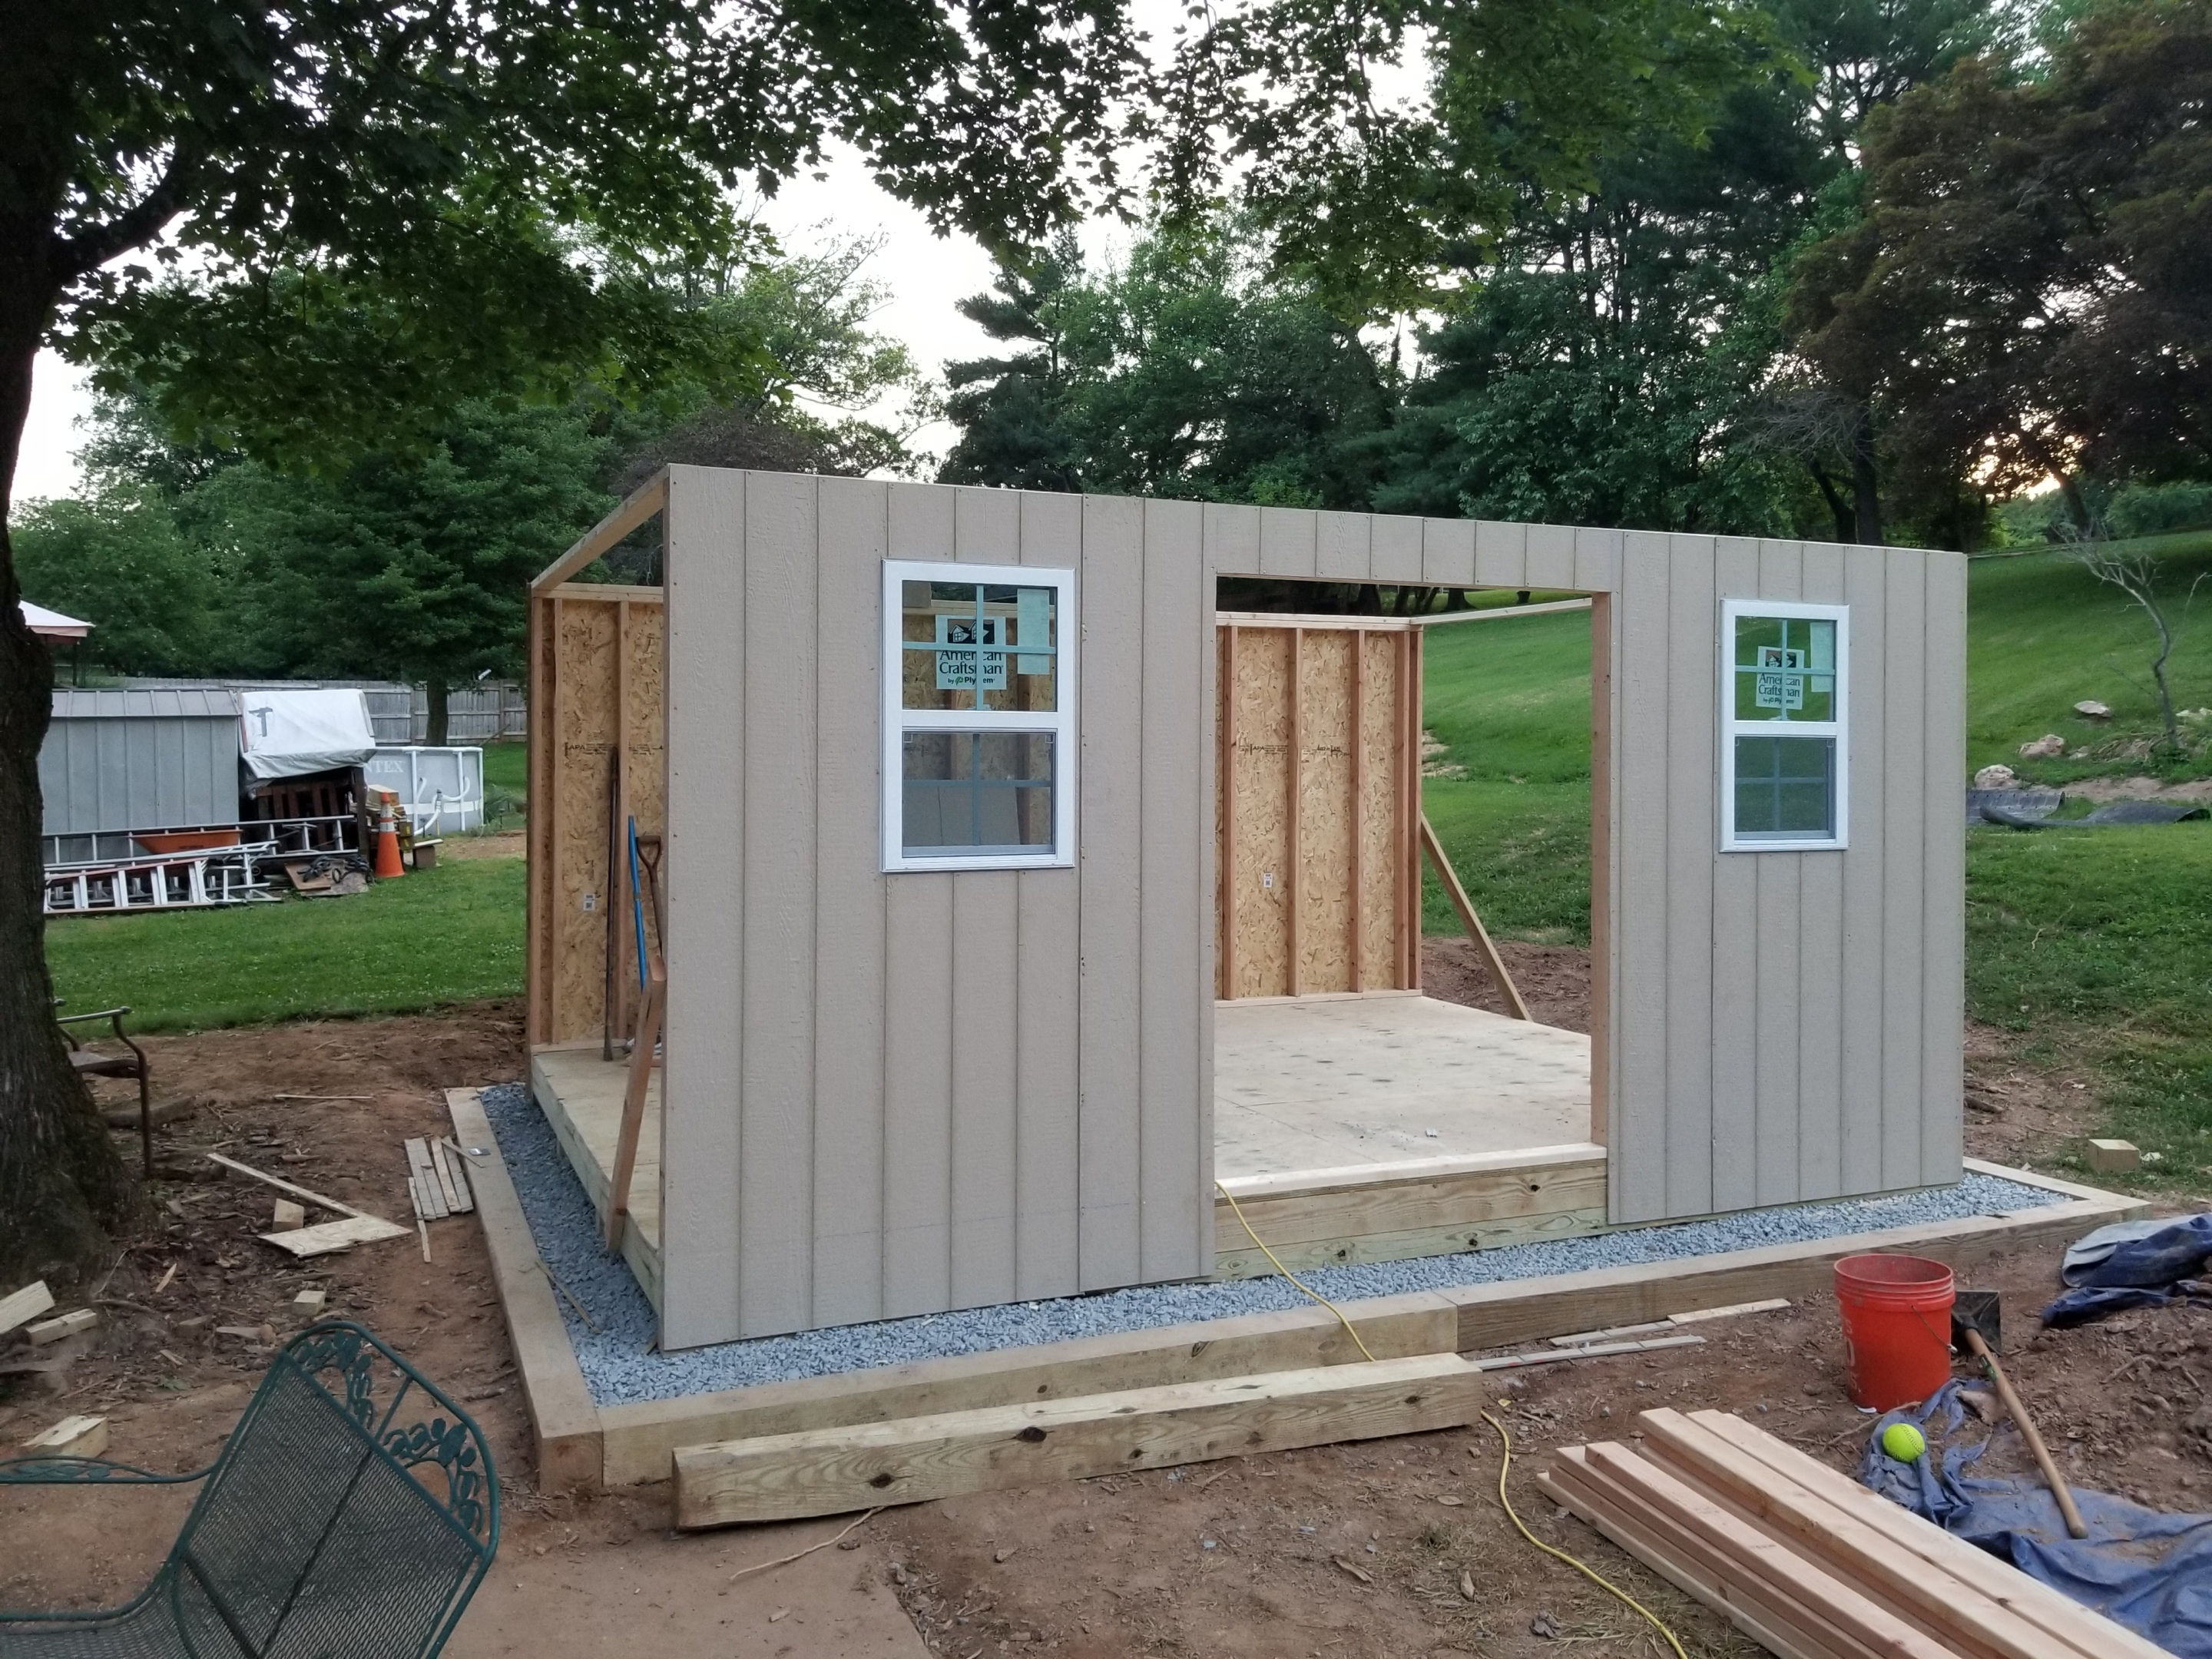 Josh's 12x16 Barn Shed
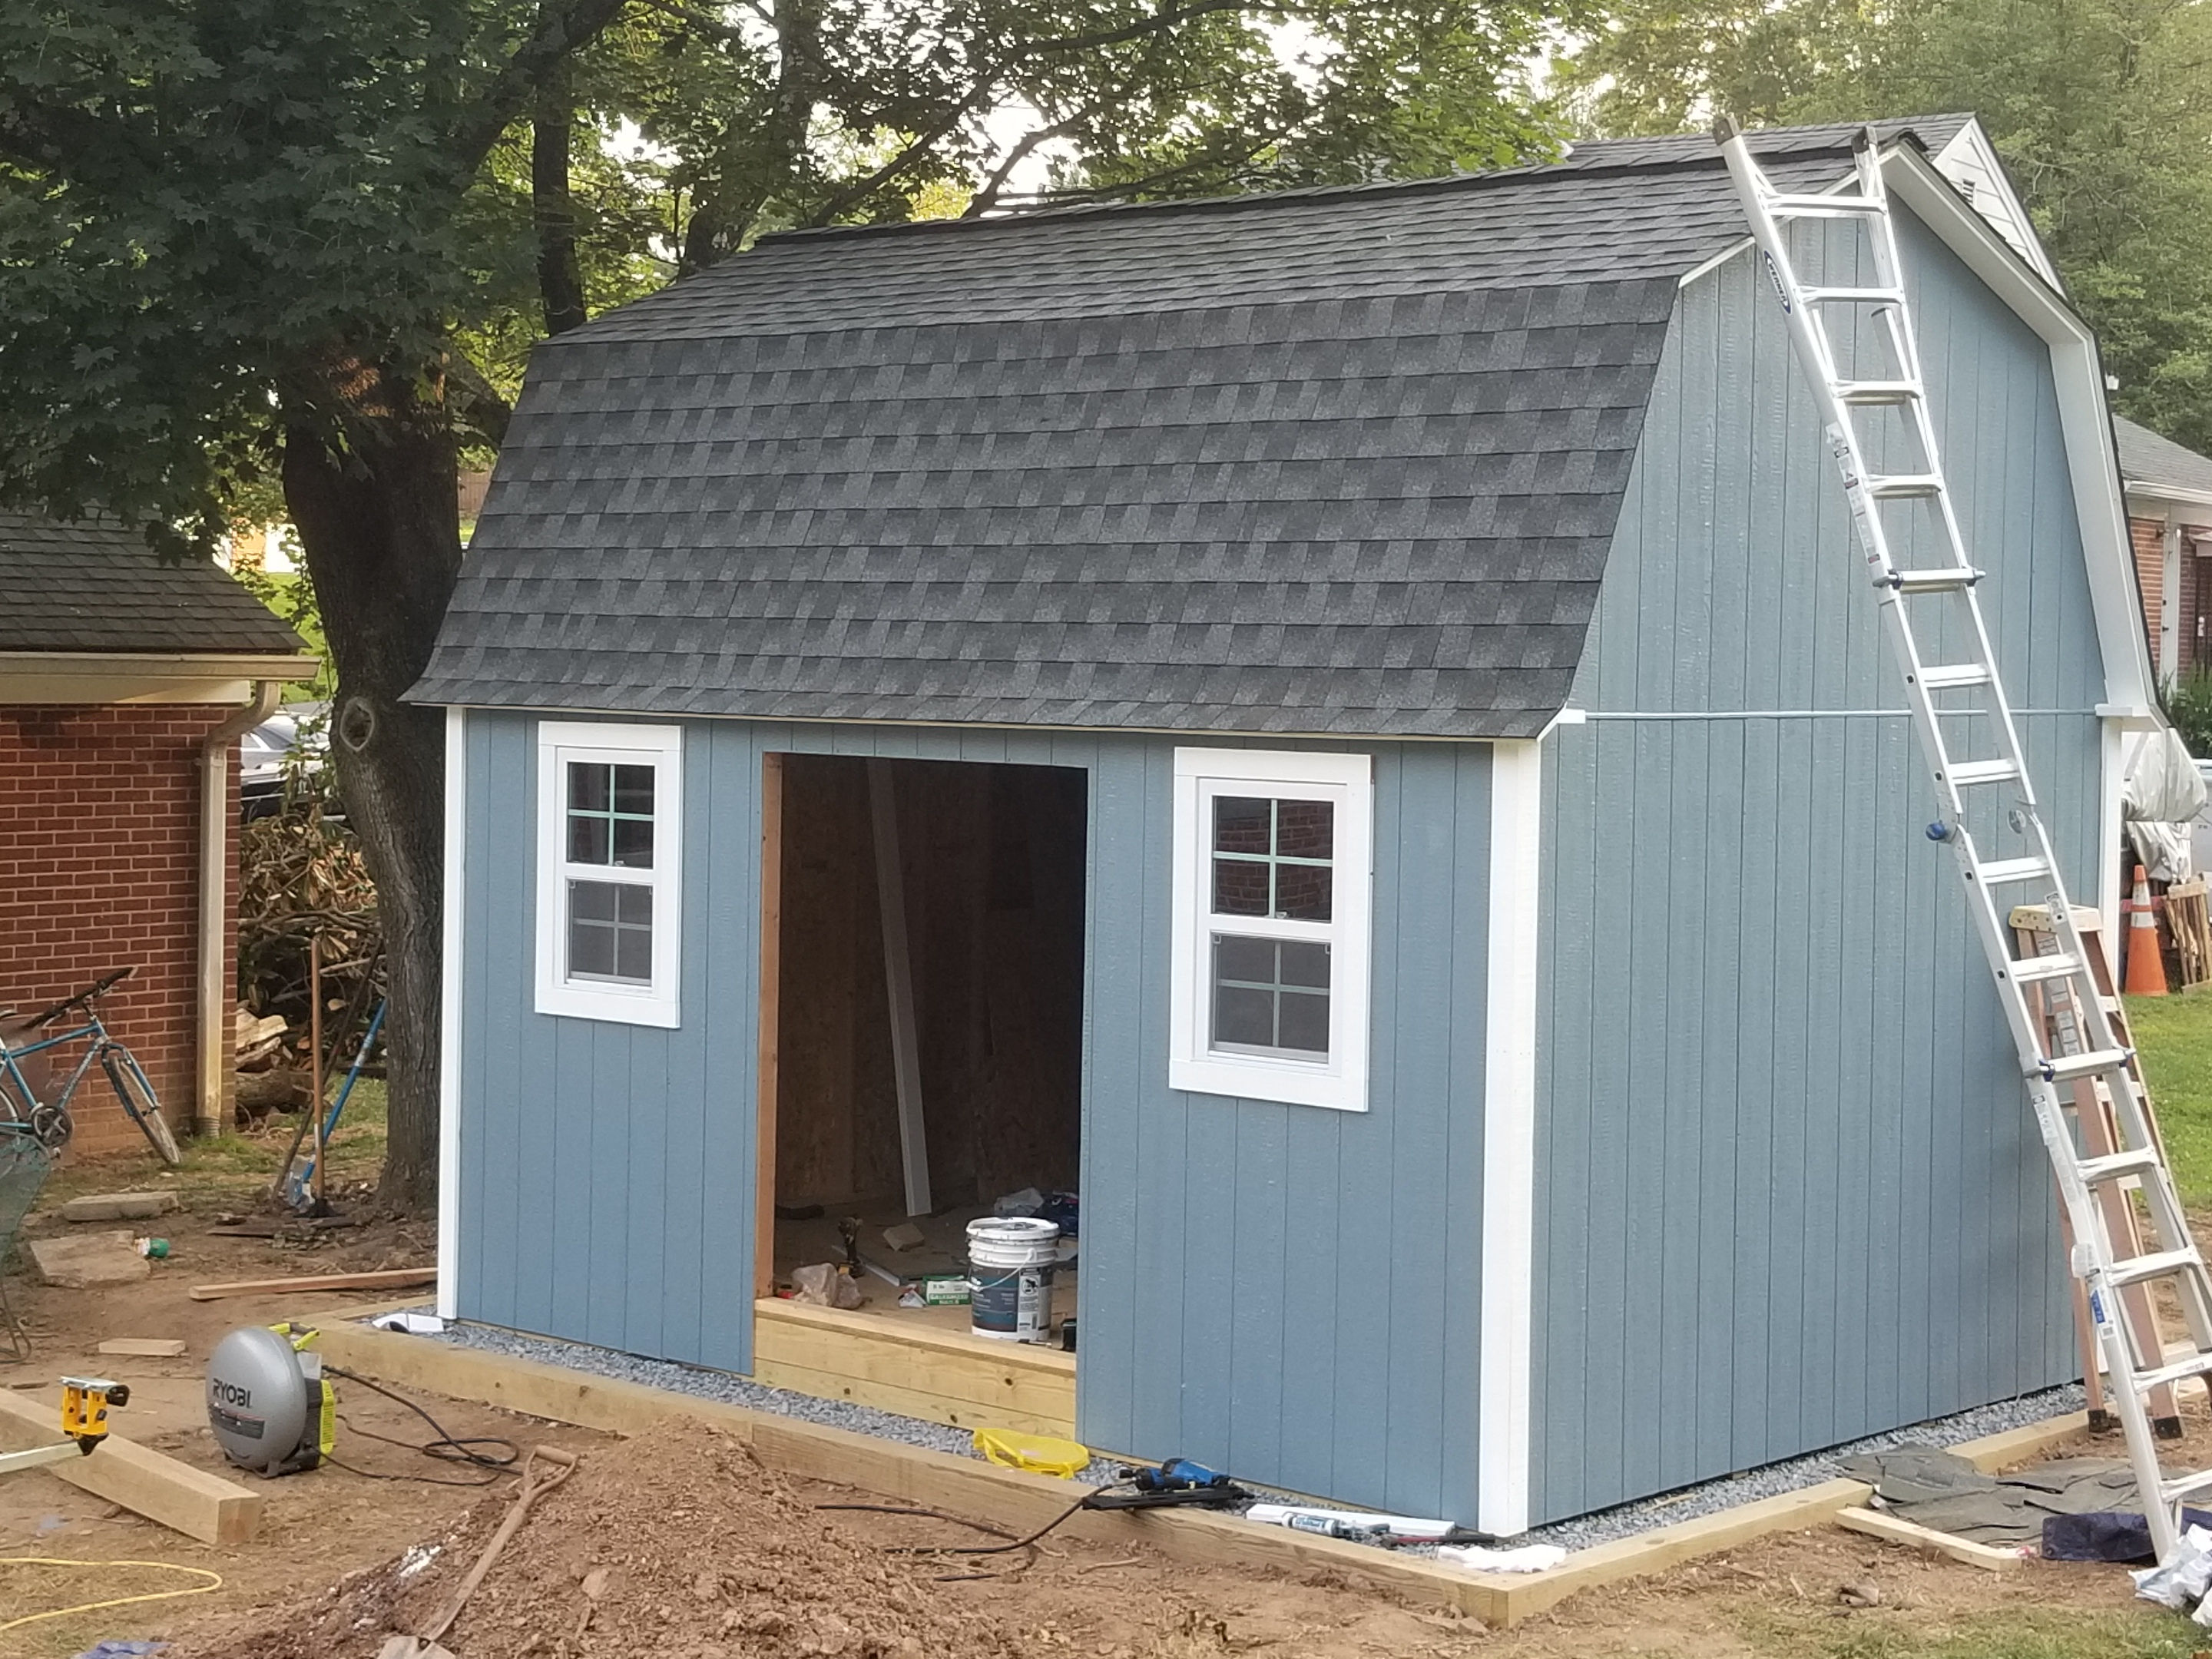 Great Job Josh! Thank you For The Shed Pictures!
Josh used my 12x16 barn shed plans that come with the option of putting the doors and windows on the long 16' wall, or just the doors on the shorter 12' end wall.
Here's a comment Josh left with one of the pictures:
"Shed's coming along nicely. Just need to add the door, a step, and some lights/outlets inside."
"I must say, your plans are worth more than what you're charging for them. Couldn't have done it without them."
Thank you Josh for your pictures and I am looking forward to getting more!
Wade's 10x16 Barn with Porch
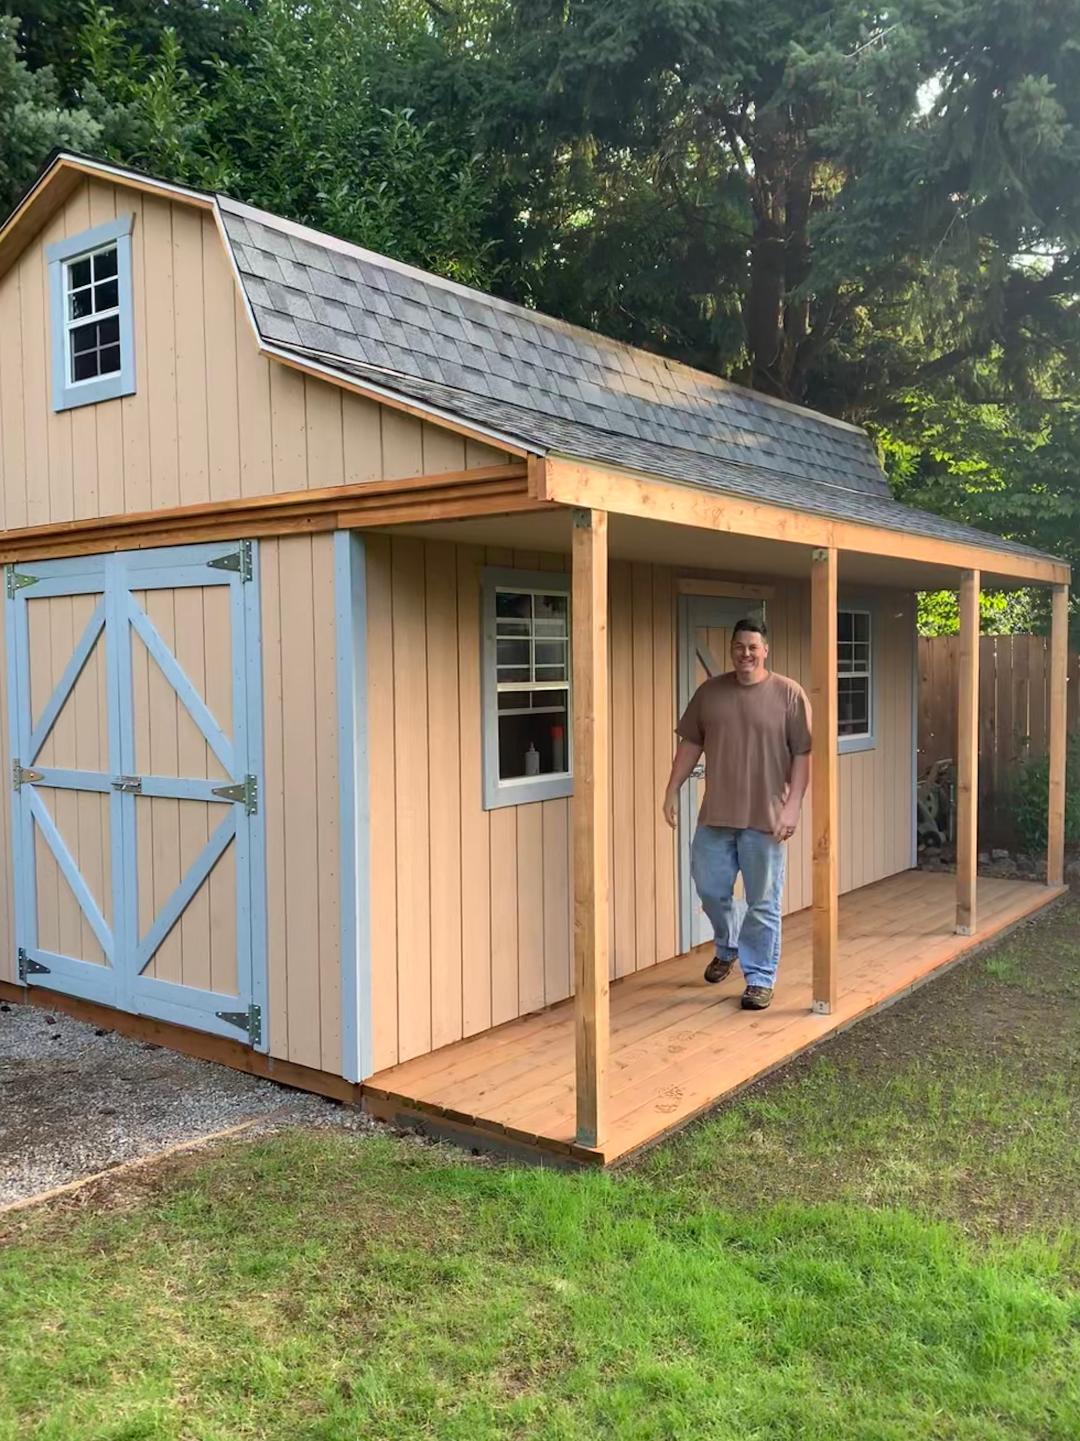 Wade's 10x16 Barn Shed with Porch
Here's Wade's really cool barn shed with porch. Wade modified my 10x16 barn shed plans and added this side porch. Here's what Wade had to say about using my plans and building this neat shed:
"I used your plans and lengthened the building to 10x20. To support the
porch, I ran the joist for the loft under the framing at the top of the
wall. And married wall studs under them to support the loft. Not the
cheapest way but it looked better I thought. It made the 8 foot exterior
wall not look as tall without decreasing interior qubicft. I ran the
2x6 x14' loft joints through a hole cut in the siding at the top of the
wall out to the face of the porch. The support for the porch is in large
part coming from the continuous loft joist that protrudes 46.5" proud
of the wall. I calculated the roof pitch for the front porch at 22.5
degrees and nailed 2x4 ripped with a 45 degree angle to the barn roof as
a shelf to mount the porch rafters and made a plywood gusset to tie the
porch rafters into the protruding joists. After attaching the 2x6 fascia
to the front of the porch I filled in the spaces where loft joists were
not available. In the end I spent $5200 on my shed as you
see it. I know it's more your plans but it's mine. The deck for the
porch is built using standard deck design. 2x6 stringers 24" on center
and 4 cement pads. I used extra ridge cap so dirt didn't directly
contact the pressure treated wood as I put backfill around the deck."
Thank you Wade for using my plans and doing an excellent job building your neat shed! And thank you for sending me your shed picture!
Pictures of Dan's 10x12 Barn Shed
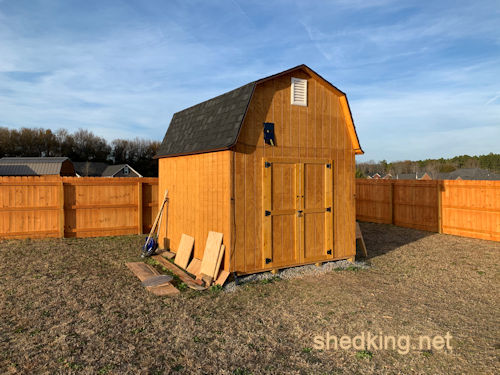
Dan did a great job building his 10x12 barn shed. Here's a few comments Dan had about this project:
John, thank you for sharing your shed plans with us! This was my first
ever shed build and I really enjoyed your blueprints and guide - the
shed came out great! Originally I wanted to build a 10x16 but it would
have required a permit, so I went with the 10x12. In the end I’m glad I
did, anything larger is not really a solo project. It took me about 9
full days to get it done alone. The sense of accomplishment I have from
building my own top quality shed is priceless. Your plans are exactly
what I was looking for. Thanks again, and feel free to post my pics on
your website!
Dan K
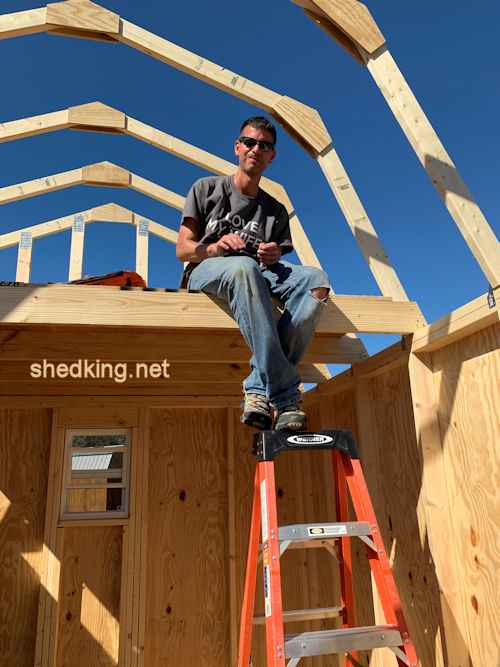 Dan and His Neat Loft
Dan this is so neat how you incorporated storage and a workshop into your shed!
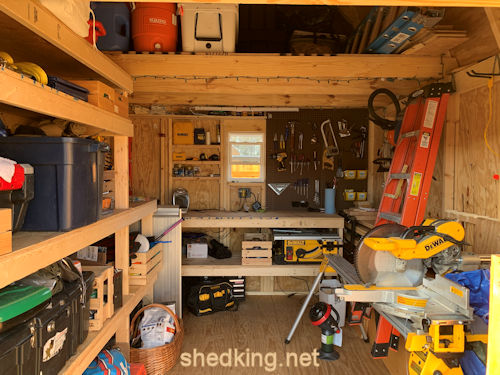 Nice Workshop and Storage Shed
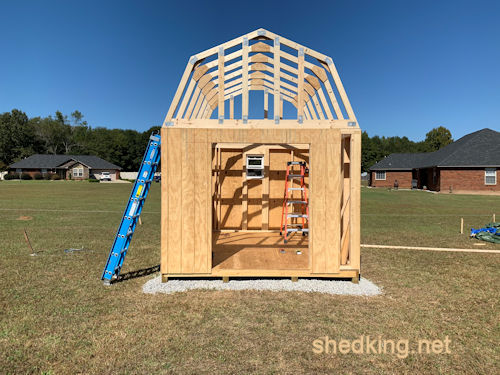
Thank you Dan for sending in your neat shed pictures!
Brian's 12x12 Shed With Loft
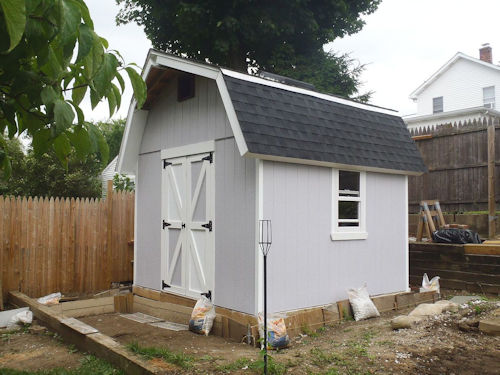 Brian's Neat 12x12 Barn Style Shed with Loft
Here's Brian's very nice 12'x12' shed with loft. Brian modified my plans somewhat by adding windows on the side wall and upper gable end for the loft area.
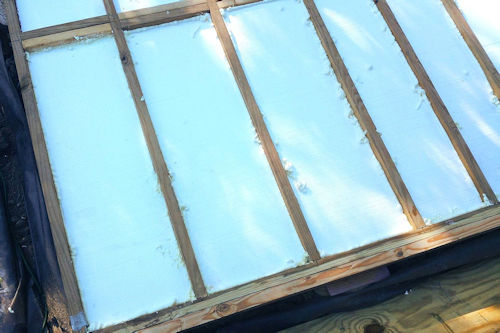 Brian Insulated This Shed Floor
Here's something Brian did that I don't see very much and that's insulating the floor framing. This is a great addition to any shed building project.
Read more about Brian's 12x12 barn shed with loft and see more pictures here.
Jon's 12'x12' Barn Shed
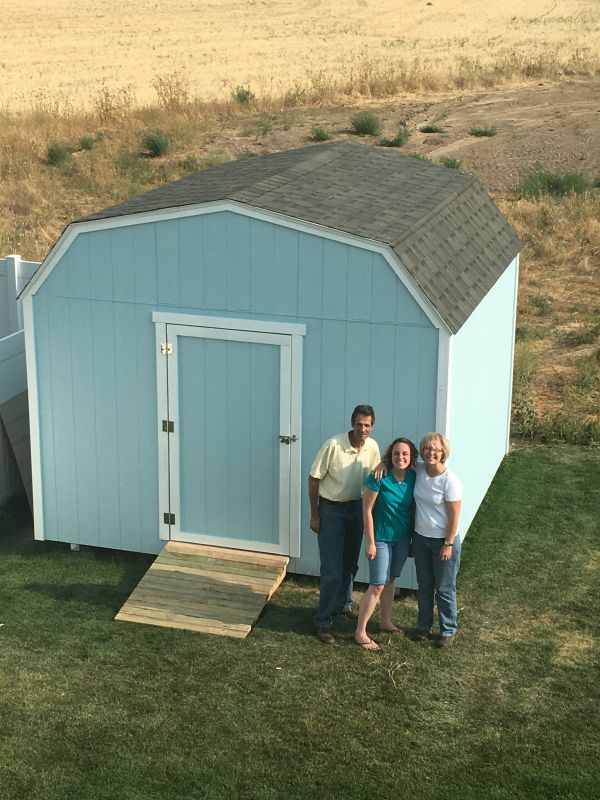 Picture of Jon's 12'x12' Barn Shed
Jon sent me this picture of his neat barn shed. He used my 12'x12' barn shed plans and modified them somewhat by changing out the 5' double shed doors to a single shed door.
Great job Jon on building this neat shed! I love the color too of the siding and trim together.
David's 12x8 Saltbox Shed
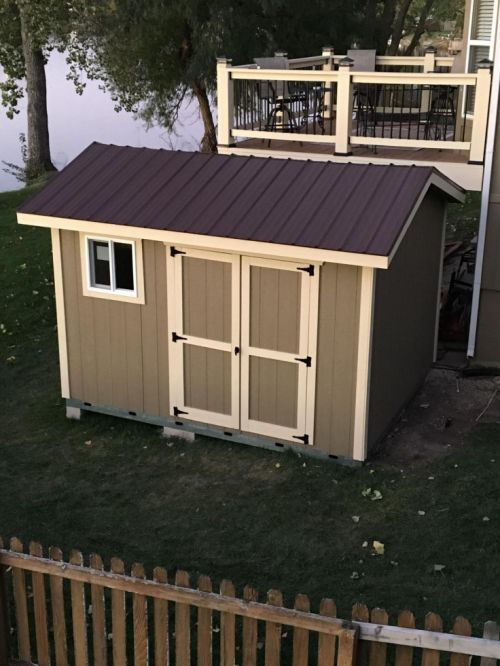 David's Picture of His 12x8 Saltbox Shed
Here's David's picture of his neat 12x8 saltbox shed. David is almost 70! David, I hope I can do this when I am 70, which is not too far away for me! Thank you for your inspiration!
He modified the roof structure by extending the eaves to 8", and used galvanized 2x6 metal studs for the floor framing.
Here's what David included with his email message:
Hello John, here is my finished shed, I added a 8 inch overhang on the rake. John yes that is galvanized metal 2x6 studs they will last for 30 plus years. Also how did you like the 8 inch overhang on the eaves? I'm proud of it and have got many compliments. I still need to wire it for electricity and build my shelving and my work bench. Thank you for you kind remarks. David
Learn more about the plans David used.
Pictures of Steve's 12x16 Barn Shed
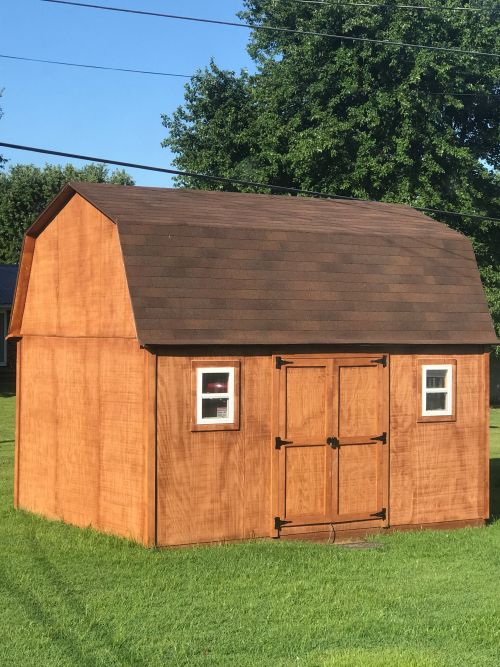 Pictures of Sheds - Steve's 12x16 Barn Shed
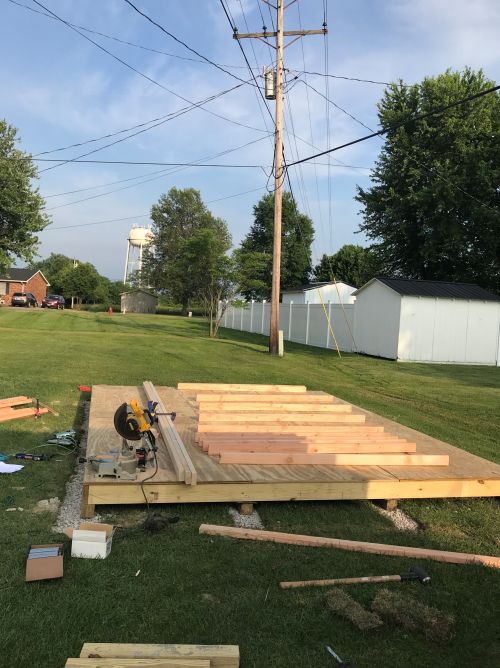 Picture of Steve's Completed Floor
Here's what Steve said with the pictures of his shed that he sent my way...
"Hey John, I enjoyed looking at sheds that people built with your plans that are posted on your website. You asked me if you could use my photo on your Facebook page and website. Actually I would love that. There were a few photos of your customers in various stages of the build. I thought I would send you a few to chose from if you can use them. Two things I wanted from a shed. I have an open carport and no basement. Besides needing lots of space for storage, I really wanted some where I could work on things. I chose the Gambrel style due to the loft storage and the fact that I would have plenty of room for a small workshop. You said my shed was the first photo you got with the doors on the long side. I thought long and hard where I would put the doors."
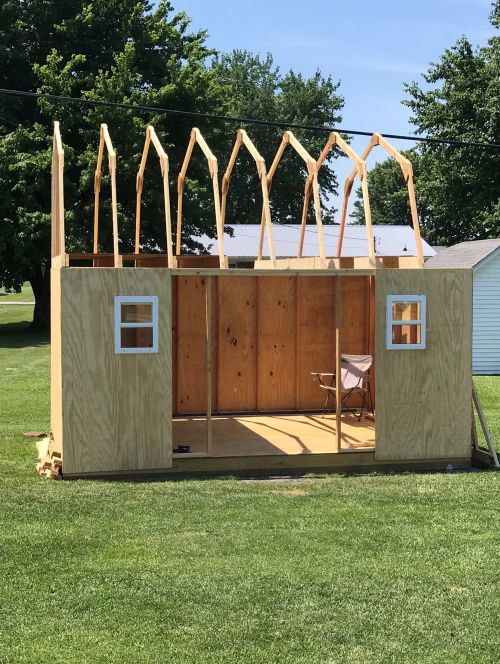 Steve's Roof Framing Picture
"The number one purpose for my shed being built where I put it in my yard, was our extremely nosy, gossiping, putting her nose in other peoples business, backyard neighbor. They have a glass sliding door that they love to look out. Our small deck was in their line of sight, not no more!! He He. The two neighbors on either side, put up fences to isolate themselves. One older neighbor came by when I was just starting to build the shed and asked me, are you planning on planting some Elephant Ear plants this year? I said probably, why you ask? He said because they blocked the woman behind our house line of sight when they sit out on their deck. I asked him, let me guess, she started some sh...t with you, oh boy did he have some things to say about her. She’s like 80 now but still causing s.... with everyone. When and if you use my photos and story, please send me a link so I can enjoy what you used them for. I can’t seem to find your Facebook page......later"
See more of Steve's pictures of his shed on my facebook page.
Learn more about the plans Steve used.
Matt's Tiny House
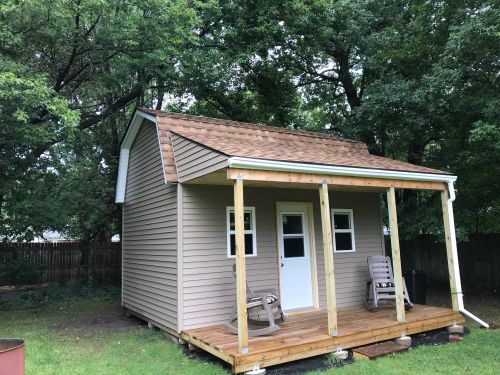 Matt's Tiny House
Here's pictures of Matt's 12x16 barn with front porch he built. This quaint little tiny house, (shed home or even a small cabin), has a 6'x16' front porch, front entry door, and a total of 4 windows.
You can learn more about the plans Matt used here: 12x16 barn shed plans with porch.
Great job building this neat shed Matt! And thank you for sending me pictures!
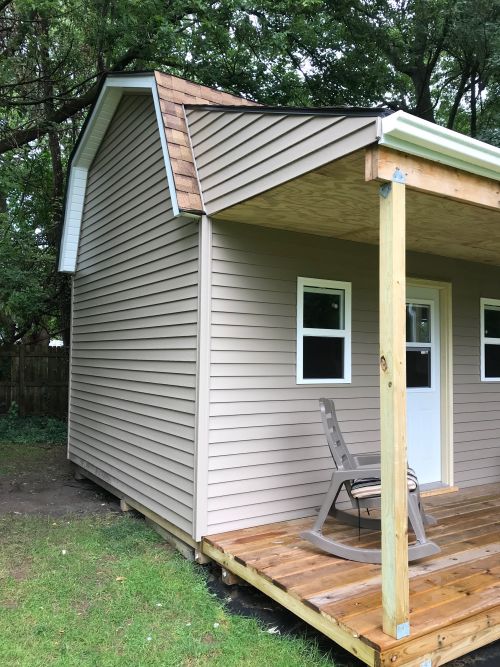
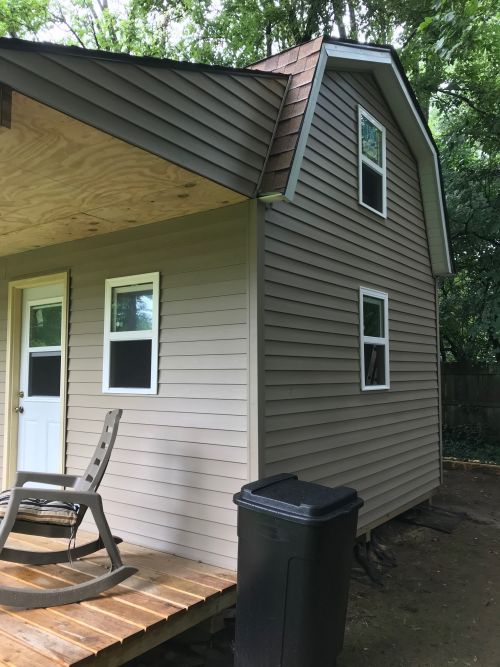 Great Job Matt!
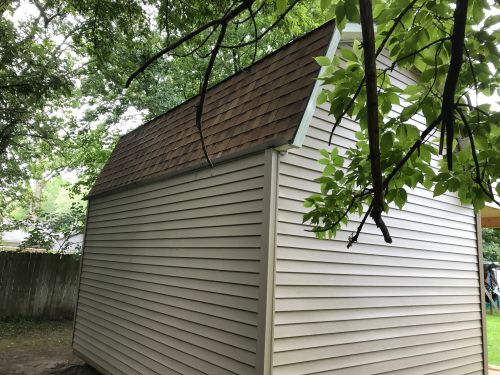 Nice Siding on This Shed!
 With a Front Porch!
Tim's Off Grid Cabin
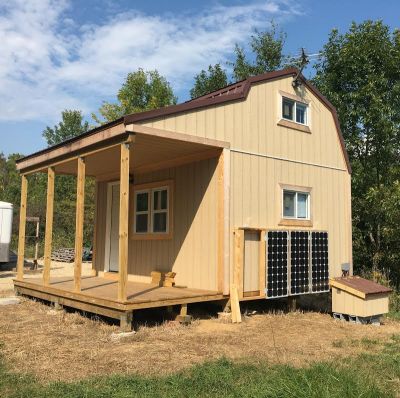
Tim used my 12x16 barn shed plans with porch to build this livable off grid small cabin.
He added solar panels for electricity, and windows in the loft area. Here's a comment Tim added with the pictures he sent: " I modified the plans to have a block between the porch and
structure. We have also added raised floor during the framing to put
insulated sheeting in the floor to have it insulated, but away from bugs
and critters. "
Best Regards, Tim
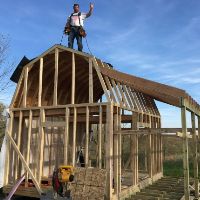 Tim Working on the Framing
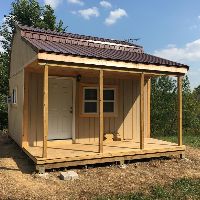 Nice Big Front Porch
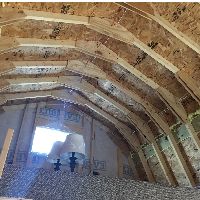 Huge Loft for Sleeping Area
Here's the plans Tim used to build this neat small cabin.
Heather's Wood Shop Shed
Here's Heather's comments about her new 12x16 barn shed she built...
"We had an old fashioned barn raising and my sisters, daughters and I with a little help from my sons and a couple of nephews built my new Woodshop using your plans. Everyone that sees it is shocked that a woman organized and built it."
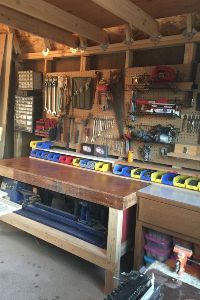 Heather's Wood Shop - Wow!
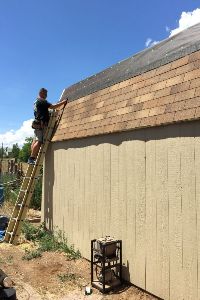 Putting The Shingles On
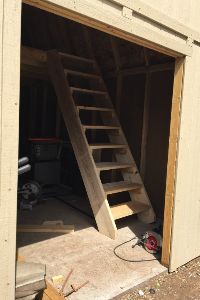 She Even Built a Stairway!
Here's the shed plans Heather used.
Jerry's 8x10 Barn Shed Pictures
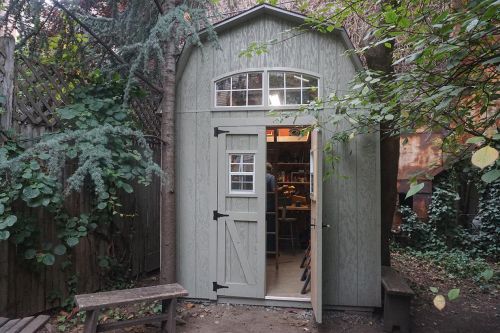 Jerry's 8x10 Barn Shed
Jerry emailed me this nice compliment:
"Hi John, I finished my shed awhile ago but I am just now getting around to thanking you for your excellent plan. It is clear and very easy to follow. Also the cut list is perfect and saves hours of figuring. I worked as a carpenter for forty years and didn't think I'd enjoy working again until now. I included a few pictures and thanks again. Have a great holiday!"
 Jerry's workshop
Jerry built this 8x10 barn shed and did such an amazing job modifying the doors by adding windows to them. He also modified the area just above the shed doors by adding in a transom window. His workshop is so neat you just want to go in there to get away from it all and work on some nice little project. Jerry used these plans to build his neat shed.
Davids Barn With Porch Shed Pictures
Here's a barn shed with porch built by David. He actually purchased 3 of my shed plans and incorporated bits and pieces from each one to build this neat shed.
Read more about Davids barn shed and his outstanding testimonial about the plans he bought from shedking.
Tim's 12x16 Barn Shed With Porch
Tim is building this really neat 12x16 barn style shed that's got a huge loft, lots of space on the first floor, and a nice 6'x16' side porch. You can learn more about the plans Tim is using here:
Jeff's 12' x32' Saltbox Workshop Shed
You did a great job building your shed Jeff! Thank you so much for sending in your shed pictures. You can read more about the plans Jeff used here: 12x16 saltbox shed plans.
Dan's Saltbox Shed
This is Dan's 12x10 saltbox style shed. This shed has lots of character, makes for a nice garden shed, and can be spruced up with a nice flower box under the window.
Craig's Barn Shed
|
Craig and his son built this awesome 12x16 barn shed that has lots of storage space inside and a huge loft. |
Jason's Barn Shed
|
Jason build this awesome 10x12 barn shed with metal roof and vinyl siding. He also added a few windows and pre-hung double doors. |
Rod's 12x16 Barn Shed
Rod built this 12x16 barn shed while coming home from the Middle East. Rod is standing in front of the shed with a little boy they take care of.. (Ross) who was so impressed by the event he's been running around hammering nails into whatever he has the strength for: foam, pumkins ect.
Yes, in spite of a few mistakes I deemed 'minor'... at the end of the day I was very proud and felt I had completed a major accomplishment.
Well, thanks a lot.
Sincerely,
Rod
Here's the pictures Rod emailed to me of his project.
John's Barn With Porch Shed
John Miller sent me pictures of the 12x16 barn with porch plans and the job he did was absolutely fantastic. He added a metal roof, pre-hung side door, and windows on either side of the entry door.
This project is going to be used for his workshop and various storage needs that he has. The loft area in this barn is great for any storage needs you might have.
Read John's comments and see more pictures of his barn shed.
Plans for this barn can be found here.
Shawns Modified Saltbox
This is a smaller version of our 12' long x 8' wide saltbox shed plans built by Shawn.
He did a great job in modifying the plans to build a smaller version to suit his needs. Shawn is from Canada and because of the heavy snow loads he has spaced the roof trusses every 16" instead of the 24" called for in the plans. Good planning and Nice looking shed Shawn!
Here's what Shawn had to say about the saltbox plans he purchased here at shedking:
Hi John,
Your plans were very helpful, to be honest the only thing that I found could have been clearer is the diagram on the roof truss angles. I ended up drawing the truss in CAD, using your angles as a starting point and getting the remaining angles from CAD. (this has been updated and made clearer on our plans!)
Who knows, maybe I put to much thought into it, however your plans did help me very much, and your willingness to answer questions was much appreciated.
Good luck with future plans and with your website, I always find it interesting to see others business ideas as the Internet sure has made sharing information easier
All the best,
Shawn, Ontario, Canada
I bow to the Shed King...All I have to say is THANK YOU!!!
I purchased your plans online to build an 8x12 salt box shed about 3 weeks ago. My wife and I just had our first child and we only have a one car garage and we accumulated a ton of baby stuff so my stuff had to find a place to go, so i needed a shed.
I convinced my wife that it would be cheaper building one than buying one at Home depot or Lowes. I was half telling the truth. Lowes has an 8x12 salt box, but it is build with 2x4" floor and 2x3 wall studs and I wanted something a bit more robust.
I am 90% done with building the shed and with upgrades such as 3/4" ply floor and roof and 2x6 platform, I am all in $1,236...Not bad I think...
Not to mention that your plans made it so easy for the weekend warrior that I am. I can do the basic and have done all the work on my home but never took on a ground up construction project such as this one.
With a little thought and making sure that you read through your instructions a few times, this project was the coolest and most fun I've had with construction yet.
Getting a ton of complements as well from the neighborhood.
Here are a few pics. Will send more after it is all done and painted...
Best $6.00 I ever spent.
Thanks again,
Jason
Scott's 12x16 Gambrel Shed
Hi there, I purchased your plans about a month ago, its been kind of slow going with our rainy April that we had but we finally got the roof trusses up today.
I forgot to take pics before now (sorry!). Its 12x16, I'm putting 2 windows on the 2 long walls a 6' door in the front and an extra side door so I can get to the back without kicking the lawnmower all the time.
I have a question, I'm not using the same type of siding you used because my wife got vinyl siding almost free from where she works. That will work out fine except now I'm not sure on how to build a door that will look decent and not warp up on me too badly. Any ideas? I was thinking I would get some exterior ply to put behind some cedar framing and paint it, I just wanted to check and see if anyone else has ever done anything different with the doors.
Thanks for your time and for the plans, they are excellent by the way. I drew up my framing walls in AutoCad and will share those with you if you're interested (I'm a drafter professionally).
Thank you,
Scott
Have a look at the 12x16 Gambrel shed plans.
Here's another 12x8 saltbox shed.
Heres another 12x8 saltbox shed design, built by Jeff.
Looks great Jeff. You did a nice job with this one.
This is not the easiest storage shed to build but if you are up to the challenge like Jeff was, you will turn out a nice shed like this one that can be used for a garden shed, storage shed, chicken coop, or a small office.
12x8 saltbox shed plans from shedking.
12x16 Gambrel shed pictures from Robert
I bought your plans for a 12x16 gambrel shed, made a few modifications to fit our application and just finished it. Thought you might like to see the process. Thanks for the plans. They were a great help. If you are wondering about the lime green trim, it is in memory of my father who passed away a few years ago. Thanks again.
Rob Adams
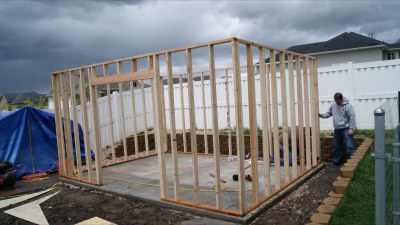
From the looks of it Robert had quite a bit of prep work to do in order to get to having flat and level ground to pour his concrete shed floor.
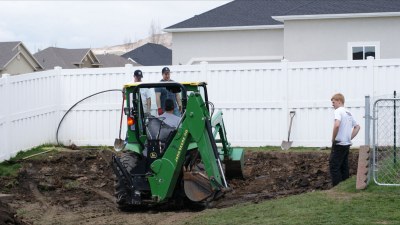

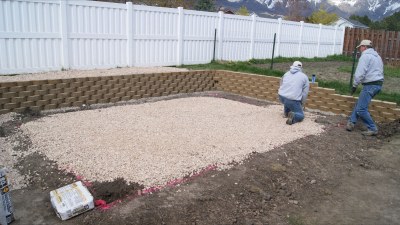
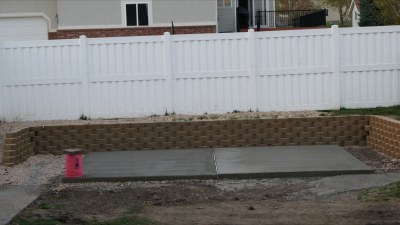
Now that the concrete cement floor is done, we can finally start building the gambrel shed.
With the roof framing done and loft boards in place, the roof can be covered with roof felt and shingled.
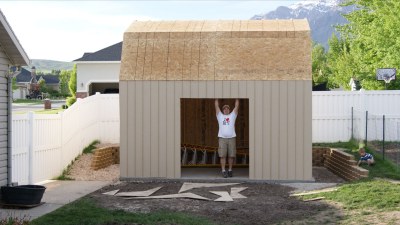
What a great job you did building this nice sized 12x16 gambrel shed with loft.
I am quite sure your Dad would have been very proud of you Robert! Thank you for visiting shedking.net and purchasing the plans, and building the shed (quite nicely I might add!)
If you would like to look at the plans Robert used to build this gambrel shed with, please click here for the 12x16 gambrel shed plans.
The Friedman's Built This Really Nice Gable Shed
Not only did the Friedman's build a really neat gable style storage shed, their landscaping is beautiful! Nice Job Done!
Plans for this 10x12 Gable Storage Shed.
Mary's 12x16 Gambrel Roof Shed with Side Porch
Mary sent me this pic in March of 2012 of the 12x16 barn with porch she is in the process of building.
Coming along very nice Mary!
My Wife Sarah's Garden Shed Pictures
I'm finally building my wife a garden shed. If it ever gets done, she'll have a nice 12'x16' gable style shed to store all her garden tools in and whatever else she needs to put in there.
We're also adding on a chicken coop on the back side of this shed so that we can get them back up closer to our house. Less walking to do to take care of the littel buggers!.
Read more and follow my building progress of Sarah's Garden Shed.
Glenn's Playhouse Shed
Glenn is building this 10x12 gambrel shed to be used as a playhouse for his kids, then later when they have grown up, Glenn will be using the shed for other purposes.
See more of Glenn's playhouse shed.
Cammy's Tiny House
Check out the progress of Cammy's tiny house being built from my 10x12 barn shed plans. This is going to be a neat project indeed!
See Pictures of Cammy's Tiny Barn House.
Monthly DIY
Shed-in-sight
Newsletter
Subscribing will get you discounts on shed plans, monthly updates, new shed design ideas, tips, exclusive discounts on shed building resources and tools. Learn more here.
Recent Articles
-
12x16 Barn with Porch Plans, barn shed plans, small barn plans
Feb 08, 26 09:53 AM
Easy 12x16 barn shed plans with porch. How to build a small barn using 3d construction models , building guides and materials lists. -
Pictures of Sheds Built By Shedking Customers
Jan 29, 26 06:39 AM
Visit our library of pictures of sheds built from our shed plans. Get great shed design ideas and plans for storage sheds, garden sheds and more. -
Barn Shed Plans with Big Lofts
Jan 23, 26 06:38 AM
My barn shed plans come with full email support, detailed building guides, materials lists, and they are cheap too!
My You Tube Videos
