Save 30% off Any Shed Plan Purchase!
Signup For My 'Shed n Sight' Newsletter
and Get Your 30% off Promo Code To Use At Checkout.
- Home
- Planning for your shed
- How to solar power a shed
Power your shed with solar - A complete DIY guide
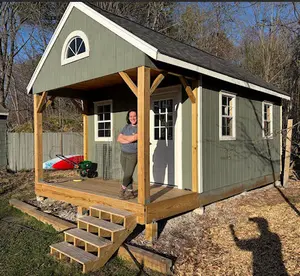
 Tim's Solar Powered Off Grid
Shed
Tim's Solar Powered Off Grid
ShedThinking about how to solar power a shed? Whether you’re lighting a simple storage shed, running tools in a workshop, powering a backyard office, or outfitting a tiny shed house, a small solar setup can boost comfort, productivity, and independence.
In this guide, you’ll learn the real‑world benefits and drawbacks of shed solar (from lower bills and blackout resilience to weather limits and upfront cost), the core equipment you’ll need (panels, charge controller, batteries, inverter, and more), necessary tools for adding solar, and a straightforward way to calculate your power loads so you size the system right the first time.
By the end, you’ll know what’s practical for your space, your budget, and how you use your shed—so you can switch on with confidence.
Three big reasons to add solar power to your shed
Why go solar on a shed? Three big reasons:
- Energy independence
- Lower energy costs over the long run
- Smaller carbon footprint.
A solar shed is quiet, reliable, and an excellent choice if the power company wants a fortune to pull a new main line.
Here are the key benefits of solar-powered sheds:
- No utility hookup needed: Avoid trenching, wiring, and monthly electric bills; ideal where grid access is costly or impractical.
- Lower operating costs: After upfront purchase, sunlight is free. Panels typically last 25–30 years with minimal maintenance.
- Reliable backup power: Keep lights, tools, battery chargers, routers, and security devices running during grid outages.
- Safer and cleaner than generators: No fumes, fuel storage, or noise; fewer fire and carbon‑monoxide risks.
- Eco-friendly: Reduces your carbon footprint and aligns with sustainability goals that customers value.
- More usable workspace: Power for lighting, ventilation fans, dehumidifiers, small heaters, and tool chargers extends workable hours and protects equipment/materials.
- Better security: Motion lights, cameras, alarms, and smart locks can run 24/7.
- Flexible and scalable: Start small (lights/USB) and add panels, batteries, or an inverter as needs grow.
- Portable options: Many kits are modular; you can relocate the system if you move or repurpose the shed.
- Works in remote locations: Great for gardens, farms, job sites, or off-grid cabins where running cable is impractical.
- Potential incentives: Some regions offer rebates or tax credits for solar purchases (check local rules and eligibility).
- Professional image and property appeal: A powered, well-lit, climate‑managed shed can boost productivity and resale appeal.
Notes:
- Benefits depend on proper sizing (panels, charge controller, battery, inverter) and adequate sun exposure.
- In some areas, permits may still apply; check local codes for solar and electrical installations.
Here are the main drawbacks of solar-powered sheds:
- Intermittent power: Output depends on sun and season. Winter, shade, and cloudy stretches can leave you short unless you oversize panels and batteries.
- Battery reliance and cost: Off‑grid sheds need storage. Batteries add significant upfront cost, have finite lifespans (roughly 5–12 years depending on type/use), can’t charge well in extreme cold, and require proper ventilation and fire-safe installation.
- Limited power for heavy loads: High‑draw or surge tools (table saws, air compressors, welders), space heaters, and AC often exceed practical off‑grid system capacity. Designing for these can be expensive.
- -Upfront expense vs trenching: For some sites, running grid power may cost less and provide unlimited, on-demand power. Solar pays back over time, but the initial outlay can be higher for equivalent reliability.
- Roof and site constraints: Small roofs, poor orientation/tilt, trees, or nearby buildings reduce output. Ground mounts take yard space and may need fencing.
- System complexity: Sizing panels, charge controllers, batteries, and an inverter is nontrivial. Mistakes cause poor performance, shortened battery life, or safety issues.
- Maintenance and monitoring: Occasional cleaning, inspections, firmware updates, and performance monitoring are needed. Snow, dust, and debris reduce production.
- Code, permits, and insurance: Even low-voltage systems can trigger permitting. DIY wiring that’s not to code may void insurance or create liability.
- Physical risks and durability: Roof penetrations can leak if not done correctly. Wind uplift, hail, or vandalism/theft can damage panels or steal components.
- Parasitic loads and losses: Inverter standby draw and conversion losses reduce usable energy, which matters in small systems.
- Aesthetics and HOA limits: Panels may change the look of a shed and can run into HOA or neighbor objections.
- Incentive limitations: Some tax credits/rebates exclude non-dwelling accessory structures or off‑grid setups.
- Upgrade path constraints: Starting at 12V can limit future expansion; switching later to 24/48V means replacing components.
- Environmental end-of-life: Batteries and electronics must be recycled/disposed of properly, adding cost and logistics.
Do this check list first before thinking about adding solar power for your shed
First, make sure your site gets enough sun. You want at least 4–5 peak sun hours per day on average. That means minimal shading year-round from trees, the house, or a neighboring building.
Do a quick shade analysis. Walk the site at 9 am, noon, and 3 pm. Look for shadows on the roof of your shed and the ground. In winter, shadows are longer, so think about the worst season too.
Check your shed’s roof condition and structure. It must handle panel weight plus wind and snow loads. Orientation matters: in the northern hemisphere, face panels south; in the southern hemisphere, face panels north. A tilt near your latitude is a good start.
Now define your goals. Do you need lights and phone charging only? Or do you plan to run electric power tools in a workshop shed or even power home appliances in a tiny home? Decide seasonal vs year-round use and how many cloudy days you want to ride through.
Determine power loads for what you need to run in your shed
Make a simple load list.
For each device, write down watts and daily run time. Example: LED light (10 W x 3 hours = 30 Wh), laptop (60 W x 2 hours = 120 Wh), small fan (15 W x 3 hours = 45 Wh). Add them up for daily watt-hours.
Choose your system type. DC-only is the most efficient for lights and USB. AC with an inverter gives you normal outlets for electrical devices and electric tools. Pick voltage: 12 V for small systems, 24 V for mid-size, 48 V for bigger tiny homes.
Efficiency first results in energy savings. Use LED lighting, high-efficiency fans, and low-power chargers. Insulate the shed if you’ll heat or cool it. Heat loads eat a lot of energy; solar is not the best way to run resistive heaters.
Quick safety and code check. If you tie to grid power or run underground cables, follow local codes and the NEC (in the U.S.). Check HOA rules, permits, and insurance. High voltage and batteries need care, personal protective equipment (PPE), and basic electrical safety.
Here are some examples for different types of shed uses or most typical uses of an outbuilding
Solar energy power for a simple storage shed
 Solar Power Up Your Storage Shed
Appliance | Typical watts (running)
- LED shop light (4 ft) | 35 W
- Motion-activated LED floodlight | 25 W
- Power tool battery charger | 90 W
- Small ventilation/exhaust fan (6–8") | 20 W
- Box fan (20") | 75 W
- Mini-fridge (3.2 cu ft) | 85 W
- Dehumidifier (20–30 pint) | 350 W
- Laptop charger | 60 W
Notes:
- Values are typical running watts; check your specific device label.
- Fridges and dehumidifiers have startup surges (often 2–3× running watts), which matter for inverter sizing.
- Quick sizing tip: Solar panel watts ≈ Total daily watt‑hours (sum of watts × hours each day) ÷ (peak sun hours × 0.7 for system losses).
Solar power for a backyard office shed
 Solar Power Your Backyard Office Shed
Appliance | Typical running watts
- LED ceiling light (panel or strip) | 20 W
- Laptop computer | 60 W
- 24–27" LED monitor | 30 W
- Wi‑Fi router + modem | 15 W
- All‑in‑one inkjet printer (printing) | 20 W
- Mini‑split heat pump, 9k BTU (cooling) | 600 W
- Mini‑fridge (3.2 cu ft) | 85 W
- Ceiling fan (52") | 50 W
Notes:
- Values are typical running watts; check your device’s label.
- Fridges and mini‑splits have startup surges (often 2–3× running watts), which matter for inverter sizing.
- Quick sizing tip: Solar panel watts ≈ Total daily watt‑hours (sum of watts × hours used) ÷ (peak sun hours × 0.7 for system losses).
Solar power for a workshop shed to run-powered tools
 How Much Solar Power Needed For A Workshop Shed?
Appliance | Typical running watts
- LED shop light (4 ft) | 35 W
- Power tool battery charger | 90 W
- Corded drill (3/8") | 500 W
- Miter saw (10") | 1,400 W
- Table saw (10", contractor) | 1,500 W
- Shop vacuum (8–12 gal) | 1,000 W
- Air compressor (6‑gal pancake) | 900 W
- Dust collector (1 HP) | 750 W
Notes:
- Values are typical running watts; always verify the nameplate on your exact tools.
- Motors (saws, vacs, compressors, dust collectors) have startup surges, often 2–3× running watts—size your inverter accordingly.
- Quick sizing tip: Solar panel watts ≈ [sum of (device watts × hours used per day)] ÷ [peak sun hours × 0.7 for system losses].
Solar power up your tiny shed house
 How Much Solar Power Needed for Tiny Shed House?
 Appliance | Typical running watts
- LED ceiling lights (two fixtures) | 20 W
- Laptop computer | 60 W
- Wi‑Fi router + modem | 15 W
- Mini‑fridge (3.2 cu ft) | 85 W
- Induction cooktop (single burner, medium) | 1,200 W
- Microwave oven (0.7–1.0 cu ft) | 1,000 W
- Mini‑split heat pump, 9k BTU (cooling) | 600 W
- Water pump (12V RV/diaphragm) | 60 W
Notes:
- Values are typical running watts; check your device labels.
- Fridges, pumps, and mini‑splits have startup surges (often 2–3× running watts), which matter for inverter sizing.
- Quick sizing tip: Solar panel watts ≈ total daily watt‑hours (sum of watts × hours used) ÷ (peak sun hours × 0.7 for system losses).
Solar power system for a shed - parts and pieces
Here’s the solar power system in plain words: solar panels, a charge controller, a battery system, an inverter (for AC), fuses/breakers/disconnects, mounting, wiring, and monitoring. You can buy a solar power kit or piece together your own system for more control.
Panels 101. Monocrystalline panels are the best quality and most efficient for small roofs; polycrystalline panels cost a bit less but need more area. Check panel power rating (W/panel) and measure your shed’s roof to see how many panels fit.
The charge controller sits between panels and batteries. It manages the flow of electric current so you don’t overcharge. MPPT controllers are smarter and harvest more energy than PWM, especially in cold weather or with longer wire runs.
Batteries are the heart. LiFePO4 (lithium iron phosphate) is light, long-lasting, and safe, but costs more up front. AGM or flooded lead-acid is cheaper initially but heavier and needs more maintenance. Keep batteries in a ventilated, temperature-stable spot.
The inverter makes AC from your DC system. Choose pure sine wave so sensitive electronics and home office gear are happy. Size it for your peak load and surge (for tool start-ups). Example: a 1,500 W inverter with 3,000 W surge for a small workshop.
Mounting matters. On the shed’s roof, hit rafters, use proper flashing, and seal every penetration to keep the main structure dry. Ground mounts work well if the roof is small or shady. Keep rows clear of shade and allow airflow under panels.
Plan wiring early. Keep DC runs short to reduce voltage drop. Use a combiner box if you have multiple strings. Add fuses or breakers on every source, and a main DC disconnect. For longer distance runs, size up the wire and consider moving electronics closer to the array.
Grounding and lightning protection. Bond frames and racks to ground, and ground the negative if your controller/inverter requires it. In lightning-prone areas, add a surge protector on the PV input and at the AC side.
Choose a good equipment wall. You want a dry, clean, ventilated area for the charge controller, inverter, shunt monitor, and disconnects. Avoid direct sun and extreme cold. Leave space to work and label everything.
 Wall Set-up Example For Solar Power Devices In Your shed
Here's my easy installation process
Measure and mark rafters on your shed roof, then mount rails and flashings;
Mount your solar panels
Run PV wire to a combiner
PV wire is a single-conductor cable specifically designed and listed for photovoltaic (solar) systems. It’s the standard wire for interconnecting solar panels and running DC “home run” leads in and around the array.
Key characteristics:
- Purpose-built for solar: Listed for PV use (commonly UL 4703 or CSA RPVU90) and allowed in both grounded and ungrounded arrays.
- Tough insulation: Cross-linked polymer (XLPE/XLPO), typically thicker and often double-insulated for extra abrasion and UV protection.
- Outdoor ready: Sunlight/UV, ozone, and weather resistant; wet-location and often direct-burial rated; cold-flex to about -40°C.
- Voltage/temperature ratings: Commonly 600, 1000, 1500, or 2000 V DC; 90°C wet and up to 105°C dry (check the spec sheet).
- Conductor: Usually stranded tinned copper for corrosion resistance and flexibility; typical sizes range from 14 AWG to 4/0 (10 AWG is common for module strings).
- Use cases: Panel-to-panel jumpers, string extensions, and exposed array runs to a combiner or junction box; often pre-terminated with MC4-type connectors.
How it differs from other wire:
- PV wire vs. USE-2: PV wire has higher voltage ratings and thicker insulation and is permitted for ungrounded arrays; USE-2 typically isn’t.
- PV wire vs. THHN/THWN-2: THHN/THWN-2 must be in conduit and isn’t for exposed array wiring; PV wire can be used exposed in the array.
Practical tip for a shed: Use PV wire on the roof between panels and to a weatherproof junction box, then transition to THWN-2 in conduit down to your charge controller/inverter. Match connector brands/types and crimp with the proper tool, and size the wire for ampacity and voltage drop per your local code.
Install the charge controller
A solar charge controller is the device that sits between your solar panels and your battery, managing how the battery is charged and protecting it from damage.
What it does
- Regulates voltage and current from the panels so the battery isn’t overcharged.
- Manages charging stages (bulk, absorption, float; and sometimes equalize) to maximize battery life.
- Provides protections: overcharge, overcurrent, reverse polarity, short circuit, and often low‑voltage disconnect (LVD) to prevent over‑discharge when powering loads.
- Monitors battery temperature (with a sensor) and adjusts charging accordingly.
- Offers settings/profiles for different chemistries (flooded, AGM, gel, lithium).
Types
- PWM (pulse‑width modulation): Lower cost and simple. Requires panel “nominal” voltage to match battery (e.g., 12V panels to a 12V battery). Less efficient, especially in cold weather or with long wire runs.
- MPPT (maximum power point tracking): More energy harvest (often 10–30% more), allows higher‑voltage panel strings feeding lower‑voltage batteries (e.g., 2–4 panels in series into a 12/24V battery), reduces wire losses, better in mixed temperatures and partial shade.
How to size/choose
- System voltage: Ensure it supports your battery bank (12/24/48V). Many auto‑detect.
- PV input voltage: The controller’s max PV Voc must exceed your array’s worst‑case cold Voc with margin.
- Current rating: Controller output amps ≥ array watts ÷ battery voltage, with a safety factor (typically 1.25×). Also consider panel Isc and code requirements.
- Power handling: Choose a controller with enough wattage headroom for future expansion.
- Battery chemistry support: Especially important for lithium (custom voltage setpoints, low‑temp charge disable).
- Features: Load terminals with LVD, remote display/app, datalogging, temp sensor, remote battery voltage sense.
- Environment: Indoor, dry, ventilated space; check operating temperature and enclosure rating.
Install tips for a shed
- Wire order: Connect battery to controller first, then panels; disconnect in reverse. Follow the manual.
- Fusing/disconnects: Use appropriate fuses/breakers between panels–controller and controller–battery, plus a DC disconnect.
- Wire gauge: Size for ampacity and voltage drop (keep PV and battery runs short and appropriately thick).
- Ventilation: Controllers dissipate heat; mount on nonflammable surface with airflow.
Common mistakes to avoid
- Exceeding PV voltage limit in cold weather.
- Undersizing the controller for array power.
- Using PWM with a mismatched high‑voltage array.
- Skipping fuses/breakers and temperature sensing.
- Mounting in damp or unventilated spaces.
Install the inverter
An inverter is the device in a solar power system that converts the panels’ and/or batteries’ DC electricity into AC electricity so you can run standard household tools and appliances.
What it does
- Converts DC to AC with the correct voltage and frequency (e.g., 120/240V, 60 Hz).
- Manages power flow: some models track panel power (MPPT), charge batteries, and switch between solar, battery, and grid.
- Provides safety features: overload and short‑circuit protection; grid‑tie models add anti‑islanding and grid monitoring.
Main types
- Grid‑tied string inverter: Panels wired in strings feed a central inverter. High efficiency, lower cost; loses output if a string is shaded unless using multiple MPPTs or optimizers.
- Microinverters: One per panel. Each panel works independently; great for shading/complex roofs; higher cost per watt.
- Optimizers + string inverter: Panel‑level optimization with a central inverter; a middle ground.
- Off‑grid inverter: Runs from a battery bank to power loads when there’s no grid.
- Hybrid (grid‑interactive) inverter: Works with solar, batteries, and grid; can back up loads during outages and do time‑of‑use shifting.
Waveform
- Pure sine wave: Clean power compatible with all electronics and motors; recommended.
- Modified sine wave: Cheaper but can cause noise, heat, or malfunction; generally avoid for modern gear.
How to size and choose
- Power rating: Continuous watts ≥ your simultaneous load; check surge rating (many tools/motors need 2–3× start surge).
- System voltage: Match your battery bank (12/24/48V) or panel array and grid requirements.
- Input limits: Ensure DC voltage/current are within the inverter’s specs, with headroom for cold‑weather panel voltage.
- Efficiency and standby draw: Higher efficiency and low idle consumption matter in small systems.
- Certifications/features: For grid‑tie, look for UL 1741/IEEE 1547; consider monitoring, multiple MPPTs, and battery charging if needed.
- Environment: Mount in a cool, dry, ventilated place; check operating temperature and noise.
Where it fits in the system
- Off‑grid/hybrid: Panels → charge controller → batteries → inverter → AC loads.
- Grid‑tied string/micro: Panels → inverter(s) → grid/AC loads (no batteries unless hybrid).
Notes for a shed
- If you only need DC lighting/USB, you may not need an inverter. For AC tools or outlets, choose a pure sine inverter with enough surge capacity.
- Include proper fuses/breakers, disconnects, grounding/bonding, and follow local electrical codes. Hire a licensed electrician for grid connections.
If you share what you want to power, for how long, and whether you have grid access, I can help size and suggest inverter options.
Lastly, add disconnects; mount batteries; connect battery-to-controller; connect PV-to-controller; connect inverter; test DC, then AC; program settings; label everything.
Plan for cloudy days
Oh oh, what if it's really been cloudy for several days? What are your options:
- bigger battery bank
- a small generator
- or a portable power station you can charge later at home. A 2 kW generator can top off a 48 V battery in the required amount of time if your charger is sized right.
Monitor and optimize your solar power for your shed
Use a shunt-based battery monitor or app-based system to see state of charge, solar array watts, and daily energy. Adjust tilt a bit for seasons. Keep the shed roof and panels clean so you get the most sunlight.
What tools will you need for adding solar power components to your shed?
Here’s a practical tool list for adding a small off‑grid solar system to a shed. It’s grouped so you can grab what you need based on the work step.
Planning and measurement
- Tape measure, chalk line, marker
- Torpedo level or 2–4 ft level
- Angle finder or phone app for tilt/azimuth
- Stud finder (for roof/rafters) or masonry drill bits if mounting on block
Safety gear
- Extension ladder (tied off) and roof brackets
- Fall‑arrest harness, lanyard, roof anchor
- Safety glasses, cut‑resistant gloves, hearing protection
- Non‑slip footwear; hard hat if working under panels
- Fire extinguisher (ABC), first‑aid kit
Electrical tools
- True‑RMS multimeter and non‑contact voltage tester
- DC clamp meter (for array/battery current)
- Insulated screwdrivers and nut drivers
- Torque screwdriver and torque wrench with socket set (to meet manufacturer specs on lugs/racking)
- Wire strippers and flush cutters
- Crimpers:
- MC4 crimp tool plus MC4 spanners/removal tool
- Heavy‑duty or hydraulic lug crimper for battery cables (e.g., 6 AWG to 2/0)
- Ferrule crimper for small control wires (optional)
- Heat gun and heat‑shrink assortment
- Label maker and electrical labels (for breakers/disconnects)
Mounting and general fastening
- Drill/driver and impact driver
- Drill bits: wood, metal, step bit; masonry bits if needed
- Socket set, combination wrenches, hex/Torx bits (per racking hardware)
- Ratchet straps or panel lifter/suction cups (nice to have)
- Utility knife, pry bar
Roof/waterproofing and penetrations
- Caulk gun
- Compatible roofing sealant and butyl tape (tool is the caulk gun; sealant is a consumable)
- Hole saws and grommet kit or weatherproof cable glands
- Deburring tool for metal edges
Conduit and cable pulling
- Conduit bender (if using EMT)
- Hacksaw/tubing cutter and reamer
- Fish tape or pull string; cable lubricant
- PVC primer/cement (if using PVC; consumables) and strap mounts
Ground‑mount or trenching (if not roof‑mounted)
- Shovel, trenching spade, post‑hole digger or auger
- Level, string line, stakes
- Tamper; concrete mixing tools (if setting posts)
Testing and commissioning
- Irradiance/tilt phone app (basic) or solar IV tester (pro/optional)
- Thermal camera (optional, for hotspot checks)
Battery handling (if using batteries)
- Battery strap/lifter
- Terminal brush, anti‑oxidation compound (consumable)
- Hydrometer (for flooded lead‑acid only)
Notes
- Components you’ll also need (not tools): panels, racking/flashing, PV wire with MC4s, combiner/breakers, DC disconnects/fuses, charge controller, batteries (if off‑grid), inverter, grounding hardware, conduit/fittings.
- Many racking systems specify exact torque and bit types—check the manual before buying tools.
- If interconnecting to the house/grid, or if local code requires it, hire a licensed electrician and pull permits. Always de‑energize and lock out before working on circuits.
If you really want to add solar power for your shed..
Budget smart. There’s an initial investment, but quality gear lasts longer and saves headaches. Compare a solar kit vs building your own system. Factor in initial costs, future battery replacements, and warranties. Cheap wire and breakers are not worth it.
Make sure you do maintenance. Every few months: wash panels if dusty, check torque on mounts, inspect cables for wear, and update inverter/charge controller firmware. Keep battery terminals clean and watch temperature limits, especially for LiFePO4.
Common mistakes to avoid: underestimating energy needs; ignoring surge on tools; using wire that’s too small; placing batteries in hot attics; overloading a small inverter; skipping fuses; mounting panels in shade. Fix the design on paper first, then buy.
Visit my amazon store for your solar power needs for your shed
Please note: if you make a purchase at my amazon store, I will make a commission, however this does not affect the price you pay. Here's my link
Have A Great Story About Solar Power For Your Shed?
Do you have a great story about this? Share it!
You might like these
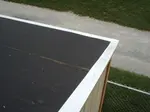
Using drip edge on your shed roof
Do you really need drip edge on your shed roof? As a professional shed builder, I can tell you that drip edge is a necessity.
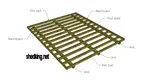
Shed Floors - Band Boards, Rim Joists, Joists and Skids.
Shed floors and the different parts of a shed floor.
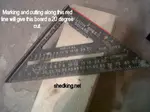
How to use a speed square for building your shed trusses and walls
How to use a speed square to easily make angle cuts for shed walls, floors, and trusses for building your shed.


Monthly DIY
Shed-in-sight
Newsletter
Subscribing will get you discounts on shed plans, monthly updates, new shed design ideas, tips, exclusive discounts on shed building resources and tools. Learn more here.
Recent Articles
-
Erecting Shed Walls So The Top Is Square
May 22, 26 06:55 AM
 If I nail the sole plates to the joists and corners together as you say and then measure diagonals across the top to be sure the shed top is square, what
 -
Pictures of Sheds Built By Shedking Customers
May 04, 26 09:13 AM
 Visit our library of pictures of sheds built from our shed plans. Get great shed design ideas and plans for storage sheds, garden sheds and more.
 -
Women Built Sheds: Inspiring Shed Projects From Real Women
Apr 28, 26 11:01 AM
 Discover how women are taking on shed building projects with confidence and skill. Get inspired by real examples, practical tips, and step-by-step advice.


My You Tube Videos
