Save 30% off Any Shed Plan Purchase!
Signup For My 'Shed n Sight' Newsletter
and Get Your 30% off Promo Code To Use At Checkout.
How to Build Double Shed Doors
 Building Double Swinging Shed Doors
To build double shed doors, here's one of the easiest ways with a step by step guide with illustrations on shed door construction below.
Before you begin any framing for your shed, it's best to decide what size doors you actually need because the framing for the wall containing these doors will have to be framed correctly for this.
For our example to use to explain how easy this really is, I am going to use the following guidelines to build a 5' wide double door for a shed that has a 10' long wall that this door has to be framed into. This is really easy if you are siding your shed with the LP smartside siding panels, or planning on siding over OSB sheets with some sort of lap siding. It doesn't matter.
Ok, lets say with this 10' wall, you want your door on the right side 1' away from the corner. (this is for illustrative purposes only. You can use any position on the wall you like).
Here's what the framing for this wall will look like with 16" on center wall studs, and the wall is 7' tall. 7' is the typical wall height for a shed.
 Example Framing For 5' Wide Double Shed Doors
When it's time to put your siding on whether it be T1-11 or LP smartside siding panels, the next step is to find the exact middle of your door opening. Cut your siding to the desired length or height. Usually this measurement will be so that your siding extends down past the floor by about 2" or so. What ever you decide on this measurement, it should remain the same all around your shed. In otherworks, the bottoms of all your siding panels will all be even all around the perimeter of your shed.
If you are just using osb, your first osb panel will be attached to the wall framing so that your panel edge is even with your middle of the door mark. To make things easier for you, a temporary board can be nailed on to the rim joist or band board so that your siding panels rest on this board. Nail this panel to the wall framing along the header edge, and the jack stud of the door framing. You won't be nailing into the bottom of this osb panel where the door will be opening.
 Siding Placement For First Panel
Using a reciprocating saw you can cut the door panel out from the back side then cut the front section left on the bottom front with a circular saw.
If you plan on building a ramp for your shed, you will want to cut the bottom of your door panel so that it is flush with the top of the floor.
The next panel can now be placed into position so that the overlapping edge is in the right place leaving a gap that is consistent with the grooves in your panels if you have them. Nail this panel to the framing and cut this panel as you did with the first.
 Second Siding Panel Placement
Now both panels have been cut out and your shed wall containing the door opening will look like this:
 Siding Panels With Doors Cutout
We have our 5' door opening for double shed doors and we have the two door panels we cut out that we can now build our doors with.
We can start with either panel, it makes no difference. If you decide that you want a shed ramp on this shed, as I mentioned earlier, the panels we have for the doors will have to have the bottoms trimmed off so that the panels when opened and shut will clear the top of the shed ramp.
For this example, we will figure on cutting the panels off for a ramp. This works out to be roughly about 2" off the bottom of each door.
 Resulting Door Panels
Working with each door panel individually, we can now frame the outside of these panels with 2x4's and 2x6's as such. These doors will be easier to build using exterior grade 1.5" screws, screwing from the back of the panels into the front 2x4's and 2x6's.
 Framing The Outside Of The Door Panels
With the door panels assembled now with 2x4's and 2x6's the shed itself now needs to be framed out with 2x4's and a lentil around the door opening The 2x4's will serve as door jambs and should be screwed or nailed to the frame flush with the door opening.
The door lentil can be made of a 2x6. Mount the jambs on each side so that they extend above the door opening about 1/4". Once the coor jambs are screwed on and in place, your lentil can be nailed into place. With the door jambs extending 1/4" above the door opening, this will allow the doors to swing freely.
 Double Shed Doors Finished
With your doors assembled, now its time to weather proof your hard work. Silicone or latex caulk should be added to all upper horizontal surfaces and all vertical surfaces. If you are using silicone, try to get a paintable silicone. Otherwise your silicone will not take latex based paint and will have to be painted with an oil based paint.
Another option I like to add to my sheds is an angled metal threshold strip on top of the floor right on the front edge. This will help protect your shed floor from wear and tear over the years. This strip can be aluminum and is readily available at your lumber supplier store.
 Protect Your Floor Edge With Metal Threshold
This metal threshold strip should be pre-drilled and screwed down with exterior pan head screws about 1.5" long every 12" starting from the ends and working your way inward.


Monthly DIY
Shed-in-sight
Newsletter
Subscribing will get you discounts on shed plans, monthly updates, new shed design ideas, tips, exclusive discounts on shed building resources and tools. Learn more here.
Recent Articles
-
Pictures of Sheds Built By Shedking Customers
May 04, 26 09:13 AM
 Visit our library of pictures of sheds built from our shed plans. Get great shed design ideas and plans for storage sheds, garden sheds and more.
 -
Women Built Sheds: Inspiring Shed Projects From Real Women
Apr 28, 26 11:01 AM
 Discover how women are taking on shed building projects with confidence and skill. Get inspired by real examples, practical tips, and step-by-step advice.
 -
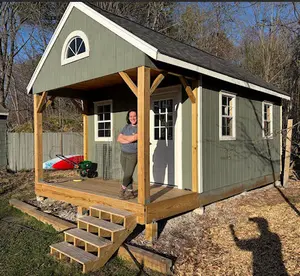
Kate Built Her Own Awesome 12x16 Garden Shed
Apr 28, 26 10:33 AM
Kate used shedking's 12x16 gable with front porch plan to build her amazing garden shed


My You Tube Videos
