Save 30% off Any Shed Plan Purchase!
Signup For My 'Shed n Sight' Newsletter
and Get Your 30% off Promo Code To Use At Checkout.
- Home
- Shed Construction
- Building a portable shed
How To Build a Portable Shed : Useful construction must do's
 How To Build a Portable Shed
If you need to know how to build a portable shed, then I can tell you that one of the most critical steps you can take is to build a wooden shed floor that can withstand a lot of moving.
I wish I would have built my wife's garden shed so that it wasn't permanently anchored to the ground! I can think of numerous times now that it would have been better in this part of the yard or that location, or closer to the house!
For one reason or another, you may want your own storage shed to be portable so that you can move it from one location to another. Perhaps you are going to be building a chicken coop shed and you need to change the location from time to time so that your chickens have fresh grass to eat.
Or maybe you have a shed that you're going to use as a garden stand that you'll be hauling around with a trailer.
If you already have a shed built and are needing it to be moved, it's possible that you or somebody else built it so good that it's already ready to be hauled. You can possibly follow some of the steps below if you haven't already done so with your shed and you may just be able to wrap the floor foundation with straps and hook them to a chain for pulling. Or you may be able to bolt on the metal strapping mentioned below and hook chains up to those for pulling.
In both situations, you may want to get the professional advice from a dedicated shed hauler to make sure all is ok. You don't want to have a destroyed shed on your hands because you didn't do the due diligence and necessary steps needed.
What type of foundation is best for a portable shed?
Obviously a shed foundation with concrete piers or a concrete slab will not suffice well for having a shed that can be moved from time to time! So the best type of shed floor for your shed to be transported or moved is going to be a shed with a wooden skid foundation. This structure will need to be built on a compacted gravel base, or should be built on a gravel base in order to make moving the shed easier over a flat surface and solid ground. I would also suggest building the floor structure with exterior wood screws rather than nails to make the structure that much stronger and less likely to pull apart.
If you are getting a building permit for your new shed, it's a good idea to check the building codes first with your local building department before building a portable shed! They may tell you that it's not possible and that your shed has to be anchored to the ground. Although if your shed is going to be anchored down with concrete anchors or some sort of anchor kits in each corner, with the skids attached to the anchors, you can most likely detach them from the anchors and then be able to move your shed! There is always a way!!
The Wooden Shed Floor: How To Build It Strong For Your Portable Shed
 Floor Framing For Building a Portable Shed
In order for you shed to be portable, there has to be structural strength sufficient enough that when you move your shed, it's not going to fall apart! The entire project of moving your shed is going to be a total waste if the basic structure or floor structure is not built well enough.
Everything from the bottom wood frame to the roof frame must be constructed properly.
Here's some definitions of the shed parts and pieces that will help you to understand the construction of a shed better (before we get into the construction of a portable shed):
Skids: These can be pressure treated 4x4 or 4x6 lumber that support the floor framing.
Ends of the skids: These are usually flush with the outside surface of the rim joists and can be cut at an angle so that when you are dragging the shed they have a better chance of not getting hung up on the ground as the shed is being pulled.
Floor joists: These run perpendicular to the band boards or band joists.
Rim joists: These are the outside end joists. They are perpendicular to the band joists.
Band joists/boards: These are the joists that the interior floor joists butt into.
Cross braces: When planning how your floor structure is going to built for your portable shed, having cross braces in between the floor joists at given intervals will make the structure that much stronger!
Floor joist plan: This is referring to the shed floor structure as it relates to on center framing of the floor joists, methods of attaching the joists to band joists and skids. This is probably one of the most critical elements you will want to get right in order to have a portable shed.
My best piece of advice here: hire a shed building company or shed hauler to move your shed! They've got lots of experience doing this!
More shed terminology for your portable shed
 Portable Shed Terminology
 This Is How The Skids Are Angled On The Bottom
Bottom plate: In wall framing, this refers to the bottom 2x that wall studs are nailed or screwed to.
Top plate: Also in wall framing, this refers to the top 2x that wall studs are nailed or screwed to. There can be one or two top plates. Typically the second or very top plate extends or overlaps the top plate and adds more strength to the wall structure. The ends will extend over the corners.
Wall frames: This refers to the back wall, front wall, and side walls that are framed with wall studs.
Solid foundation: For our example of building a portable shed, a solid foundation is referring to a well built and constructed wooden shed floor.
Roof trusses: Like ribs on an animal or human being, these make up the framing for a roof and can be gable, gambrel, or shed trusses.
Weight of the structure: Obviously this is a major factor to consider in building a portable shed. If it's going to be extremely heavy this will probably eliminate the 'portableness' of the shed!
Step-by-Step Guide On How To Build a Portable Shed
- Obtain a building permit
- Purchase building materials
- Get necessary tools ready
- Build a strong and sturdy wooden shed floor
- Build properly framed walls
- Build properly framed pre-built trusses or ridge board with rafters
- Add siding and trim to your portable shed
- Install roof cladding
- Install doors and windows
- Finish your shed out with good quality paint.
Obtain a building permit
Before you start building your shed, you’ll need to complete the building permit process. This will ensure that your shed meets the local building codes. The process varies from location to location, so you should check with your local government to find out what’s required.
In most cases, you’ll need to submit a building permit application and provide a copy of your shed plans. You’ll also need to provide a plot plan, which is a drawing that shows the location of your shed on your property. Once you’ve submitted all the required documents, you’ll need to wait for approval before you start building your shed.
Purchase needed shed materials
You’ll also need to gather the materials you’ll need to build the floor, walls, and roof. This includes lumber for framing - treated and untreated, plywood and osb, siding of your choice, tar paper and drip edge and shingles, trim board like cedar or pvc trim. You’ll also need to ensure you have the materials you’ll need for the foundation, specifically a gravel foundation or crushed rock foundation to make moving your shed easier. Obviously if you do all the great building of your shed to make it portable but you build it just over raw ground or dirt, it's going to be very very difficult to pull the shed out of the dirt!
Gather the necessary tools
You will definitely want to have the tools on hand to build your shed:
- Circular saw
- Hammer
- Drill guns - cordless of corded. However I prefer cordless for better mobility. An you may not have access to an outlet for power.
- Nailer - this is definitely optional but it will make building your shed so much easier!
- Levels - it's a great idea to have at least a 2' and a 4' level. If you can get ahold of a 6' or 8' level that's even better.
- Spud bar - I always have one of these on hand for tamping down metal mending plates or for help in digging holes.
The most important point on how to build a portable shed: Build a strong wooden shed floor
This step is perhaps one of the most important for building a portable shed. If the shed floor is not built properly then you will most likely run into major problems trying to move it. Here's what I suggest you do to build a nice strong and sturdy wooden shed floor:
Placing your support skids
You should always build your shed floor with pressure treated lumber!
Cut beveled ends on the skids or runners that will be used to support your shed floor and to hook chains or straps to for pulling or hauling your shed.
Cut all lumber to specified lengths. You may think that buying a 12' 2x6 at the store that it's going to be exactly 12' WRONG! It's probably going to be 12' 1/4" or more! Don't make the same mistake I did when I first started building sheds and assume boards you buy at the lumber store are the exact same length they say they are.
Lay out your skids or runners so that they are in the approximate position they need to be in.
 Bevel Or Cut Angles on The Skid Ends
Securing floor joists to skids
One of the most important factors of building your shed floor for making it portable is to make sure your floor joists are properly secured to the skids. You will want to do this by first making sure your floor joists are spaced correctly, and this is usually at 16" on center. Once you have them in place about where they need to be, you will want to use 3" exterior grade screws to screw your band boards to each joist end using a minimum of 2 screws per end.
After you have your band boards in place screwed to joist ends, secure each joist where it meet each location of the skid it rests on with a 3" exterior grade screw toe screwed on each side of the joist down into the skid. This must be done at each joist location where it meet the skid it rests on.
Attach plywood or 2x floor sheeting
Your floor sheeting should run perpendicular to the floor joists for strength. You will want to make sure that the ends of your flooring are landing in the middles of your floor joists. This is a step that you need to make sure you have done properly when you screwed your floor joists down in the previous step.
Floor boards should be nailed or screwed down every 6" along the perimeter and 12" along the interior above each floor joist.
Here's more detailed information on how to build a shed floor.
Frame your shed walls properly
 Take Extra Steps to Frame Shed Walls Properly
When it comes to building walls for your portable shed:
- When framing the shed walls, I would use 3" screws, exterior grade, 2 at each end screwed from the plate into the stud.
- I would definitely screw them down to the flooring after they are framed and stood up making sure that my screws are going into floor joists for added strength, and I would also place 2 screws beside each wall stud whether by each floor joist or not.
- Screw wall corners together making sure walls are plumb (level) first then drive a screw every 6" to 8" along the stud edge.
- Properly install whatever siding you are going to use.
More information on how to build shed walls here.
Build roof framing such as trusses, or ridge board with rafters
 Framing The Roof For Your Portable Shed
The picture above shows the roof for the example portable shed with trusses. You will want to make sure that each truss or rafter end is screwed down with 3 - 3" screws - 2 on the side toe-screwed to top plate, and one screw in the end toe-screwed to top plate. In addition to using screws on the ends of trusses or rafters, make sure to use hurricane ties as shown in the above picture. And see picture below.
More detailed information on how to build a shed roof here.
 Make Sure To Use Hurricane Ties For Your Truss/Rafter Ends
Add siding and trim
You can do this as you would normally in the course of building your shed.
Add roof cladding
A definite plus here would be to use metal roofing in place of shingles. I have seen shingles blow off when hauling a shed. Of course if you have no other option, than going with shingles is what it is! One option you should consider is to use architectural dimensional shingles. They are much more ridgid and stand less chance of tearing or blowing off when your portable shed is being hauled.
Install your shed doors and windows
Again do this as you would normally. One tip I have is that with your windows, you may want to criss cross tape over the glass just in case it happens to shatter in transit.
You can learn more on how to add shed doors here.
Learn more about shed windows here.
Ok now let's get your portable shed hauled to it's new lacation!
 Let's Get Your Portable Shed Hauled To It's New Location!
You Might Like These Related Links
Looking for a good shed hauler? Find a good shed hauler here.
More info on how to build a shed here.


Monthly DIY
Shed-in-sight
Newsletter
Subscribing will get you discounts on shed plans, monthly updates, new shed design ideas, tips, exclusive discounts on shed building resources and tools. Learn more here.
Recent Articles
-
Pictures of Sheds Built By Shedking Customers
May 04, 26 09:13 AM
 Visit our library of pictures of sheds built from our shed plans. Get great shed design ideas and plans for storage sheds, garden sheds and more.
 -
Women Built Sheds: Inspiring Shed Projects From Real Women
Apr 28, 26 11:01 AM
 Discover how women are taking on shed building projects with confidence and skill. Get inspired by real examples, practical tips, and step-by-step advice.
 -
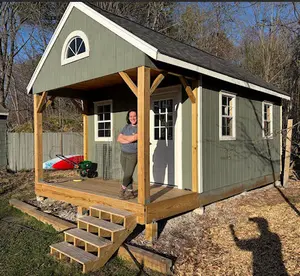
Kate Built Her Own Awesome 12x16 Garden Shed
Apr 28, 26 10:33 AM
Kate used shedking's 12x16 gable with front porch plan to build her amazing garden shed


My You Tube Videos
