Want to Save 20% off Any Shed Plan Purchase!
Signup For My 'Shed n Sight' Newsletter
and Get Your 20% off Promo Code To Use At Checkout.
Sarah's Garden Shed
Follow along as I build Sarah's garden shed. I plan on posting lots of pictures of the progress as it happens. Speaking of progress, with all the rain we've had since I started building this 12x16 shed, it's been going very slow indeed!
Ok, also I just turned 60 so maybe that has something to do with the delay!
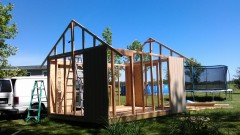
 Sarah Wondering If I know What I'm Doing!
That's Sarah, my wife, patiently waiting for me to get her garden shed finished!
This garden shed is going to be 12' x 16'. It will have 5' double doors in the front right wall, a 32" entry door in the back, and 2 windows. One up front and the other located on the left wall.
 Floor's Done, Ready to Frame The Walls
Phew, got the hardest part of building the shed done, the floor on concrete anchors and blocks.
 That's Me, John The Shedmaster of Shedking That's Me, John The Shedmaster of Shedking |
Wow, 2 weeks later I've framed up 2 walls on top of the shed floor. How impresive! Looking a little pudgy there aren't you John? Ok, here I am at the beginning stages of building. I can't believe I used to build these at the rate of one a day when I was building them full time when I had my shed building business! So, I'll be lucky if I get this thing done by the first snow fall! Well, with any luck, Sarah will be packing and moving all her garden stuff in here very shortly. |
Ok, I've got to rest. So much work accomplished. Don't go anywhere, I've got more pictures coming soon.
 Siding Started on The Wall Framing
Ok, now that I've rested up for a week, I decided to do some more work on the garden shed for my wife. See the siding up in each of the 4 corners? That's because I'm too lazy to do it all at once! Besides, this way I can move on to the roof framing.
Sarah is working today, so this way when she gets home, and I have the roof framing done, she will really be impressed with the geritol man once again!
 Gable End Trusses Up Gable End Trusses Up |
Wow, did I really get those gable ends up by myself? Piece if cake. I'm so used to doing things alone. I must give off a spiritual radience when I need help, because nobody ever shows up until I start cleaning up for the day! |
|
Yes, and I got the 2x8 ridge board up too all by myself! Where the heck is all my help at? And I wonder why I can't hardly walk at the end of the day. |
 Ridge Board in Place Ridge Board in Place |
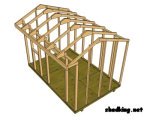
 Rafters Attached to The Ridge Board
 Are You Ever Going To Get My Garden Shed Done?
 That's Me Again Up in The Roof Framing That's Me Again Up in The Roof Framing |
And yes, I'm up in the roof framing wondering the same thing! Still can't belive in my younger days I could build one of these in 2 or 3 days. I'm hoping to get this baby wrapped up in another couple of weeks at least. One other thing, don't tell my wife I put pictures of her on here, she'd kill me! |
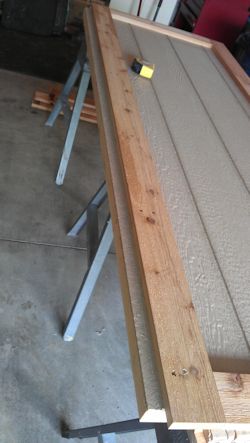
Notice on the roof framing below how I left the rafter tails uncut. This way after I get all the roof sheeting on I can cut along side the bottom edge of roof sheeting to get a nice clean straight edge for adding cedar trim.
If I had pre-cut them, chances are that very few of them would have lined up for the trim placement due to variances in wood and also human error!
 Getting The Roof Sheeting Up
I use a program called sketchup to do all my plans with. Below you can see a rendering of the plans I am working on for the actual shed shown on this webpage.
The rendering program I use is Shaderlight.

|
Finally getting to the construction of the shed doors. I decided to build these doors a little different then previous doors I have built. Rather then framing out the fronts with 2x4's I decided to trim them out with cedar 1x4's and use the 2x4 framing along the back sides of each door giving them more rigidity. Also, if you notice the bottom of the door to the right, the trim extends below the actual door itself. This will stop the door from swinging all the way into the shed. I did the same to the top of the door. If you would like to read more about how I build shed doors, you can follow this link: |
 Building The Front Double Shed Doors Building The Front Double Shed Doors |
This view of the front doors installed on the shed, and half the roof shingled. This image is rather dismal and plain looking, but as I move along with the construction windows and more trim will be added to give this garden shed lots of character.
 Almost Got The Outside Done!
Once I have the outside nearly done, I will be doing electric, flooring the loft, insulating, putting up drywall, then cabinets.
Then, once that is all finished, the main reason for doing all this construction was to add a chicken pen to the back, then build a new chicken coop.


Rough-in electric is done, and just about finished insulating and drywalling! I could probably live out here.

The cabinets I added are from a kitchen I remodeled a few months back. They are actually better than the junky ones we have in our house.

Finally getting the cedar trimwork on the exterior of the shed. Sarah wanted me to add the rooster decoration that you see up on the gable end. Nice little touch!
Just Another Setback.....
|
Here it is Labor Day Weekend 2014. I rented a trencher to dig a trench to the garden shed so I could run a water line and electric line . After digging the trench, I laid both the lines and drilled an 1-1/2" hole in my concrete basement wall to feed them through into the basement so I could hook them up. After taking the trencher back, which was the morning after I rented it, we got ALOT of rain! Seems lately whenever it rains we get a monsoon! As you can see from the picture on the right, my trench is 36" deep and filled to the top with rain water! |
 My Freshly Dug Trench My Freshly Dug Trench |
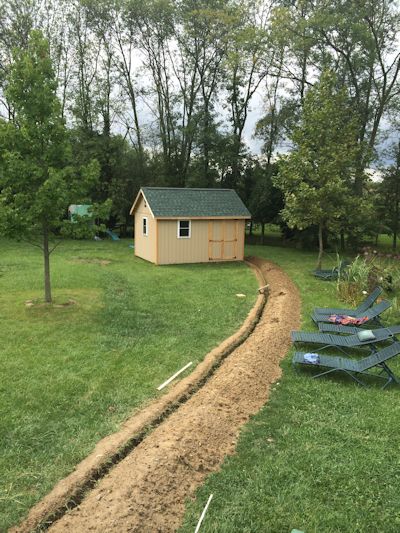 60' Trench out To Sarahs Garden Shed
Luckily the trench has a 3' drop from about the middle of the trench down to the shed, so not all of it filled with rain water. But, my main concern was seeing the water line floating on top of the water.
What was I going to do now? This line had to be at least 32" deep to avoid freezing in the winter time. Well, I got a concrete float and pushed it down into the trench and weighted it down with a concrete block. Maybe I had avoided disaster by doing this. I sure hope so.
I'll have a better idea when the rain water dissipates. But, another problem has crept up.
The hole I drilled through the concrete wall was now leaking water into the basement. My grand daughters woke me up about 1am to let me know there was water on one end of the basement back where I drilled the hole. Great!
Well, I got up and proceeded to panic. Water can do some nasty things if it does things it's not supposed to do, like fill up your basement and damage all that's down there.
To make a long story short, I got the hole plugged up with concrete patch you can use for holes in concrete, and you can even apply it in wet conditions. Problem solved!
Next time I'll check the weather report!
Almost Finished!
|
You know I wish I could just stay home and work on my website and all sorts of things around the house that I started years ago! Here I am in the garage with tools set up to build flowerboxes for the shed. Retirement is not far away, and I can't wait! |
 Building Flowerboxes Building Flowerboxes |

I am finally finished with my part of this 'long' shed building project for my wife! Phew, what a relief it is. Here it is the middle of October! And I'm done!
Wooooooo Hooooooooooo!
Painting and landscaping will be done by the rest of the family ( I hope, but not holding my breath!) Well I did help Sarah plant the rose bush and, gee I can't remember what else they were, because she once again ripped open here stitches from her surgery (hysterectomy) the second time. She had a 15lb lifting limit (like that's gonna slow her down! Come on, she'll never learn will she!).
But the electric is all done, with outlets and lights inside, and a water hookup on the outside.You can barely see the red handle on the right side - that's the water hookup.


I hope you have enjoyed this page and the pictures and comments about this shed building project.
If you are interested in building a shed like this one, you can find the plans here.
2021 Update on my wife's garden shed...
 Taken Winter of 2020
The picture above was taken in the winter of 2020, the year of the coronavirus. As you can tell we got more snow this year than in the previous 4 years I think! What a year to have to deal with considering everthing that happened with the corona virus. Thank God no one in my family got seriously ill from the desease although some of my grand kids did get it buy suffered no ill consequences!!
If you would like to visit my shed plans page you can do that here.


Monthly DIY
Shed-in-sight
Newsletter
Subscribing will get you discounts on shed plans, monthly updates, new shed design ideas, tips, exclusive discounts on shed building resources and tools. Learn more here.
Recent Articles
-
Joining the walls of a shed to each other
Apr 02, 24 09:49 PM
Hello! My son and I are planning on building an 18'foot x 18'foot lean-to style storage shed. When I was a kid building walls with my own dad (about 60 -
Types of Roofs For Sheds: Designs, Materials, and Styles
Feb 07, 24 10:23 AM
 Various types of roofs for sheds including gable, hip, gambrel, saltbox, flat, and more. Gain insights into designs, materials and styles.
 -
How to build a shed roof, Shed roof construction, Shed roof design.
Feb 07, 24 09:17 AM
 Here's a simple how to build a shed roof guide. Your shed roof construction and shed roof design from building simple shed roof trusses right here at shedking.net
My You Tube Videos
